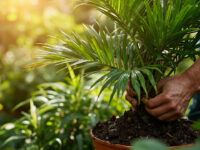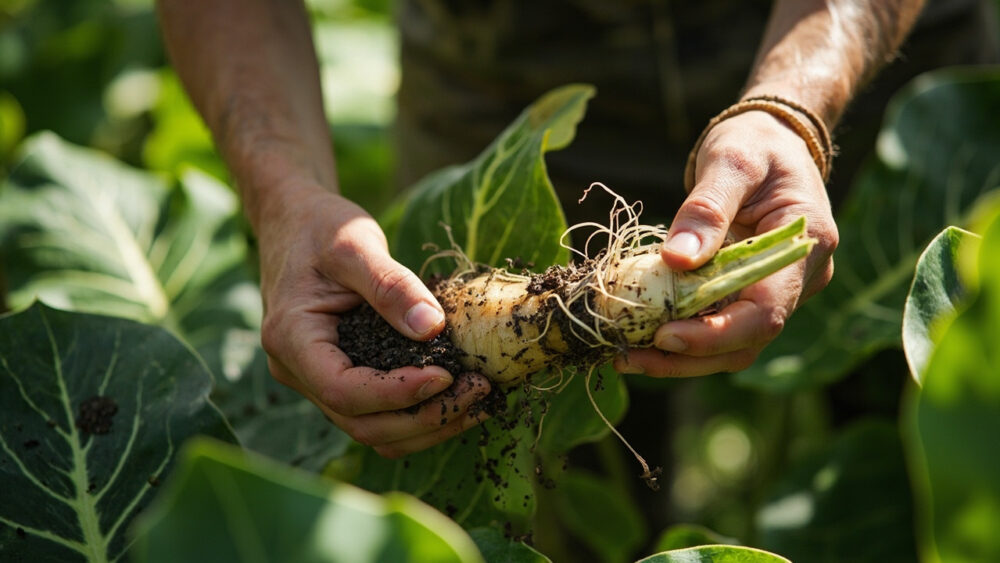
The method that actually works for alocasia is division, not stem cuttings, because almost every alocasia grows from a central rhizome that produces offset pups you can separate with roots already attached. Water propagation from a cut stem sometimes works on a few thick-stemmed types, but it’s a slow, unreliable gamble compared to pulling an established pup off the mother plant. If you learn how to propagate alocasia by division instead of fighting the plant’s natural habit, you’ll have a rooted, independent plant in weeks instead of months.
Most failed attempts share the same root cause, and it isn’t bad luck. It’s cutting the wrong part of the plant, at the wrong time, then panicking when it rots.
Before you touch a knife, there’s a sign on the mother plant that tells you whether a pup is even ready to come off, and most people miss it completely. There’s also a timeline most guides gloss over, and the honest truth about why alocasia cuttings rot more often than they root. Stick around for the Alocasia at a Glance card at the bottom, it’s the version worth saving to your phone before you go outside or over to the plant shelf to do this.
Why Division Beats Cuttings for Alocasia
Alocasia doesn’t branch and root along a stem the way pothos or philodendron does. It grows from a corm or rhizome at the base, and that structure sends up new shoots, called pups or offsets, that already have their own root systems forming underground before you ever see them above soil.
A stem cutting from alocasia has no reliable node to root from, which is why so many people snap off a leaf and stem, stick it in water, and watch it sit there doing nothing for weeks before it turns to mush. Division skips that problem entirely because you’re not asking the plant to grow new roots from scratch. You’re just separating roots it already has.
That’s the mistake almost everyone makes on their first try.
Step by Step: Dividing an Alocasia Pup
Find and Assess the Pup
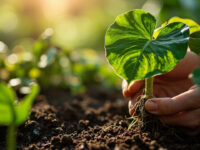
Look at the base of the mother plant for a smaller shoot pushing up through the soil, usually a few inches from the main stem. The sign everyone misses is size: a pup needs at least one fully unfurled leaf and ideally two before you separate it. Pull one that’s too small and it usually has barely any roots of its own yet, so it stalls out or dies instead of taking off.
Unpot and Expose the Roots
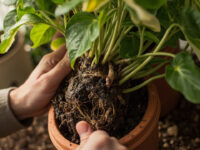
Slide the whole plant out of its pot and gently knock or rinse loose soil away from the root ball so you can see where the pup connects to the mother rhizome. You’re looking for a thin but distinct root and rhizome connection, not just leaves poking up near each other.
Separate the Pup
If the connection is thin, tease it apart with your fingers. If it’s thick and woody, use a clean, sharp knife to cut through the rhizome, leaving as many roots as possible attached to the pup’s side. Dust the cut surface on both the pup and the mother with cinnamon or a fungicidal powder, which helps prevent rot at the wound.
Once separated, that pup is a whole plant, it just needs the right medium to settle into.
Rooting Medium and Conditions
Pot the divided pup into a well-draining aroid mix, something like a blend of chunky bark, perlite, and a bit of standard potting soil. Straight potting soil holds too much water around a fresh-cut rhizome and invites rot before new roots can establish.
Keep the medium barely moist, not wet, for the first two to three weeks. This is the part that trips people up: they treat a fresh division like a thirsty houseplant and drown it right when it’s most vulnerable to rot.
Alocasia wants warmth and humidity above almost anything else while it’s recovering. Aim for soil temperature around 70 to 75°F and ambient humidity of 60% or higher if you can manage it, a clear humidity dome or loosely tented plastic bag over the pot works well. Bright, indirect light is enough; skip direct sun until the plant is established, since stressed new divisions scorch easily.
Get the medium and humidity right and the timeline below becomes almost boring, in a good way.
Timeline: What to Expect Week by Week
Here’s the honest answer to the question every reader is already forming: how long until I know it worked?
- Week 1: The pup may look stalled or even slightly droopy. This is normal shock, not failure, as long as there’s no soft, mushy stem.
- Weeks 2 to 3: Existing leaves should perk back up and hold turgor. No new growth yet, but the plant should look stable rather than declining.
- Weeks 4 to 6: A new leaf spike, often a tightly furled point, starts pushing up from the center. This is your first real confirmation that roots have taken hold.
- Weeks 6 to 10: The new leaf unfurls fully and growth speeds up, especially if temperatures and humidity stay consistent.
If you’re past week four with zero new growth and no new leaf spike at all, something is off, and it’s worth checking the base for rot before waiting any longer.
When and How to Pot Up or Plant Out
Once a division has produced one full new leaf and feels slightly resistant when you tug gently on the base, meaning roots are anchoring it, it’s ready to size up. Move it into a pot only one to two inches larger in diameter than its current one. Alocasia actually prefers being slightly snug in its pot, and oversized pots hold excess moisture that invites root rot.
If you’re in a warm climate, USDA zone 10 or higher, and want to plant divisions outdoors, wait until nighttime lows are reliably above 60°F and soil has warmed well past the last frost date. Alocasia has zero cold tolerance and will collapse at the first real chill.
Space outdoor plantings 18 to 36 inches apart depending on the variety, since mature alocasia can get wide fast.
Potting up correctly matters, but it won’t save a division that failed for one of a few very specific reasons.
Why Attempts Fail (and the Fix)
Most failures trace back to one of these:
- Dividing a pup too young: fewer than two leaves usually means not enough independent root mass yet. Wait longer.
- Overwatering the fresh cut: a wound on a rhizome is an open door for rot. Keep medium barely moist until new growth confirms rooting.
- Skipping the fungicidal dusting: raw cut surfaces left untreated in a warm, moist pot are prime real estate for bacterial and fungal rot.
- Cold or dry air: alocasia sulks and drops leaves fast below 60°F or in dry indoor winter air without added humidity.
- Trying stem cuttings on species without a strong rhizome habit: some giant types can occasionally root a stem section in water, but it’s slow and far less reliable than division.
Fix the moisture and the timing, and the success rate on this method is genuinely high.
One more thing worth knowing before you start cutting into any part of this plant.
A Quick Safety Note
Alocasia contains calcium oxalate crystals and is toxic to people, dogs, and cats if chewed or ingested, causing mouth irritation, drooling, and swelling. Wash your hands after handling cut rhizomes and sap, and keep divisions away from curious pets while they’re rooting on a low shelf. If a pet or child ingests any part of the plant, contact a veterinarian or doctor rather than waiting to see what happens.
Alocasia at a Glance
- Best method: divide rooted pups from the base rhizome, not stem cuttings in water.
- When to divide: anytime the pup has at least one, ideally two, fully unfurled leaves.
- Rooting medium: chunky, well-draining aroid mix of bark, perlite, and potting soil.
- Ideal conditions: 70 to 75°F soil temperature, 60% or higher humidity, bright indirect light.
- Watering during rooting: barely moist for the first two to three weeks, never soggy.
- Timeline: new leaf spike by weeks four to six, full unfurl and active growth by weeks six to ten.
- Potting up: move up only one to two pot sizes once roots anchor and one new leaf appears.
Division works because you’re not creating new roots, you’re separating roots that already exist.
Get the timing and moisture right, and this is one of the easier houseplant propagations to succeed at on the first try.