The fastest reliable way to grow stevia from cuttings is to snip a 3 to 4 inch stem tip from a healthy plant, strip the lower leaves, and root it in damp perlite or a light seed-starting mix under bright, indirect light. Roots show up in 10 to 14 days if the stem stays turgid and the medium stays moist but never soggy. Miss either of those two conditions and the cutting rots before it ever roots, which is exactly what happens to most first attempts.
Stevia is a strange plant to propagate because it looks easy and mostly isn’t. It roots fast when conditions are right, and it collapses into a limp brown mess almost as fast when they’re not.
There’s one mistake that tanks the majority of attempts, and it’s not the one people expect. There’s also a sign at the two-week mark that tells you whether the cutting took, and most people misread it as failure when it’s actually success. Stick with this and the full Stevia at a Glance card is waiting at the bottom, saved-to-your-phone ready.
Why Cuttings Beat Seeds for Stevia
Stevia seed is notoriously inconsistent. Germination rates run low, and seedlings vary wildly in sweetness because stevia doesn’t come true from seed the way a lot of herbs do.
Cuttings solve both problems at once. A cutting is a clone, so if your mother plant tastes sweet with no bitter aftertaste, every cutting from it will too. Rooting also takes days, not the weeks seed germination demands, and you skip the leggy, unreliable seedling stage entirely.
The catch is that stevia stems are soft and herbaceous, closer to basil than to a woody shrub. That softness is exactly why the standard mistake happens.
That mistake is next, and it’s not overwatering.
The Mistake That Ruins Most Stevia Cuttings
If you assumed overwatering kills most stevia cuttings, that’s a reasonable guess and it’s wrong. The real killer is taking the cutting from the wrong part of the plant, specifically a soft, actively growing tip that wilts within an hour of being cut.
Stevia tips lose water fast because the stem has almost no cuticle protecting it. Cut a tip, leave it on the counter while you find scissors and a pot, and it’s already flagging by the time it hits the rooting medium. A wilted cutting can still root, but the odds drop hard.
The fix is speed and slightly firmer wood. Take cuttings from a stem that’s just starting to firm up at the base, not the newest floppy growth tip, and get it into medium within a minute or two of cutting.
Here’s exactly how to do that from start to finish.
Taking the Cutting
Choose a stem 4 to 6 inches long with at least three sets of leaves, cut just below a leaf node using clean scissors or a sharp knife. Snip 3 to 4 inches from the tip so you keep the semi-firm portion, not the delicate top inch.
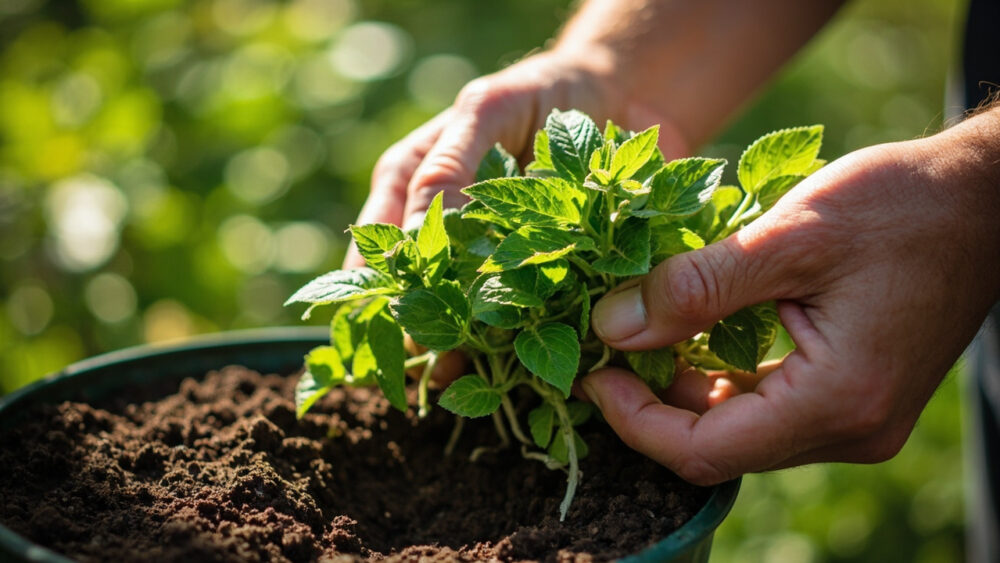
Strip the bottom two sets of leaves, leaving two or three leaves at the top. Those stripped nodes are where roots form, and leaving leaves on them just invites rot.
Rooting Medium and Setup
Use perlite, a 50/50 perlite-and-peat mix, or a light seed-starting mix. Avoid garden soil and anything heavy or compost-rich, it holds too much water and suffocates the cut end.
Dip the stripped end in rooting hormone if you have it (not required, but it speeds things up and improves your odds). Poke it about an inch deep into pre-moistened medium, firm gently around the stem, and water lightly.
Conditions That Actually Matter
Bright, indirect light and warmth are non-negotiable. Stevia roots best at 70 to 75°F, with bright but not scorching light, a north or east windowsill works, a south window with a sheer curtain works too.
A clear cup or plastic bag tented over the cutting holds humidity and stops the leaves from transpiring faster than the unrooted stem can handle. Vent it daily for a few minutes so it doesn’t turn into a mold incubator.
Get this setup right and the timeline below is almost boring in how predictable it is.
Week by Week: What to Actually Expect
Days 1 to 3: the cutting looks tired, maybe a little droopy, especially the first afternoon. This is normal stress, not failure, as long as it’s not fully collapsed.
Days 4 to 7: the existing leaves perk back up and hold steady. No new growth yet, this is the cutting settling in and beginning to callus at the cut end.
Days 8 to 14: this is the stage everyone misreads. You’ll see little to no visible change above the soil, and it’s tempting to assume nothing’s happening. Underground, if things are going well, root hairs are forming. A gentle tug that meets slight resistance means roots have started, don’t yank it out to check, that undoes the progress.
Days 14 to 21: new leaf growth at the tip is your real confirmation. Once you see fresh, small leaves unfolding, the cutting has rooted and is feeding itself.
Once you see that new growth, it’s time to think about moving up, not moving out.
Potting Up and Planting Out
Move a rooted cutting into a 4-inch pot of standard potting mix once roots are an inch or so long, usually 3 to 4 weeks after taking the cutting. Keep it in bright indirect light for another week before giving it full sun, sudden direct sun after low light can scorch tender new growth.
Don’t rush it outside. Stevia is not frost-tolerant at all, even a light frost kills it outright. Wait until nighttime temperatures are reliably staying above 50°F, which is typically two to three weeks after your last spring frost date, before hardening off and planting in the garden.
Harden off over 7 to 10 days, a few hours of outdoor shade the first days, building up to full sun exposure by the end. Space plants 12 to 18 inches apart in well-drained soil, stevia hates wet feet and will sulk or rot in heavy, soggy ground.
That’s the physical process handled, but there’s still the honest question of why so many people never get this far.
Why Most Stevia Cutting Attempts Fail
Beyond the wrong-cutting mistake already covered, three things quietly sink the rest of the attempts.
- Rot from overly wet medium: stevia’s soft stem has almost no tolerance for sitting in saturated soil, keep the medium moist like a wrung-out sponge, never wet.
- Low light during rooting: a cutting with no roots can’t push new growth without decent light, a dim corner stalls it indefinitely even if it doesn’t rot.
- Taking cuttings from a stressed mother plant: a mother plant that’s drought-stressed, flowering, or leggy from low light produces weak cuttings no matter how well you follow the steps.
Fix the source plant and the process, and stevia actually roots easier than most people expect going in.
Everything above compresses into the card you actually came here to save.
Stevia at a Glance
- Best time to take cuttings: spring through midsummer, whenever the mother plant has healthy, semi-firm new growth.
- Cutting size: 3 to 4 inches long, taken just below a leaf node, with the bottom two leaf sets stripped.
- Rooting medium: perlite or a light, well-draining seed-starting mix, kept evenly moist, never soggy.
- Ideal rooting conditions: 70 to 75°F, bright indirect light, humidity tent vented daily.
- Time to root: 10 to 14 days for root formation, visible new leaf growth by day 14 to 21 confirms success.
- When to plant outside: two to three weeks after your last frost, once nights stay above 50°F, spaced 12 to 18 inches apart.
- Biggest killer: soggy medium and floppy, unstressed tip cuttings that wilt before they root.
Speed and a firm-ish stem beat every other variable in this process.
Get those two right and stevia roots about as reliably as any herb you’ll ever propagate.