Rutabaga wants cool weather, loose deep soil, and a long, unhurried growing season of about 90 to 100 days. If you’re figuring out how to grow rutabaga successfully, the short version is this: get seed in the ground in mid to late summer for a fall harvest, thin the seedlings ruthlessly, and keep the soil evenly moist the whole time. Skip any of those three and you get small, woody, bitter roots instead of the sweet, dense ones you’re picturing.
Most first attempts go sideways in one specific way, and it’s not the one people expect. It isn’t the cold, rutabaga shrugs off frost. It’s crowding, and I’ll explain exactly why it wrecks the root below.
There’s also a timing question almost everyone gets backwards, a watering habit that turns roots woody without you ever seeing it happen, and the harvest test that actually tells you when to pull instead of guessing. Stick around for the full walkthrough, and save the Rutabaga at a Glance card at the bottom for your phone.
When to Plant Rutabaga
If you assumed rutabaga is a spring crop like other root vegetables, that guess backfires in most climates. Rutabaga is a fall crop first and a spring crop only as a backup. It needs 90 to 100 days to mature and it actually improves with a light frost or two at the end, which sweetens the roots.
Count backward from your first expected fall frost and plant 90 to 100 days before that date, which usually lands in early to midsummer depending on your zone. In zones 3 to 6 that’s often late June through mid-July. In zones 7 and warmer, you have more room and can plant into early August.
Spring planting works too, but you’re racing heat. Get seed in as soon as soil can be worked, 3 to 4 weeks before your last frost, since rutabaga tolerates surprisingly cold soil once it’s up.
The bigger question is what happens if you plant too late, and that’s where the soil itself starts to matter.
Choosing the Spot and Prepping the Soil
Rutabaga needs full sun, at least 6 hours a day, and soil that’s loose down to 10 or 12 inches. Shallow, compacted soil is the second-biggest reason roots come out stunted or forked, right behind crowding.
Work in a couple inches of compost, but go easy on fresh nitrogen-heavy amendments. Too much nitrogen pushes leafy top growth at the expense of the root, which is the opposite of what you want.
Aim for soil pH between 6.0 and 6.8. If you grew brassicas like cabbage or turnips in that bed within the last two years, rotate elsewhere if you can, since they share pests and diseases.
Once the bed is loose and fed, the next decision is how you actually get seed into it.
Planting Rutabaga Step by Step
1. Sow seed directly
Rutabaga does not transplant well because disturbing the taproot causes forking. Direct sow rather than starting indoors.
2. Depth and spacing
Plant seeds about 1/2 inch deep, in rows spaced 18 to 24 inches apart. Sow seeds every inch or so along the row, you’ll thin later.
3. Germination conditions
Soil temperature between 60 and 75 F gets you germination in 5 to 10 days. Keep the surface consistently moist until seedlings appear, a dried-out crust will stop germination cold.
4. The thinning step people skip
Once seedlings have their first true leaves, thin to one plant every 6 to 8 inches. This is the step that saves the whole crop.
Crowded rutabaga plants compete for root space underground, and the result isn’t just smaller roots, it’s roots that stay small permanently even if you thin late. Thin early, thin hard, and don’t feel guilty about pulling healthy seedlings.
With spacing sorted, the plant’s needs for the rest of the season come down to two things: water and food.
Watering and Feeding Through the Season
Rutabaga needs steady moisture, about 1 to 1.5 inches of water a week from rain or irrigation. The mistake that quietly ruins texture is inconsistent watering, not too little water overall.
Let the soil dry out and then flood it back to wet, and the root responds by growing in fits and starts, which shows up later as a woody, fibrous texture even though the plant looked fine all along. Mulch with 2 to 3 inches of straw or shredded leaves to even out soil moisture and keep the root zone cool.
Feed lightly once, about 3 to 4 weeks after thinning, with a balanced or low-nitrogen fertilizer. That’s usually all rutabaga needs if your soil prep was decent.
Consistent moisture keeps the root growing smoothly, but it also happens to be exactly what a few pests and diseases are waiting for.
Problems That Actually Show Up
The two most common issues are flea beetles and root maggots, and both hit brassica relatives generally, not just rutabaga.
- Flea beetles: tiny shot-hole damage in leaves, worse on young seedlings. Floating row cover from planting until plants are established handles most of it.
- Root maggots: tunnels inside the harvested root, larvae in the soil around the base. Row covers and crop rotation are your main defenses; if you’ve had them before, avoid planting brassicas in that spot again for 2 to 3 years.
- Clubroot and other soil diseases: stunted, yellowing plants with swollen, distorted roots. There’s no cure once it’s in the soil, so prevention through rotation and good drainage is the only real strategy.
- Splitting roots: usually a sign of a dry spell followed by heavy watering or rain. Even moisture prevents it.
If a pest problem gets ahead of you, an insecticide labeled for the specific pest and for vegetable gardens is the right call, applied exactly per the product label.
Most of these problems are manageable with prevention, which just leaves the question of when the root underground is actually ready.
When and How to Harvest Rutabaga
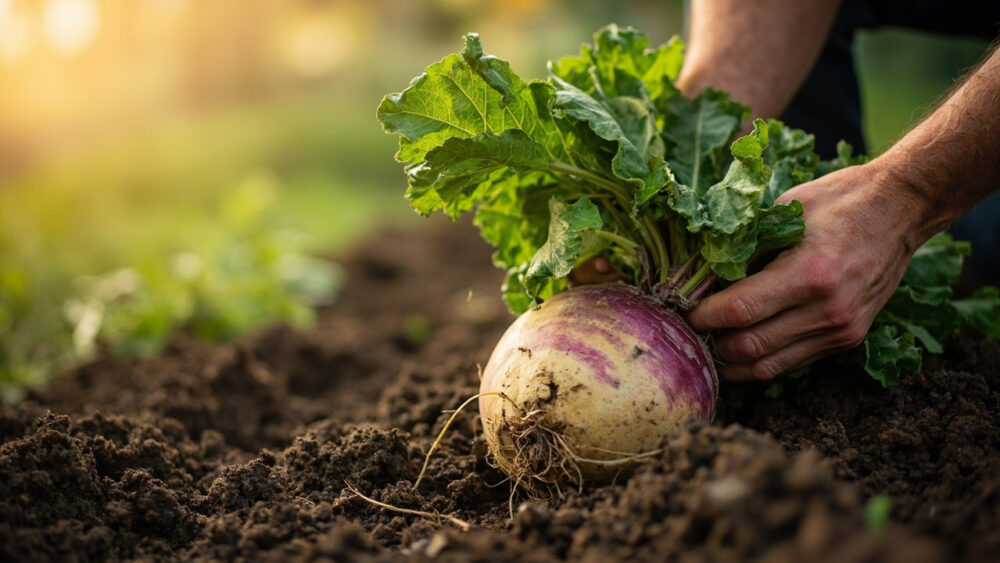
Rutabaga is ready when the root reaches 3 to 5 inches across, usually 90 to 100 days after sowing. The honest answer to “how do I know,” though, is that size alone can fool you, since roots can look full-sized and still taste sharp and undersweet.
The real test is timing plus a light frost. A frost or two, with nighttime temps dropping into the mid 20s to low 30s F, converts starches to sugars and noticeably improves flavor. Don’t rush harvest before at least one frost if you can help it.
To harvest, loosen soil around the root with a garden fork before pulling, rutabaga roots go deep and snap the tops off if you just yank. Twist off the leaves, leaving an inch of stem, and roots will store for 2 to 4 months in a cold, humid spot like a root cellar or the crisper drawer of a fridge.
That’s the whole arc from seed to storage, and here’s the version you can actually save.
Rutabaga at a Glance
- When to plant: mid to late summer for fall harvest, 90 to 100 days before first frost, or 3 to 4 weeks before last frost for a spring crop.
- Soil and site: full sun, loose soil 10 to 12 inches deep, pH 6.0 to 6.8, moderate compost, light on nitrogen.
- Depth and spacing: sow 1/2 inch deep, rows 18 to 24 inches apart, thin to 6 to 8 inches between plants once true leaves appear.
- Water needs: 1 to 1.5 inches per week, kept steady, mulch to prevent dry-wet swings.
- Watch for: flea beetles, root maggots, clubroot, and split roots from uneven watering.
- Harvest sign: roots 3 to 5 inches across, after at least one light frost for best flavor.
- Storage: trim tops to 1 inch, keep cold and humid, lasts 2 to 4 months.
Thin early and water on a steady schedule, and the rest of this crop mostly takes care of itself.
Get those two things right and a frost or two at the end will do the rest of the flavor work for you.