You grow prickly pear cactus by rooting a cut pad in dry soil, not by planting seed, and by nearly ignoring it once it’s established. Set a pad 2 to 3 inches deep in fast-draining soil after the danger of frost has passed, water sparingly, and wait. That’s the whole trick to how to grow prickly pear cactus successfully, but the details determine whether your pad rots in week three or turns into a six-foot pad-stacked clump loaded with fruit in year three.
Here’s what almost nobody tells you going in. The mistake that kills most attempts happens before the pad ever touches soil, and it has nothing to do with watering. There’s also a sign gardeners misread constantly, mistaking a shriveling pad for a dying one when it’s often doing exactly what it should. And there’s a question you’re about to ask the minute your cactus finally puts out a flower: how long until you actually get fruit.
I’ll answer all of it, plus give you the mistakes that cost people an entire growing season. Save the “Prickly Pear Cactus at a Glance” card at the bottom of this page to your phone, you’ll want it the next time you’re standing in the nursery aisle or staring at a pad wondering if it’s ready.
When to Plant Prickly Pear Cactus
Plant after your last frost date has passed and nighttime temperatures stay reliably above 40°F. Soil temperature matters more than the calendar. You want the ground to have warmed and dried out from winter or spring rain, not stayed cool and damp.
In most climates that means late spring into early summer. In hot desert zones (USDA zones 9 through 11), you can plant earlier in spring or even in fall, avoiding the hottest peak of summer when a fresh cut pad can scorch before it roots.
Prickly pear is hardy roughly from zone 9 down to as cold as zone 3 or 4 depending on the species, with Opuntia humifusa and a few other cold-hardy types surviving well below freezing once established. New cuttings, though, need warmth to root. Cold, wet soil is the single fastest way to lose a pad before it ever starts growing.
Timing gets the plant in the ground alive, but the spot you choose decides whether it thrives.
Choosing the Spot and Preparing the Soil
Prickly pear wants full sun, at least 6 hours a day, and soil that drains so fast water disappears within seconds of hitting it. This is a desert plant. Rich garden soil, clay, or anywhere water puddles after rain is exactly wrong.
If your native soil holds water, don’t fight it with amendments alone. Build a raised mound or bed 8 to 12 inches high, and mix in coarse sand or fine gravel at roughly 50 percent by volume with regular garden soil. Cactus and succulent potting mix works fine for container growing.
Give it room. Many prickly pears spread wide and get top-heavy, so plan for a mature footprint of 3 to 6 feet across depending on the species, more for older clumping types. Crowding it against a wall or path just means fighting spines with a broom later.
Once the site is right, the actual planting is almost anticlimactic.
Planting Prickly Pear Cactus Step by Step
This is where most people go wrong before they’ve even touched dirt. You do not plant a fresh cut pad immediately. That’s the mistake that ruins most attempts.
Step 1: Cut and cure the pad
Cut a healthy, mature pad from an established plant using clean pruning shears, ideally in spring or early summer. Set it in a dry, shaded spot out of direct sun for 5 to 10 days.
You’re waiting for the cut edge to callus over, turning dry and slightly leathery. Planting a fresh, wet cut is an open door for rot, and it’s the number one reason beginner cuttings fail.
Step 2: Plant at the right depth
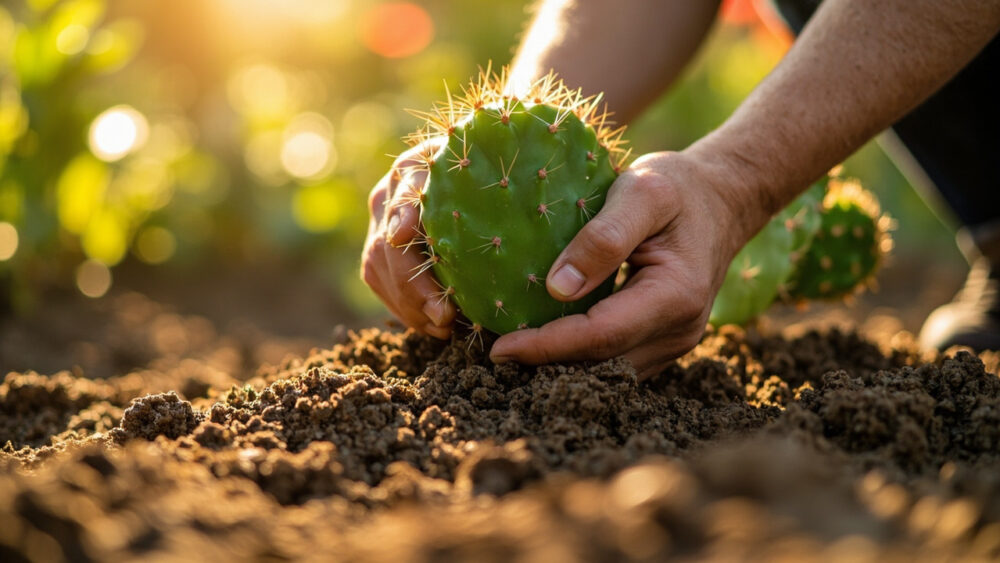
Once calloused, bury the bottom 1 to 2 inches of the pad in your prepared soil, roughly 2 to 3 inches deep total. Pack soil gently around the base so it stands upright without extra support in most cases.
Step 3: Space for the plant’s real size
Space multiple pads 2 to 4 feet apart for smaller species, 4 to 6 feet for larger clumping types. It looks absurdly far apart on planting day. It won’t in three years.
Step 4: Hold off on water at first
Don’t water immediately after planting. Wait about a week to let any remaining cut tissue seal and settle in, then water lightly. This is counterintuitive to anyone used to planting anything else, and it’s the second most common way people accidentally rot a new pad.
Getting a pad in the ground alive is one thing, keeping it alive through its first summer is the real test.
Watering and Feeding Through the Season
Here’s the sign everyone misreads: a new pad that looks slightly shriveled or wrinkled a few weeks after planting is usually fine. It’s pulling on its own stored moisture while roots establish, not dying of thirst.
If you assumed a wrinkled pad means water it more, that guess causes more rot deaths than drought ever does with this plant. Check soil at 2 inches deep instead. If it’s bone dry and the pad looks papery and deflated rather than just slightly soft, water. Otherwise, leave it alone.
Once established, water deeply but infrequently, roughly every 2 to 4 weeks in active growing season, less in winter, and effectively not at all during winter dormancy in cooler climates. Established plants in the ground often survive entirely on rainfall in arid regions.
Feed sparingly. A low-nitrogen, cactus-specific fertilizer once in spring is plenty; too much nitrogen produces soft, weak growth prone to rot and less able to handle cold.
Water discipline gets you through summer, but a few specific problems show up no matter how careful you are.
Problems That Actually Strike Prickly Pear Cactus
The plant is tough, but it’s not invincible. A short list covers almost everything you’ll run into.
- Rot at the base: soft, dark, mushy tissue near the soil line, almost always from overwatering or planting an uncured cut. Cut away affected tissue with a clean blade and let it dry out; there’s no fixing rot by watering less after the fact once it’s spread.
- Cochineal scale: white, cottony-looking patches on the pads. Wipe or spray off with a strong jet of water, or treat with insecticidal soap following the label exactly for repeat infestations.
- Cactus borers and beetles: look for small holes, sawdust-like frass, or sudden collapse of a pad. Remove and destroy affected pads promptly to stop spread.
- Sunscald on new transplants: pale, bleached patches on plants moved suddenly from shade to full sun. Acclimate gradually over 1 to 2 weeks next time.
Most of these show up on the pads themselves, which is exactly where you’ll be looking when it’s finally time to harvest.
When and How to Harvest Prickly Pear
Here’s the honest answer to the question you’re about to ask: an established plant typically flowers in its second or third year, and fruit follows a few months after bloom, usually mid to late summer into fall depending on climate. A pad planted this year will not fruit this year, in almost every case.
Fruit is ready when the color deepens to deep red, purple, or yellow-orange depending on variety, and it gives slightly to gentle pressure like a ripe plum. Pads (nopales) are harvested younger and more often, cut while still bright green, firm, and 4 to 6 inches long, before spines toughen.
Always harvest with tongs or heavy gloves. Every part of this plant carries fine, hair-like glochids in addition to the obvious spines, and they embed in skin far more easily than the big spines do. Both fruit and pads are edible once properly de-spined and prepared, but if you’re foraging a wild plant rather than one you planted yourself, be certain of species identification before eating anything, since correct ID matters and this guide is not sufficient for that on its own.
Once you’ve harvested once, the plant keeps producing pads and fruit for years with almost no further input from you.
Prickly Pear Cactus at a Glance
- When to plant: after last frost, once soil is warm and dry, late spring to early summer in most climates, spring or fall in hot desert zones.
- Soil and site: full sun, at least 6 hours daily, fast-draining sandy or gravelly soil, raised mound if your native soil holds water.
- Planting depth and spacing: cure a cut pad 5 to 10 days before planting, bury 2 to 3 inches deep, space 2 to 6 feet apart depending on species.
- Watering: none for about a week after planting, then deeply every 2 to 4 weeks once established, far less in winter.
- Feeding: low-nitrogen cactus fertilizer once in spring, skip it if growth already looks vigorous.
- Watch for: base rot from overwatering, cochineal scale, sunscald on newly transplanted pads.
- Harvest: pads at 4 to 6 inches while young and green, fruit when deep-colored and slightly soft, usually mid to late summer into fall in year two or three.
Get the cure-before-planting step right and the water discipline right, and this plant does almost everything else itself.
Everything past that is just patience, gloves, and a decent pair of tongs.