Kidney beans go in the ground after all frost danger has passed and soil has warmed to at least 60°F, planted an inch to an inch and a half deep, 3 to 4 inches apart in rows spaced 18 to 24 inches. They need a full growing season of 90 to 120 warm days to mature into the dry, deep-red beans you shell out at the end. That part is simple. The part that trips people up is everything around it.
Most failed attempts at growing kidney beans do not fail from bad soil or bad luck. They fail from one specific timing mistake made in the first two weeks, and from a watering habit that seems careful but actually invites the disease that kills the whole row. There is also a sign at midseason that looks like trouble but is not, and a real sign of trouble that looks completely harmless until the pods are already ruined.
I will walk through all of it in order, planting through harvest, and at the bottom you will find a save-able Kidney Beans at a Glance card with the numbers you actually need on hand once you are standing in the garden with a trowel.
When to Plant Kidney Beans
Wait until soil temperature is reliably at 60°F or higher, checked a couple inches down, not just air temperature on a warm afternoon. Kidney beans are true warm-season plants, more sensitive to cold soil than green beans even. Seed sown into 50°F soil will often just rot instead of sprouting.
This is the mistake that ruins most attempts: planting on the calendar date of last frost instead of waiting for the soil itself to catch up. Air can hit 65°F for a few days while the ground underneath is still in the low 50s. Push your soil thermometer in, or just plant a week or two after your last frost date once the ground has had time to warm through.
In most zones that lands somewhere in late spring, and gardeners in zone 3 or 4 may not get there until early summer. Kidney beans need that full 90 to 120 day stretch of warmth to finish, so in short-season climates, planting on time matters more than usual.
Get the timing right and the rest of the season gets a lot easier.
Choosing the Spot and Prepping the Soil
Kidney beans want full sun, six hours minimum, ideally eight or more. Skimp on light and you get lanky plants with fewer pods, not a shadier version of the same harvest.
Soil should be well-drained and only moderately fertile. This is the part that surprises new growers: beans do not want rich, heavily nitrogen-fed soil. Like most legumes, kidney beans fix their own nitrogen from the air through bacteria on their roots, and soil loaded with extra nitrogen pushes leafy growth at the expense of pods.
Work in an inch of compost if your soil is thin or sandy, and skip the high-nitrogen fertilizer entirely. Aim for a soil pH between 6.0 and 6.8. If you have never grown beans or peas in that bed before, an inoculant powder containing rhizobium bacteria at planting time can meaningfully boost yield, though it is not strictly required.
Pick a spot you have not grown beans, peas, or other legumes in for the past two to three years if you can help it, since that rotation break keeps soil-borne disease pressure down.
Once the bed is ready, the planting itself takes ten minutes.
Planting Kidney Beans Step by Step
1. Direct sow, do not transplant
Kidney beans hate root disturbance and rarely recover well from transplant shock. Sow seed directly where it will grow. Starting indoors is possible but rarely worth the trouble for this crop.
2. Depth and spacing
Plant seeds 1 to 1.5 inches deep. Space seeds 3 to 4 inches apart within the row, with rows 18 to 24 inches apart to give the bushy plants room to spread.
3. Water in at planting
Water thoroughly right after sowing to settle soil around the seed, then hold off until you see sprouts, usually in 7 to 14 days depending on soil temperature.
4. Thin if needed
If germination runs thick, thin seedlings so they end up at that 3 to 4 inch spacing once they have their first true leaves. Crowded plants get poor air circulation, which sets up the disease problems covered below.
Once seedlings are up and spaced, the job shifts from planting to steady maintenance.
Watering and Feeding Through the Season
Kidney beans want consistent moisture, not constant moisture. About 1 inch of water a week, from rain or irrigation combined, is the target. Let the top inch of soil dry between waterings.
Here is the habit that causes real damage: watering overhead in the evening, which leaves foliage wet all night. Bean plants are prone to fungal diseases like rust and bacterial blight, and wet leaves overnight are exactly the setup that lets those diseases take hold. Water at the soil line in the morning instead, using a soaker hose or the base of a watering can, and your disease risk drops sharply with no other changes needed.
Skip nitrogen fertilizer for the reasons already covered. If your soil is genuinely poor, a light feeding of compost or a balanced low-nitrogen fertilizer at flowering can help, but most beds need nothing extra at all once compost has been worked in at planting.
Mulch around plants once they are a few inches tall to hold moisture and keep weeds down without cultivating too close to those shallow roots.
Get the water right and most of the disease pressure takes care of itself, but a few problems still show up regardless.
Problems to Watch For
Here is the sign that looks alarming but usually is not: yellowing lower leaves late in the season, right as pods are filling out. That is normal senescence, the plant redirecting energy into the beans. Leave it alone.
The real trouble is quieter. Watch for these:
- Mexican bean beetles and Japanese beetles: skeletonized leaves with veins left intact. Handpick when populations are low, and use row cover early in the season before flowering to keep beetles off entirely.
- Aphids: clustered on new growth, causing curled or distorted leaves. A strong water spray knocks most populations back; insecticidal soap handles the rest if needed, applied per the product label.
- Bacterial blight and rust: water-soaked or rust-colored spots on leaves, usually from wet foliage. Remove affected leaves, water at the soil line going forward, and avoid working in the bean patch while leaves are wet, since handling wet plants spreads bacteria between them.
- Root rot: wilting despite moist soil, usually from soil that stays too wet. This one is often not fixable midseason; the honest fix is better drainage and rotation next year.
None of these are usually fatal to the whole crop if you catch them early and keep leaves dry.
Once the plants push through pest and disease pressure, the only remaining question is when to actually pull the harvest.
When and How to Harvest Kidney Beans
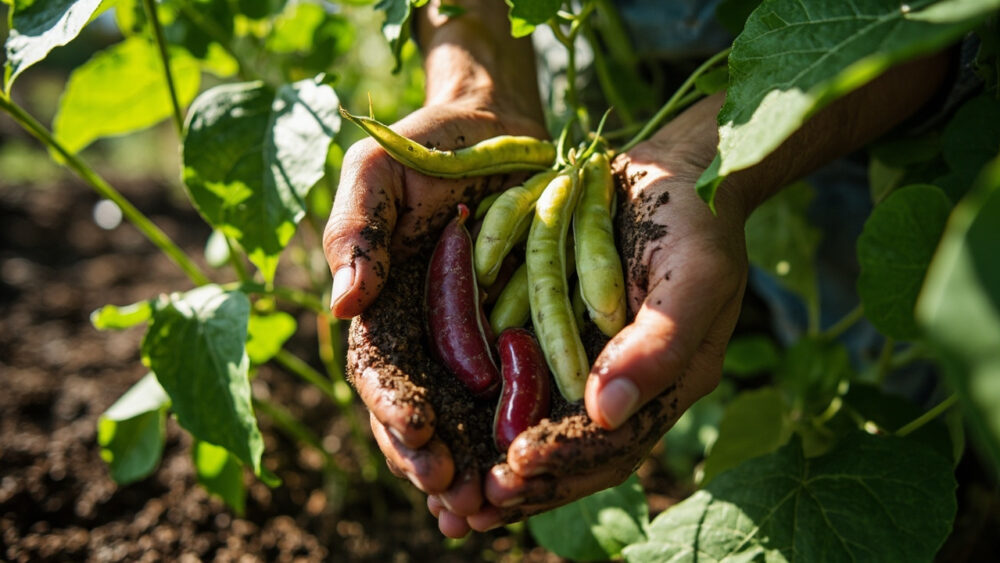
For dry kidney beans, the ones you shell and store, wait until pods are fully dry, brittle, and tan to brown on the plant itself. This is usually 90 to 120 days after planting, well after the plant has stopped flowering and the leaves have mostly yellowed and dropped.
Do not confuse this with green bean harvest timing. Kidney beans are grown to full dry maturity, not picked young and tender, and the “harvest early to keep them coming” advice that works for green beans will just leave you with immature, undersized kidney beans.
Test a pod by snapping it. If it cracks cleanly and the beans inside are firm and fully colored, deep red with the classic kidney shape, you are ready. If pods still bend rather than snap, give it another week or two.
If frost threatens before pods finish drying down, pull whole plants and hang them somewhere warm, dry, and well-ventilated, like a shed or covered porch, to finish drying off the vine. This works well and is a normal end-of-season move, not a failure.
Once shelled, cure beans another week or two in a single layer somewhere dry before storing them airtight, where they will keep for a year or more.
One more thing worth saying plainly: raw or undercooked kidney beans contain a natural compound that causes serious digestive illness in people, and they must be soaked and boiled thoroughly before eating, never eaten raw or slow-cooked at low heat. If anyone or any pet eats raw kidney beans or seed and shows vomiting or illness, call a doctor or veterinarian rather than waiting it out.
That is the whole arc, planting through cured, stored beans. Here is everything condensed for your phone.
Kidney Beans at a Glance
- When to plant: after all frost danger has passed, once soil is consistently 60°F or warmer.
- Depth and spacing: sow 1 to 1.5 inches deep, 3 to 4 inches apart, in rows 18 to 24 inches apart.
- Sunlight and soil: full sun, six to eight hours, well-drained soil with pH 6.0 to 6.8, moderate fertility and no extra nitrogen fertilizer.
- Watering: about 1 inch per week, applied at the soil line in the morning, never overhead in the evening.
- Days to maturity: 90 to 120 days from seed to fully dry, harvest-ready pods.
- Harvest signal: pods dry, tan to brown, and brittle enough to snap cleanly, beans inside firm and fully red.
- Storage: cure shelled beans a week or two in a single layer, then store airtight for a year or longer.
Get the soil temperature and the dry-down timing right, and kidney beans are one of the more forgiving crops you will grow this year.
The rest is just patience while the pods finish their work on the plant.