You grow chamomile by direct-sowing or transplanting it into well-drained soil after your last frost, giving it full sun to light shade, and keeping the seedbed consistently damp until it germinates in 7 to 14 days. It is one of the easiest herbs you can plant, which is exactly why so many people mess it up. They bury the seed too deep, they crowd it, or they let it dry out in that first fragile week and wonder why nothing came up.
There is also a harvest mistake almost nobody expects: the flowers you want are only good for a few days each, and if you wait for the whole patch to bloom at once before you start picking, you lose the earliest and best ones to browning and bitterness.
I will walk through timing, soil, planting depth and spacing, feeding, the problems that actually show up on chamomile, and exactly when and how to harvest for tea-quality flowers. Save-able Chamomile at a Glance card is at the very bottom, once you have all the reasoning behind it.
When to Plant Chamomile
Direct-sow chamomile two to three weeks before your last expected frost, or transplant seedlings out right around the last frost date once nights stay above about 40°F. Soil temperature matters more than the calendar: chamomile germinates well once soil hits roughly 55 to 68°F, and it tolerates a light frost once established.
German chamomile is an annual that self-seeds readily, so an early spring sowing often gives you a second flush from dropped seed in late summer. Roman chamomile is a perennial hardy to about zone 4, and it is more forgiving about exact planting timing since it is not racing to flower and set seed in one season.
In hot-summer climates, a fall sowing 6 to 8 weeks before first frost also works well, since chamomile actually prefers cool weather to the peak of summer heat.
Get the timing right and the next decision, where you actually put it, matters just as much.
Choosing the Spot and Prepping the Soil
Chamomile wants full sun for the strongest bloom, though it tolerates light afternoon shade in hot climates without much complaint. What it will not tolerate is soggy feet: standing water or heavy clay that stays wet is the fastest way to rot the roots before the plant ever gets going.
Loose, well-drained soil matters more than rich soil here. Chamomile is not a heavy feeder, and soil that is too fertile tends to push lush foliage at the expense of flowers. Work compost into dense or sandy soil to improve structure, but do not overdo it.
Aim for a soil pH in the 5.6 to 7.5 range, which covers most garden soil without amendment. If your soil is a slow-draining clay, raised beds or mounded rows solve the problem better than any additive.
Once the bed drains well and sits in good light, you are ready for the part everyone rushes.
Planting Chamomile Step by Step
This is where most first attempts go wrong, and it is almost always about depth. Chamomile seed is tiny and needs light to germinate, so burying it is the single most common reason for a bare patch three weeks later.
Steps for direct-sowing
- Rake the bed smooth and remove clumps and stones from the top inch of soil.
- Scatter seed thinly on the surface and press it in gently with your palm or a board, but do not cover it with soil.
- Mist the bed daily, or as often as needed, to keep the surface consistently damp until germination, which takes 7 to 14 days.
- Once seedlings show two true leaves, thin them to 8 to 12 inches apart for German chamomile, or 6 to 12 inches for the lower-growing Roman type.
Steps for transplanting
- Start seed indoors 6 to 8 weeks before your last frost, using the same surface-sow, no-cover method in trays.
- Harden off seedlings over 7 to 10 days before moving them outside.
- Set transplants at the same depth they sat in their pots, spaced 8 to 12 inches apart, and water in well.
Get the spacing right and you avoid the second big mistake, which is crowding plants so tight that airflow disappears and mildew moves in.
With seed or seedlings in the ground, the next few weeks of watering decide whether you get a thin stand or a full one.
Watering and Feeding Through the Season
If you assumed chamomile needs constant moisture like a vegetable seedling, that guess only holds true for the first two to three weeks. Once established, chamomile is genuinely drought-tolerant and prefers to dry out somewhat between waterings.
Check the soil an inch down with a finger. Water when it feels dry there, roughly once a week in average conditions, more often during a hot, dry stretch. Overwatering established plants is more likely to cause problems than underwatering.
Skip heavy feeding. A single light application of compost or balanced fertilizer at planting is usually enough for the whole season. Excess nitrogen produces leafy, floppy plants with fewer flowers, which defeats the point of growing it.
Mulch lightly around the base to conserve moisture and keep weeds down without smothering the shallow roots.
Water and feed it modestly and correctly, and the next question is what still might go wrong even so.
Problems That Actually Show Up on Chamomile
Chamomile is genuinely low-trouble, but three issues account for nearly everything that goes sideways.
Damping off at germination
Seedlings collapse at the soil line in their first week or two. This comes from overly wet, poorly ventilated conditions right after sowing. Thin seedlings for airflow and ease off misting once they are up.
Powdery mildew in humid, crowded beds
A white, dusty coating on leaves shows up when plants are packed too tight with poor air circulation, especially in humid summers. Space plants properly from the start and water the soil, not the foliage, to keep it from getting a foothold.
Aphids on new growth
Small clusters of aphids on stems and buds are common but rarely serious. A strong spray of water knocks most of them off, and insecticidal soap applied per the product label handles persistent infestations.
None of these are season-enders if you catch them early, which is the honest, non-alarming truth about growing this herb.
Handle the plant right through these small hurdles and you arrive at the part you have been waiting for.
When and How to Harvest Chamomile
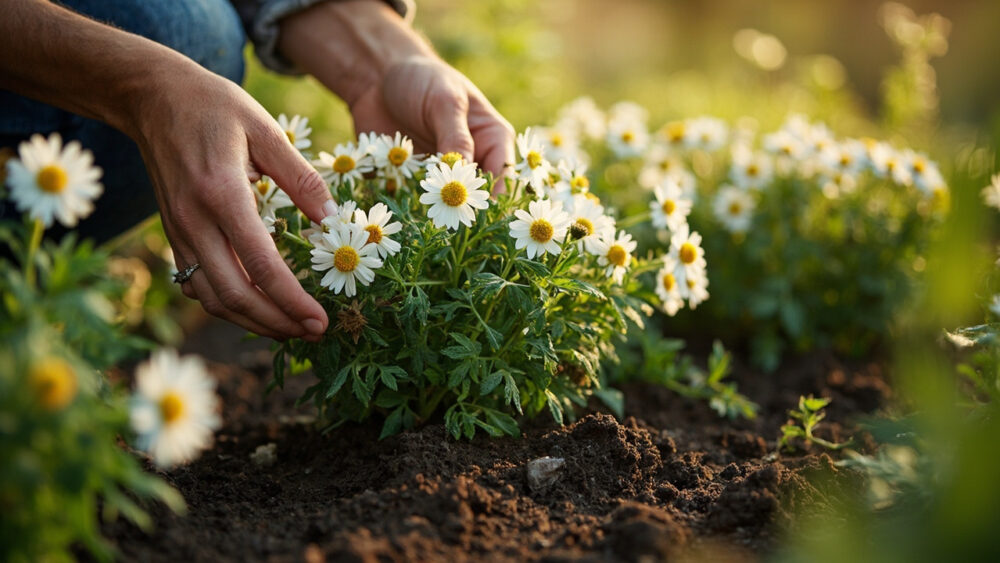
Chamomile typically flowers 60 to 90 days after sowing, depending on variety and conditions, and once it starts it keeps producing new blooms for weeks. The flowers are ready to pick when the white petals have fully opened and started to curve downward, with the yellow center domed and firm.
Do not wait for every flower to open at once. That is the harvest mistake from the intro: chamomile blooms in waves, not all at once, and each individual flower is only at peak quality for a few days. Pick a little every two to three days through the bloom period rather than waiting for one big harvest day.
Snip or pinch flower heads just below the petals, drop them into a shallow basket or tray so they do not compress and bruise, and dry them within a day.
Dry flowers on a screen or paper towel in a warm, airy, out-of-direct-sun spot for several days until they feel papery and crumble slightly, then store in an airtight jar out of light.
Regular picking also pushes German chamomile to keep flowering longer, so harvesting often is not just for your tea jar, it is a maintenance habit that extends the whole season.
Chamomile at a Glance
- When to plant: direct-sow 2 to 3 weeks before last frost, or transplant seedlings around last frost once soil hits 55 to 68°F.
- Sun and soil: full sun to light shade, loose well-drained soil, pH 5.6 to 7.5, no heavy feeding.
- Planting depth and spacing: sow seed on the surface, do not cover, thin or space plants 8 to 12 inches apart.
- Germination time: 7 to 14 days with the surface kept consistently damp.
- Watering once established: let the top inch of soil dry between waterings, roughly weekly.
- Watch for: damping off in wet seedbeds, powdery mildew in crowded humid beds, occasional aphids.
- Harvest window: blooms 60 to 90 days after sowing, pick flowers every 2 to 3 days once petals curve downward.
Get the seed depth and spacing right, and everything else with chamomile is forgiving.
Pick often instead of waiting for one big harvest, and the plant will keep rewarding you with more.