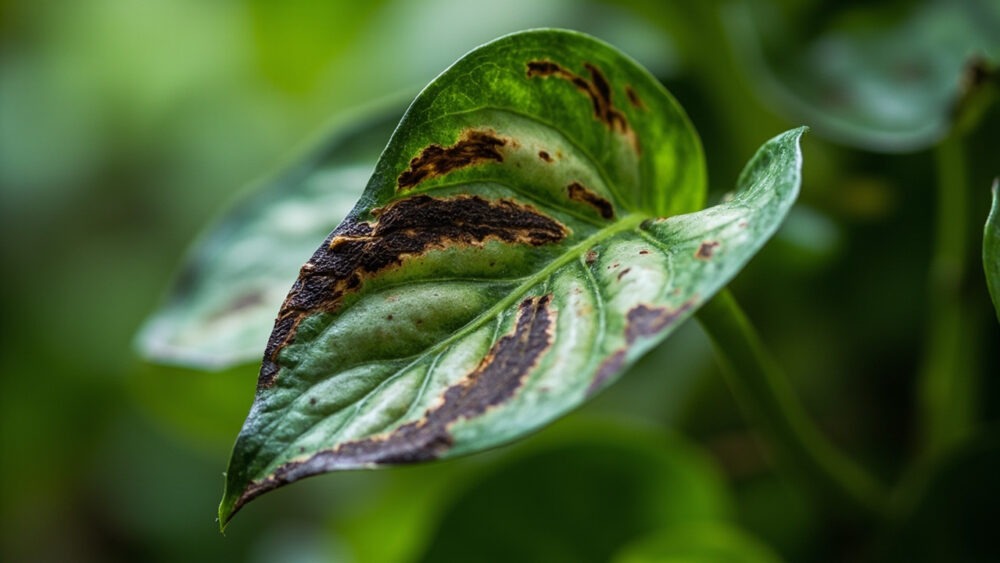
Nine times out of ten, satin pothos leaves turn brown from underwatering combined with low humidity, especially crispy brown edges or tips on otherwise healthy-looking leaves. The fix is simple: check the soil an inch down, and if it’s bone dry, water thoroughly and bump up the humidity around the plant. But that’s not the only cause, and it’s not even always the right one.
Most people blame direct sun first, and sometimes that’s right, but scorch has a very specific look that a lot of other problems get mistaken for. The pattern of the browning, where it starts on the leaf, and which leaves are affected first all point to a specific cause, and guessing wrong means you might “fix” the wrong thing while the real problem keeps going.
Below is every likely cause ranked by probability, a tell-apart guide, an honest recovery outlook, and prevention that actually works. Save the diagnosis checklist at the very bottom, it’s built to run in two minutes standing right next to the plant.
Most Likely Causes, Ranked
1. Underwatering and Low Humidity
Confirm it: stick a finger into the soil up to the second knuckle. If it’s dry and the pot feels light when you lift it, this is likely your cause. Browning usually shows up as crispy tan or brown patches on leaf tips and edges, and it can hit leaves of any age.
Satin pothos (Scindapsus pictus) is more moisture-sensitive than the tougher golden pothos, and it does not forgive long dry stretches the way its cousin does.
Fix it: water thoroughly until it runs from the drainage holes, then let the top inch or two dry out before watering again. Group it with other plants or run a small humidifier nearby if your home air is dry, particularly in winter with the heat running.
Get the watering rhythm right and half your browning problems disappear on their own.
2. Direct Sun Scorch
Confirm it: check if the browning is only on the side of the plant facing a window, and look for a bleached, papery, almost see-through quality at the center of the brown patch rather than a uniform crisp edge. Scorch tends to hit new growth and exposed leaves hardest, since those tissues are softest.
If the plant sits within a foot or two of an unfiltered south or west window, this is a real suspect.
Fix it: move it back a few feet or filter the light with a sheer curtain. Satin pothos wants bright, indirect light, not a spot where the sun actually lands on the leaves for hours a day.
Sun damage doesn’t undo itself once it’s on the leaf, so where you decide to put the plant next matters more than anything you do to the leaf itself.
3. Overwatering and Root Rot
Confirm it: this is the one everyone assumes is underwatering’s opposite twin, but the tell is different. Pull the plant slightly and check the soil for a sour, swampy smell, and feel the roots if you can get to them. Mushy, dark, or slimy roots mean rot. Browning from rot usually starts as yellowing that turns brown and mushy, not crispy, often starting at the base of the plant and moving up.
Fix it: stop watering immediately. If roots are still mostly white and firm, let the soil dry out fully and repot into fresh, well-draining mix. If most roots are black and mushy, trim away the rot and repot into a much smaller pot with fresh soil, then water sparingly for the next month.
This one splits into two very different outcomes depending on how far the rot has spread, and that’s worth understanding before you decide how hard to fight for the plant.
4. Fertilizer Burn or Mineral Buildup
Confirm it: look for brown, crispy leaf tips and margins paired with a white or crusty film on the soil surface or pot rim. This shows up most in plants fed on a strict schedule without ever flushing the soil, or in homes with hard tap water.
Fix it: flush the pot with a slow, heavy pour of room-temperature water, letting it drain fully two or three times, to wash out accumulated salts. Cut fertilizer back to half strength and only during active growth in spring and summer.
If the soil surface looks crusty white before you even check anything else, you’ve probably already found your answer.
5. Cold Drafts or Temperature Shock
Confirm it: think about what changed recently. A leaf near a drafty window, an AC vent, or a spot that got briefly exposed to near-freezing air during a move or a delivery day will often brown or turn almost black and mushy at the site of exposure, while the rest of the plant looks fine.
Fix it: relocate the plant away from vents, exterior doors, and single-pane windows in winter. Damage from a one-time cold event won’t spread, but it also won’t reverse on the affected leaf.
Isolated, oddly placed damage on just one or two leaves points somewhere very different than browning that’s spreading across the whole plant, which is exactly what the next section untangles.
How to Tell the Causes Apart
Location on the plant is the fastest clue. Scorch and drafts hit whichever leaves faced the window or vent. Rot starts low, at the base and older leaves, and climbs upward. Underwatering and fertilizer burn tend to hit tips and edges across the whole plant, old and new leaves alike.
Texture matters just as much as location. Crispy and dry means water, sun, or fertilizer. Mushy, dark, and soft means rot or cold damage. Papery and bleached at the center of the brown means sun.
Once you know where and what it feels like, the fix usually picks itself.
Will It Recover?
A leaf that’s already turned brown will not turn green again, regardless of cause. That part is not fixable, and no product or trick reverses it.
What matters is whether the plant recovers going forward. Underwatering, sun scorch, fertilizer burn, and cold damage all have a good prognosis once you fix the cause: trim off the damaged leaves for appearance, and new growth should come in clean within a few weeks to a couple of months.
Root rot is the honest exception. Caught early, with firm white roots still present, recovery odds are good. Caught late, with most of the root system black and mushy, the plant may not pull through, and it’s fair to cut your losses and try propagating a healthy stem instead of nursing a collapsing root system.
Knowing which outcome you’re looking at changes how much effort is worth spending, and prevention is how you avoid landing here again.
How to Keep It From Happening Again
Check soil moisture by feel, not by schedule. Satin pothos wants to dry out somewhat between waterings, but not bone dry for long stretches. Water when the top inch or two feels dry, not on a fixed weekly date.
Keep it in bright, indirect light a few feet back from strong direct sun, and away from heating vents, AC blasts, and drafty doors. Feed lightly during spring and summer only, and flush the soil with a heavy water every couple of months to prevent salt buildup.
Use a pot with drainage holes, always, and let excess water actually leave the pot rather than sitting in a saucer.
Get those habits right and this plant, which is genuinely one of the easier pothos types once dialed in, mostly takes care of itself.
Diagnosis Checklist
- Check the soil an inch down: if dry and the pot feels light, suspect underwatering first.
- Smell the soil: if sour or swampy, suspect root rot and check the roots next.
- Feel the roots if accessible: mushy and dark means rot, firm and white means the roots are fine.
- Look at where the browning sits on the plant: base and older leaves first points to rot, tips and edges everywhere points to water or fertilizer.
- Check the leaf texture: crispy and dry suggests sun, water, or fertilizer, mushy and dark suggests rot or cold.
- Check for a white crust on the soil surface or pot rim: if present, suspect fertilizer or mineral buildup.
- Check the plant’s position: within a foot or two of strong direct sun or a vent points to scorch or drafts.
- Match your findings to the matching cause above, then apply that fix and trim off already-brown leaves for appearance.
Most brown leaves on a satin pothos trace back to something fixable in five minutes, not a plant on its way out.
Fix the cause, trim the damage, and give it a few weeks before you judge the results.