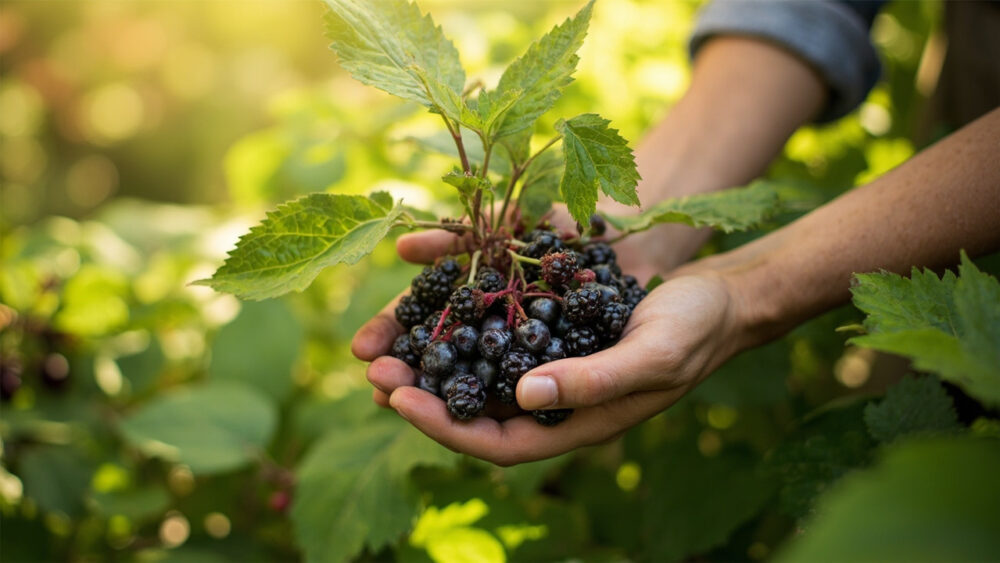
Elderberries want full sun to partial shade, soil that stays moist but never waterlogged, and a partner shrub nearby since most varieties need cross-pollination to fruit well. Plant bare-root or potted shrubs in early spring once the soil can be worked, space them 6 to 8 feet apart, and set them no deeper than they sat in the pot. If you know how to grow elderberries from the first season on, you get a fast, forgiving shrub that fruits by year two or three and keeps producing for decades.
That said, most first attempts stall out for one specific reason that has nothing to do with soil or sun. It’s a pollination mistake almost every new grower makes, and it’s the difference between a shrub loaded with dark clusters and one that flowers beautifully and sets almost nothing.
There’s also a harvest-timing call that trips people up every single year, plus the honest truth about how long you’ll actually wait for a real crop. Stick with this and you’ll get the full planting-to-harvest picture, including a save-able Elderberries at a Glance card at the bottom with every number in one place.
When to Plant Elderberries
Plant in early spring, as soon as the ground thaws and can be worked, roughly the same window you’d plant raspberries or currants. Bare-root stock goes in while still dormant, before leaf buds swell. Potted nursery plants are more forgiving and can go in anytime from early spring through early fall, as long as they get regular water while establishing.
Elderberries are hardy across USDA zones 3 through 9 depending on variety, so a hard freeze after planting won’t hurt an established or dormant shrub. What it will hurt is a plant already pushing tender new growth, so if you’re in a late-frost region, hold off potted plants with active leaves until the worst frost risk has passed.
Fall planting works in milder climates, giving roots a head start before winter dormancy.
Choosing the Spot and Prepping the Soil
Give elderberries full sun for the heaviest fruit set, though they’ll tolerate light afternoon shade, especially in hot climates where afternoon sun can stress the leaves. They naturally grow along stream banks and ditches, so they want soil that holds moisture, moderately rich, slightly acidic to neutral, in the 5.5 to 6.5 pH range.
Work compost into the planting area before you dig, and pick a spot with decent drainage. Elderberries tolerate damp soil far better than most fruiting shrubs, but standing water for days at a time will still rot roots.
Skip a spot that bakes dry in summer with no supplemental water nearby. This is a shrub that sulks fast in drought and rewards you fast when it has consistent moisture.
Once you’ve picked the ground, it’s time to talk about the mistake that quietly wrecks most first harvests.
The Pollination Mistake
Here’s the one that gets almost everyone: planting a single elderberry shrub and expecting a full harvest. Elderberries are often sold as self-fruitful, and technically many varieties will set some berries alone. But cross-pollination between two different cultivars dramatically increases fruit set, often the difference between a handful of clusters and a shrub bent over with them.
Plant two different varieties within 60 feet of each other, closer is better. This single decision affects your yield more than fertilizer, pruning, or soil quality combined.
Planting Step by Step
1. Dig the hole
Make it twice as wide as the root ball and just as deep, so the plant sits at the same depth it was growing at in the pot or nursery row.
2. Loosen the roots
For potted plants, gently tease apart any circling roots. Bare-root plants should have their roots spread out naturally in the hole, not jammed in bent.
3. Backfill and firm
Fill in with native soil mixed with compost, firming gently as you go to remove large air pockets. Don’t tamp it hard enough to compact the soil.
4. Water in immediately
Give each new plant a deep soak right after planting, enough to settle the soil around the roots completely.
5. Mulch
Lay 2 to 3 inches of mulch around the base, keeping it a few inches back from the stems to avoid rot.
Space plants 6 to 8 feet apart if you’re growing a hedge or windbreak, or up to 10 feet if you want each shrub to develop as a standalone specimen.
Get the planting right and the next few months are mostly about staying consistent with water.
Watering and Feeding Through the Season
Elderberries need consistent moisture through their first two seasons while roots establish, about 1 inch of water a week if rain doesn’t provide it. Once mature, they handle short dry spells better but still fruit best with steady water, especially as berries are sizing up in mid to late summer.
Feed lightly in early spring with a balanced fertilizer or a layer of compost worked into the surface. Heavy nitrogen pushes leafy growth at the expense of flowers and fruit, so resist the urge to overfeed a shrub that looks slow.
Prune in late winter while still dormant, removing dead, damaged, or crossing canes and cutting back the oldest wood to encourage new growth, since elderberries fruit best on one- and two-year-old canes. A shrub left completely unpruned still fruits, just less generously and with more tangled, shaded interior growth.
Even with good care, a few problems show up almost every season, and knowing them ahead of time saves real fruit.
Problems That Actually Show Up
Birds are the biggest threat to your harvest, not pests or disease. They’ll strip ripening clusters overnight if you’re not watching closely as berries darken. Bird netting draped over the shrub as clusters start to color is the most reliable fix.
Powdery mildew and leaf spot can appear in humid climates or crowded plantings with poor airflow. Prune for open centers and avoid overhead watering late in the day to keep foliage drier. If mildew becomes a recurring problem, a fungicide labeled for ornamental or fruiting shrubs can help, applied exactly as the label directs.
Borers and aphids show up occasionally but rarely threaten an established, healthy shrub. Keep the base clear of debris and prune out any cane showing dieback or sawdust-like frass, a sign borers may be inside.
One thing worth stating plainly: raw elderberries, along with the leaves, stems, bark, and unripe fruit, contain compounds that are toxic to people and pets if eaten in quantity, causing nausea and digestive upset. Cooking ripe berries neutralizes this, which is why elderberries are almost always made into syrup, jam, or wine rather than eaten raw off the plant. If a pet or child eats a significant amount of any part of the plant, contact a veterinarian or poison control rather than waiting to see what happens.
Once the shrub is healthy and the berries are safely ripening, the only question left is exactly when to pick.
When and How to Harvest
If you assumed you harvest as soon as berries turn dark, that guess costs you the best fruit. Elderberries can look fully purple-black while still tart and slightly firm days before they’re truly ripe. Wait until the entire cluster droops downward and the berries are plump, deep purple to black, and pull off easily with a gentle tug, usually in mid to late summer depending on your climate and variety.
Cut whole clusters rather than picking individual berries, snipping the stem where it meets the main branch. Strip berries from the stems afterward, since stems and unripe berries are the toxic parts you want to avoid processing into food.
New shrubs typically produce a light first harvest in their second year, with full production arriving by year three or four as canes mature. That’s the honest timeline, and it’s worth planning for rather than expecting a loaded shrub the first summer.
Once picked, elderberries don’t hold long on the counter, so cook, freeze, or process clusters within a day or two of harvest.
Everything above comes together in the quick-reference card below, worth saving before you head out to plant.
Elderberries at a Glance
- When to plant: early spring once soil can be worked, or fall in milder climates, zones 3 through 9 depending on variety.
- Spacing: 6 to 8 feet apart, with two different varieties planted within 60 feet for reliable cross-pollination.
- Planting depth: same depth the plant sat at in its pot or nursery row, no deeper.
- Sun and soil: full sun to light afternoon shade, moist and well-drained soil, pH 5.5 to 6.5.
- Water: about 1 inch weekly during establishment, consistent moisture through fruit development after that.
- Main threats: birds stripping ripe clusters, powdery mildew in humid or crowded plantings.
- Harvest: mid to late summer, when whole clusters droop and berries pull off easily, first light crop in year two, full production by year three or four.
Get two varieties in the ground with good sun and steady water, and the shrub does most of the rest on its own.
Just remember, ripe means the whole cluster hangs heavy, and everything you eat from it needs to be cooked first.