Knowing how to care for blackberries comes down to five things: full sun, well-drained soil with regular water, a trellis or support for the canes, an annual pruning routine that respects the plant’s two-year cane cycle, and picking berries only when they’ve gone fully dull black. Skip any one of those and you get a tangled thicket that fruits poorly and takes over the yard. Get them right and a single row feeds a family for weeks every summer.
There’s one mistake that wrecks more blackberry patches than drought, disease, or bad soil combined, and it has to do with which canes you cut and when. There’s also a sign of “ripeness” almost everyone misreads, and it costs them the best berries of the season. Stick around, because the save-able Blackberries at a Glance card at the bottom covers spacing, pruning timing, and the water schedule in one glance for next time you’re standing in the patch with dirty hands and no signal.
Light, Placement, and Temperature
Blackberries want full sunat least 6 to 8 hours a day. In partial shade they’ll survive and even leaf out fine, but fruiting drops off hard and the berries turn sour and small.
They’re winter-hardy in USDA zones 5 through 9 depending on variety, with trailing types generally the least cold-tolerant and erect, thorny types the toughest. Pick a site with good air movement, since stagnant humid air around the canes is what invites fungal disease later.
Avoid low spots where frost settles or water pools after rain. Blackberries tolerate a lot, but soggy roots and late frost on new spring growth are two things they don’t forgive.
Once the site is right, water becomes the daily decision you’ll actually be making.
Watering: How Much, How Often, and How to Tell
Blackberries need about 1 to 2 inches of water a week during the growing season, more in the two to three weeks while fruit is sizing and ripening. That’s the single highest-payoff watering window of the year: skimp on water during fruit development and you get small, seedy berries no matter how well you fed the plant.
Check the soilnot the calendar. Push a finger 2 inches down near the root zone. If it’s dry at that depth, water. If it’s still damp, wait a day or two.
Established plants handle brief dry spells better than people expect, but first-year canes have shallow roots and need more consistent moisture. A 2 to 3 inch layer of mulch, straw or wood chips both, holds moisture and keeps roots cooler through summer heat.
Overhead watering late in the day is one of the quiet mistakes here, since wet foliage overnight is exactly what fungal spores want.
Water right and you’ve solved half the disease problem before it starts, but soil and feeding solve the other half.
Soil and Feeding
Blackberries want well-drained, slightly acidic soil, ideally a pH between 5.5 and 6.5. Heavy clay that stays wet is a real problem here; raised rows or amending generously with compost fixes it.
Feed in early spring as new growth starts, using a balanced fertilizer or a nitrogen-leaning one at about half the rate you’d use on vegetables. Blackberries are not heavy feeders. Too much nitrogen gives you a jungle of leafy cane growth and noticeably fewer berries, which surprises a lot of first-time growers who assume more feeding means more fruit.
A second light feeding right after harvest supports the new canes that will bear next year’s crop. That’s worth remembering, because those canes matter more than this year’s berries do.
Which brings us to the part of blackberry care that actually determines whether you get a harvest at all.
Pruning: The Mistake That Ruins Most Blackberry Patches
Here’s the fact that trips up almost everyone growing blackberries for the first time: the canes are biennial. A cane grows the first year (called a primocane), fruits in its second year (now called a floricane), then dies. If you don’t know which cane is which, you’ll cut the wrong one and lose a year’s harvest without ever knowing why.
After harvestcut the floricanes, the ones that just fruited, all the way to the ground. They’re finished and won’t produce again. Leave the current season’s new green primocanes alone; they’re next year’s fruit.
In late winter, while the plant is still dormant, thin the remaining canes to 4 to 6 of the strongest per plant and cut them back to about 4 to 5 feet if they’re floppy or overly tall. For trailing varieties, tip the primocanes at 3 to 4 feet during the growing season to force lateral branching, which is where most of the fruit actually forms.
Erect and semi-erect types benefit from a support wire or trellis at 3 and 5 feet. Trailing types need one to stay off the ground at all, since sprawling canes rot where they touch wet soil.
Get the pruning cycle right for one season and it becomes automatic, but there’s still a harvesting mistake waiting even after you’ve done everything else correctly.
Problems Most Likely to Strike
The three most common issues are cane blight, spider mites, and birds, and none of them require panic, just early action.
- Cane blight and other fungal spots: dark lesions on canes, often from overhead watering or crowded plants. Remove and destroy infected canes, improve airflow by thinning, and if it persists, a fungicide labeled for cane fruit applied per the product label helps.
- Spider mites: fine stippling or bronzing on leaves, worse in hot dry weather. A strong water spray knocks populations down. Insecticidal soap per label directions handles heavier infestations.
- Birds: the most reliable pest of all. Netting draped over the row as berries start to color is the only fix that consistently works.
- Orange rust: bright orange powdery patches on leaf undersides in spring, mainly on wild or trailing types. There’s no cure once a plant has it. Remove and destroy the entire plant to protect the rest of the patch.
Most of these show up in the same weeks the berries are ripening, which is exactly when people are watching the fruit and not the leaves.
The Ripeness Mistake, and What Thriving Actually Looks Like
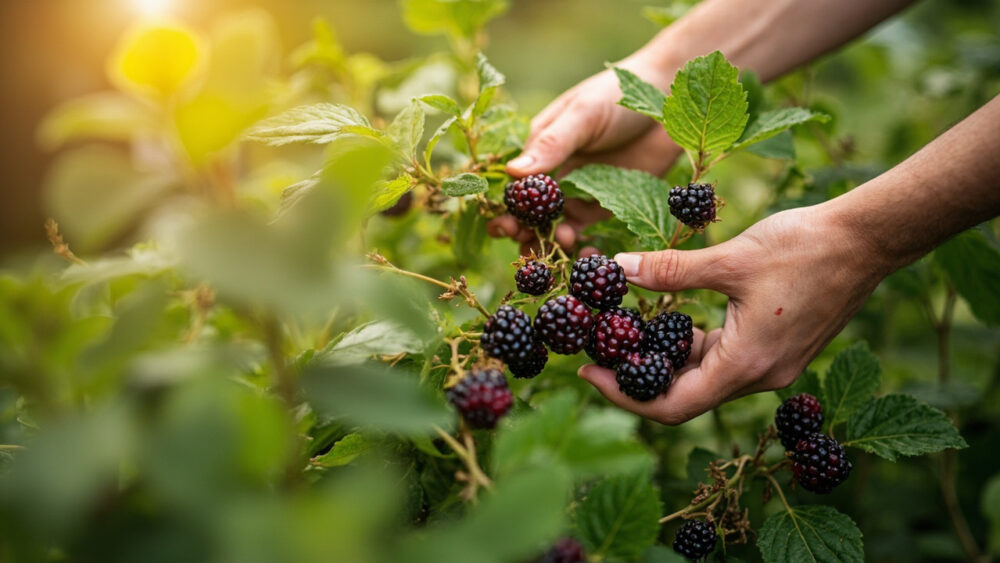
If you’ve been picking blackberries as soon as they turn fully black, you’re picking too early. That’s the misread almost every new grower makes.
A blackberry that’s black but still glossy and firm is often a day or two from its best flavor. Wait for the berry to turn a slightly duller, matte black and give gently under light pressure with almost no resistance when tugged. If it takes any real effort to pull off the plant, it isn’t ready yet.
A thriving blackberry plant shows vigorous cane growth each spring, dark green leaves with no yellowing between the veins, and a heavy, even set of flowers in late spring that follow through to full-sized, glossy fruit. Weak, spindly primocanes or sparse flowering usually point back to not enough sun or a feeding and pruning schedule that’s fallen behind.
Once you’ve got the timing down on picking, pruning, and watering, blackberry care stops being guesswork and turns into a simple yearly rhythm.
Blackberries at a Glance
- When to plant: early spring as soon as the soil can be worked, or in fall in mild-winter climates.
- Spacing: 3 to 4 feet apart for erect types, 5 to 8 feet for trailing types, rows 8 to 10 feet apart.
- Light: full sun, at least 6 to 8 hours daily.
- Water: 1 to 2 inches per week, more during fruit development, checked by feel 2 inches down rather than by schedule.
- Soil: well-drained, slightly acidic, pH 5.5 to 6.5, enriched with compost.
- Pruning: cut spent floricanes to the ground right after harvest, thin to 4 to 6 canes per plant in late winter.
- Harvest: pick when berries are dull matte black and release with almost no tug, usually mid to late summer.
Most blackberry failures trace back to one thing: cutting the wrong canes or picking too soon.
Get the cane cycle and the ripeness cue right, and everything else about this plant takes care of itself.