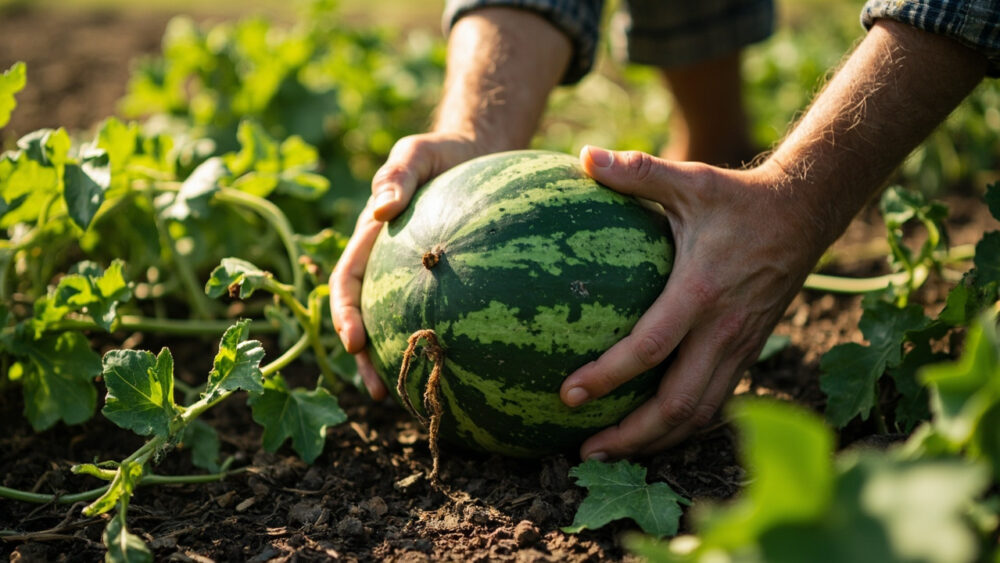
When to harvest watermelon comes down to three checks working together: the curly little tendril nearest the stem has dried and browned, the pale spot where the melon touches the ground has turned from white to a creamy yellow, and the fruit gives a hollow, dull thud rather than a sharp slap when you thump it. One sign alone lies to you often enough to ruin a melon. All three together are honest almost every time.
Most gardeners get one part of this wrong without knowing it, and it is usually the part they trust most. That confident thump test everyone learned from a relative? It is the least reliable of the three on its own.
Stick around, because the timing window is narrower than people assume, one common cutting mistake can cost you the rest of the plant’s harvest, and there is a storage detail about watermelon that surprises almost everyone who is used to curing squash or pumpkins. The full Watermelon at a Glance card is at the bottom, saveable in ten seconds, once you have seen why each sign matters.
The Tendril: Your First and Most Honest Clue
Look at the curly tendril growing from the vine at the point closest to where that melon’s stem attaches. While it is green and springy, the melon is still filling out.
Once that tendril has fully browned and dried, curled up like a dead vine clipping, the melon has stopped taking on more sugar from the plant. This is the single best early warning sign, and it usually shows up a few days before the melon is fully ready, not the exact day.
Some varieties, especially seedless types, have tendrils that brown a little unevenly, so treat this as your cue to start checking the other two signs closely rather than as the final word by itself.
The tendril tells you when to start paying close attention, the ground spot tells you when you are close.
The Ground Spot and the Thump, Read Together
The belly spot
Every watermelon has a spot on its underside where it rests on the soil. Early on this spot is pale white or greenish white.
As the melon ripens, that spot shifts to a buttery cream or pale yellow. A spot that is still bright white almost always means you are too early, no matter how big the melon looks.
The thump test, honestly
A ripe watermelon gives a low, hollow, almost muffled thud. An underripe one rings higher and sharper, almost metallic.
This test is real, but it is subtle and inconsistent between varieties, and plenty of experienced gardeners misjudge it when they use it alone. Use it to confirm what the tendril and ground spot are already telling you, not to overrule them.
Three signs agreeing is what actually protects you from cutting into a melon a week too soon.
The Timing Window, and What Early or Late Costs You
Most watermelon varieties reach maturity 65 to 90 days after transplanting, depending on whether you are growing a compact icebox type or a large classic slicer. Count from your transplant date, not your seed-starting date, and use that number as a rough calendar to start watching the vine closely rather than a day to cut on.
Here is the part that trips people up: unlike a peach or a pear, watermelon does not ripen after picking. Whatever sugar and flavor are in that melon the moment it leaves the vine is all it will ever have. There is no windowsill fix.
Pick too early and you get pale, watery, faintly bland flesh that never improves. Pick too late and the flesh turns mealy, grainy, and sometimes hollow at the center, with flavor that has started sliding backward.
That no-ripening-after-picking fact is exactly why getting the three signs right matters more with watermelon than with almost any other fruit you grow.
How to Harvest Without Damaging the Vine
Once the tendril is brown, the belly spot has turned creamy, and the thump sounds hollow, you are ready to cut.
- Use clean, sharp pruners or a garden knife, never a twist-and-pull. Twisting tears the vine and can wound the main stem, which stresses the whole plant.
- Cut the stem two to three inches from the melon, leaving a short handle of stem attached rather than cutting flush.
- Support the melon’s full weight with your other hand as you cut, especially on larger varieties, so it does not drop and crack on impact.
- Lift, do not drag, the melon off the vine and off the soil to avoid bruising the rind on the underside.
A clean cut protects the rest of the plant, and the rest of the plant may still owe you more melons.
Right After the Cut: What to Do With It
Move the melon out of direct sun as soon as it is off the vine. Sitting in full sun on hot soil for hours does it no favors and can soften the rind faster than you want.
Watermelon does not need curing the way winter squash or pumpkins do. There is no waiting period to toughen the skin or convert starch to sugar, because that conversion already happened on the vine or it did not happen at all.
Wipe off garden soil with a dry cloth rather than rinsing right away, and set it somewhere shaded and cool while you decide whether to eat it that day or hold it a bit longer.
How long you can actually hold onto that melon before quality drops is the part almost nobody tells you honestly.
Storage, Second Melons, and Keeping the Harvest Going
An uncut, ripe watermelon holds well at room temperature for about one to two weeks, and a bit longer, up to three weeks, in a cool spot around 50 to 60°F. Refrigeration slows it further but also gradually dulls flavor and texture, so many gardeners hold whole melons at room temperature and only chill what they plan to eat within a few days.
Once cut, watermelon is a refrigerator item: wrap it and eat it within about three to five days for the best texture.
Most vining watermelon varieties set fruit over several weeks, not all at once, so a healthy plant often has two or three melons at different stages on it simultaneously. Keep checking tendrils and belly spots on each one individually rather than assuming they all ripen together.
Consistent watering through fruit set, tapering off slightly in the final one to two weeks before harvest, gives you better flavor concentration without cracking the fruit.
Everything above works better with the quick numbers in front of you, which is exactly what the card below is for.
Watermelon at a Glance
- When to plant: transplant or direct-seed two to three weeks after your last frost, once soil has warmed to at least 65 to 70°F.
- Days to maturity: 65 to 90 days from transplant, varying by variety size.
- Spacing: 24 to 36 inches between plants in rows, or 3 to 4 feet on hills, with rows 6 to 8 feet apart for vining types.
- Ready signs: tendril nearest the stem fully browned and dried, ground spot shifted from white to creamy yellow, hollow dull thud when tapped.
- Harvest method: cut the stem two to three inches from the fruit with clean pruners, never twist or pull.
- After picking: no ripening or curing happens off the vine, so pick only when all signs agree.
- Storage: whole melons keep one to two weeks at room temperature or up to three weeks cool, cut melons keep three to five days refrigerated.
Get the tendril, the belly spot, and the thump to agree before you cut, and you will not need luck.
Everything else about growing watermelon is patience, this last part is just paying attention.