The answer to when to prune Japanese maple is late fall through mid winter, while the tree is fully dormant and bare, ideally on a dry day with temperatures above freezing so cuts don’t sit in frozen wood. The second best window is high summer, after the leaves have fully hardened off. What you want to avoid almost entirely is spring, right as sap starts moving.
That part is simple enough. What trips people up is everything downstream of the calendar: how much to actually remove without leaving the tree looking hacked, which cuts trigger that thin, weepy bleeding everyone panics about, and the one pruning habit that quietly turns a graceful layered maple into a dense green ball over a few years.
Stick around, because the mistakes section covers the cut that ruins a Japanese maple’s whole shape for a decade, and at the bottom there’s a save-able at-a-glance card with the timing, tools, and cut ratios in one place.
The Right Season, and Why Spring Is the Trap
Dormant season pruning, from around late November through February in most temperate climates, is the safest window. The tree has dropped its leaves, sap flow has slowed way down, and you can see the actual branch structure without foliage hiding it.
Summer pruning, once new growth has hardened (usually by mid to late June through July), works too and is actually better for minor shaping and thinning, since you can see exactly where the canopy is too dense.
Spring is the one time to leave the saw alone. Japanese maples are notorious sap bleeders, and a cut made just as the tree is breaking dormancy can weep for weeks. It rarely kills the tree, but it’s messy, stressful for the plant, and entirely avoidable.
Timing solves half the problem, and the other half is what you cut with.
Tools and the One Prep Step Nobody Skips Twice
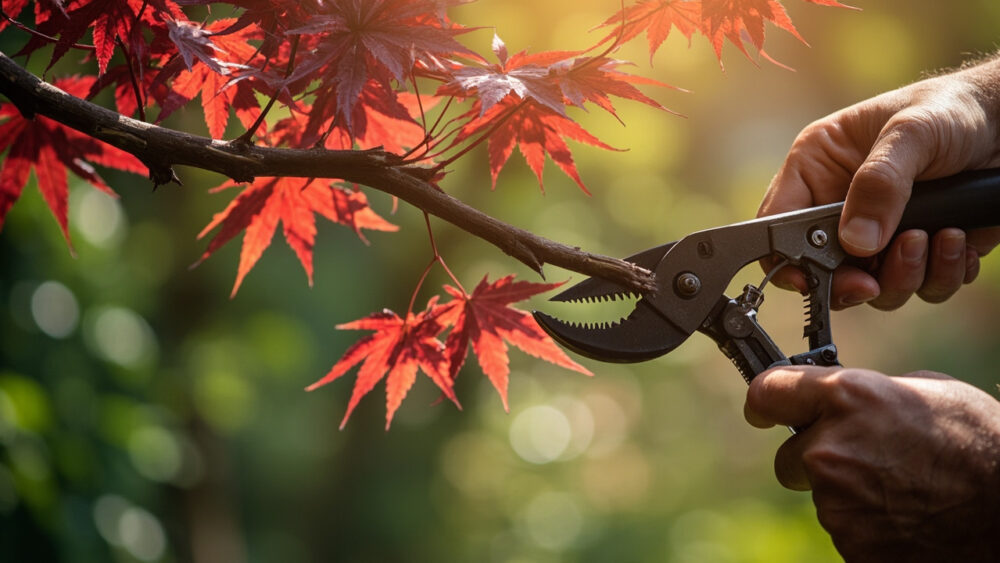
You need bypass pruners for anything pencil-thick or smaller, bypass loppers for branches up to about 1.5 inches, and a sharp folding saw for anything bigger. Skip anvil-style pruners entirely; they crush rather than slice, and Japanese maple bark is thin enough that crushed wood invites disease.
Sterilize your blades before you start, wiping them down with rubbing alcohol. Japanese maples are genuinely more disease-prone than a lot of landscape trees, and moving fungal spores from one cut to the next is how a healthy tree ends up with dieback by next season.
Dull blades are the other quiet killer here, tearing bark instead of cutting clean and leaving wounds that heal slowly.
Sharp, clean, correctly sized tools are non-negotiable, and now the cuts themselves.
How Much to Take, and Exactly Where to Cut
The honest guess most people make is that more thinning equals a healthier tree. That guess is what leaves a Japanese maple looking see-through and stressed by August.
The real rule is to remove no more than 15 to 20 percent of the live canopy in a single season, and less than that on a tree younger than three or four years, which needs its leaf area to keep building root mass.
Step 1: Remove the dead, damaged, and crossing wood first
Cut back to healthy wood, identifiable by green or white cambium just under the bark rather than brown. This alone often solves 80 percent of what looked like a “needs pruning” tree.
Step 2: Cut back to a branch junction, never mid-branch
Every cut should end at a fork or at the trunk, leaving no stub. A stub can’t heal over and becomes a slow entry point for decay.
Step 3: Thin from the inside out, not the outside in
Reach into the canopy and remove entire small branches that cross or rub, favoring branches that grow outward and downward slightly, which is the natural layered look Japanese maples are prized for. Shearing the outer silhouette instead creates a dense shell of twiggy growth with a bare, shaded interior.
Step 4: Step back every few cuts
Walk around the tree and look at it from a few angles before making the next cut. It’s far easier to overcut than to put a branch back.
Get the ratio and the junction rule right, and the recovery is almost always graceful.
What the Tree Looks Like Afterward
A little sap weeping at dormant-season cuts is normal and not a sign of damage, even though it looks alarming against the bark. It usually stops within a few days to a couple weeks.
New growth the following spring will often be noticeably more vigorous right around larger cuts, sometimes sending up a few overly upright shoots. Thin those out the following winter rather than letting them compete with the tree’s natural shape.
If a cut is larger than about 2 inches across, expect a slower callusing process over a full year or two. That’s normal for the species and not a reason to seal the wound with paint or tar, which traps moisture against the wood far more than it protects it.
A slow, patient response is the correct response, and it’s why the next section matters so much.
The Mistakes That Cost You the Tree’s Whole Shape
The single most damaging habit is topping or shearing the outer canopy to control size. It forces a thicket of dense, upright water sprouts right at the cut, destroying the airy, tiered silhouette that takes a decade or more to develop, and no amount of follow-up pruning fully restores the original branch architecture.
A close second is pruning hard in spring, right as buds swell, which causes the heaviest sap bleed of the whole year and adds unnecessary stress on top of the seasonal push of new growth.
Removing more than 20 to 25 percent of the canopy in one go, especially on a stressed or young tree, is the fastest way to trigger dieback rather than fix a problem.
And leaving stubs instead of cutting to a junction guarantees slow-healing wounds that become entry points for fungal issues, including the cankers and verticillium wilt Japanese maples are already somewhat prone to; if you ever see sudden branch-wide wilting or dark streaking under the bark, that’s a job for an arborist rather than more pruning.
Avoid those four things and a Japanese maple genuinely forgives almost everything else.
Japanese Maple at a Glance
- When to prune: late fall through mid winter while fully dormant, or mid to late summer after new growth has hardened, never in spring as buds break.
- How much to remove: no more than 15 to 20 percent of the live canopy per season, less on trees under three to four years old.
- Where to cut: always back to a branch junction or the trunk, never leaving a stub.
- Tools needed: sharp bypass pruners, bypass loppers for up to 1.5 inches, a folding saw for larger limbs, all sterilized with alcohol before starting.
- Order of cuts: dead and damaged wood first, then crossing or rubbing branches, then light thinning from the interior outward.
- Normal aftermath: some sap weeping at dormant cuts, slower callusing on cuts over 2 inches, occasional vigorous upright shoots the following spring.
- Biggest mistake to avoid: shearing or topping the outer canopy, which destroys the natural layered shape for years.
Prune in the cold, dormant months, take a little at a time, and always cut back to a junction.
Do those three things and the tree’s shape stays intact for decades, not just one good season.