The best way to preserve onions long term is to cure them properly first, then store the cured bulbs somewhere cool, dark, and dry with air moving around them, which keeps most varieties good for four to eight months without any canning, freezing, or dehydrating at all. If you want them to last even longer, or you have a bumper crop that curing can’t fully handle, freezing chopped onions or dehydrating them into flakes both work well and skip the fuss of canning, which is genuinely not recommended for onions on their own. How to preserve onions really comes down to matching the method to how you plan to use them later.
There’s one mistake that ruins more stored onions than anything else, and it has nothing to do with temperature. There’s also a sign of trouble that looks harmless at first and gets waved off until half the bin is soft. And there’s a question you’re probably about to ask right after this one: can you just toss onions straight into the freezer raw, skin and all? The honest answer surprises people.
Stick with me through the sections below and I’ll walk you through curing, storage life for every method, the prep that actually matters, and the mistakes that quietly wreck a whole batch. Save-able specifics, including exactly how long onions last each way, are waiting in the “Onions at a Glance” card at the very bottom.
Curing: The Step Most People Skip or Rush
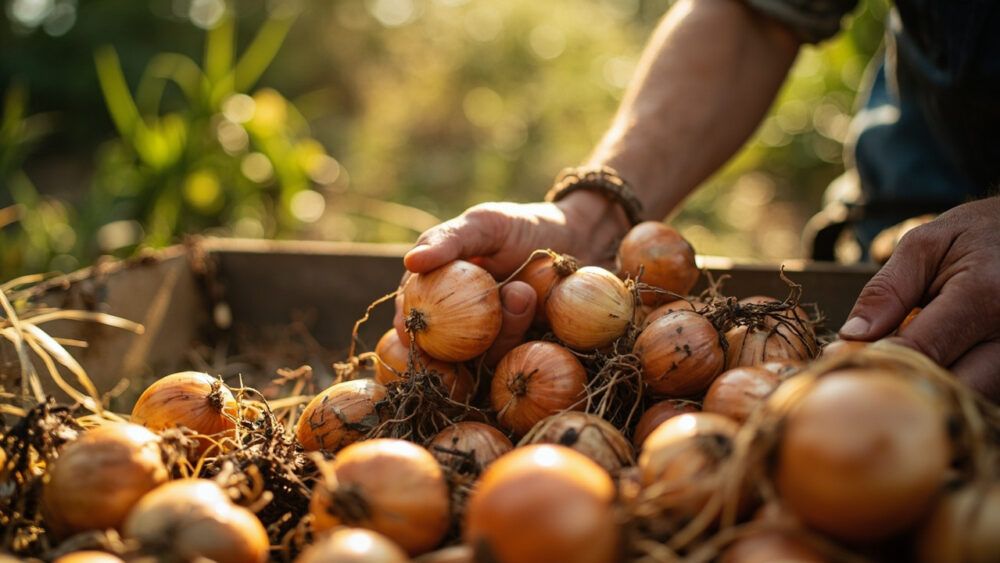
Curing means drying onions down until the outer skins turn papery and the necks tighten up, which seals out rot-causing bacteria and moisture. Pull onions when the tops have flopped over and started to yellow or brown on their own, not because you forced them down.
Lay or hang them somewhere warm, dry, and shaded, ideally 75 to 90°F with good airflow, for two to four weeks. A covered porch, garage, or shed works better than full sun, which can scald the bulbs.
You’ll know curing is done when the outer skin is dry and crackly and the neck feels tight and thin rather than thick and juicy. Skip this step and even a “long storage” onion will rot in weeks.
Once cured, the real storage decisions start.
The Best Way to Store Cured Onions Long Term
Trim the dried tops to about an inch, brush off loose dirt without washing, and check every bulb by hand. Set aside any with soft spots, bruises, or green sprouting starting at the neck; those go in the kitchen for immediate use, not into storage.
Store the keepers in a mesh bag, old pantyhose knotted between bulbs, or a single layer in a shallow crate, somewhere that stays 35 to 50°F with low humidity and decent air circulation. A cool basement, unheated closet, or garage that doesn’t freeze all does the job.
Check on them every couple of weeks. One turning bulb can spread trouble to its neighbors if you let it sit.
That’s the shelf-stable route, but not every onion you grow or buy is a good candidate for it.
Which Onions Actually Store Well (and Which Don’t)
If you assumed all onions store the same way, that guess is what fills basements with mush by midwinter. Storage life depends heavily on the variety and how much sugar and water is packed into the bulb.
Pungent, thick-skinned storage onions, yellow globe types and most late-season varieties, cure hard and keep for months. Sweet onions and most red onions, softer and juicier by nature, are built for eating fresh within a few weeks to a couple months, even when cured well.
If you’ve got a crate of sweet onions, don’t fight their nature. Freeze or dehydrate the surplus instead of hoping they’ll hold like a storage yellow onion will.
That brings up the freezer question everyone has next.
Freezing Onions: Skip the Blanching, Skip the Skin
You can freeze onions raw, and blanching is not required, which is the opposite of what a lot of general “how to freeze vegetables” advice implies. Peel, chop or dice to the size you’ll actually cook with, spread the pieces on a tray in a single layer, and freeze until solid before bagging.
That freeze-before-bagging step matters. Skip it and you get one dense onion brick instead of pourable, scoopable pieces you can grab a handful from.
Frozen onions go soft on thawing, so they’re for cooked dishes only, soups, sauces, sautés, never for a fresh salad or a burger topping.
Dehydrating solves that texture problem, if you’re willing to trade a little time for it.
Dehydrating Onions: Slow, Smelly, and Worth It
Slice onions thin and even, about 1/8 to 1/4 inch, and dry them at 125 to 135°F until they’re brittle and snap rather than bend, usually 6 to 12 hours depending on thickness and humidity. No blanching needed here either.
Fair warning: your kitchen or garage will smell like onions for a day or two. Run a dehydrator in a garage or covered porch if you can.
Once fully dry, cool completely and store in an airtight jar. You can leave them as flakes or grind them into onion powder in a spice grinder or blender.
Dried onions are shelf stable, but “fully dry” is doing a lot of work in that sentence, and getting it wrong is where things go sideways.
The Sign It Has Turned (and the One People Ignore)
A soft spot at the neck, a sour or musty smell, or a bulb that feels squishy under light pressure all mean rot has started; that onion goes in the compost, not back in storage. Sprouting green shoots means the onion is redirecting its stored sugar into new growth, so it’s edible but going downhill fast.
The sign people miss is different: a faint sticky wetness on the outer skin with no smell yet. That’s early rot starting from the inside out, days before it smells or feels soft on the outside.
For frozen or dehydrated onions, ice crystals inside the bag or any clumping in dried flakes means moisture got in, which invites freezer burn or mold. Frozen onions with heavy ice buildup are safe to use but will taste flat. Dehydrated onions that clump or feel even slightly leathery should be tossed, since that dampness can grow mold you won’t see until it’s well established.
Most of these problems trace back to a short list of avoidable mistakes.
The Mistakes That Ruin a Batch
- Washing before storage: water trapped under the skin invites rot. Brush dirt off dry instead.
- Storing uncured onions: skipping the two to four week cure is the single biggest cause of early rot.
- Piling bulbs in a deep bin: no airflow means one bad onion takes down several around it.
- Storing near potatoes: potatoes give off moisture and gases that make onions sprout and soften faster.
- Freezing without pre-freezing on a tray: you end up with a solid clump instead of usable portions.
- Under-drying for dehydration: if it bends instead of snapping, it isn’t done, and it will mold in the jar.
Fix those six habits and almost every storage failure disappears.
Here’s the whole thing distilled to what’s actually worth saving.
Onions at a Glance
- Curing time: two to four weeks in a warm, dry, shaded spot with airflow, 75 to 90°F, until skins are papery and necks are tight.
- Best storage conditions: 35 to 50°F, low humidity, good air circulation, mesh bag or single layer in a crate.
- Cured storage life: yellow and other storage onions, four to eight months. Sweet and red onions, a few weeks to two months.
- Freezer method: peel and chop raw, no blanching, freeze on a tray first, then bag. Keeps six to twelve months, texture is soft, cooked uses only.
- Dehydrator method: slice 1/8 to 1/4 inch thick, dry at 125 to 135°F for 6 to 12 hours until brittle. Stores a year or more in an airtight jar.
- Never do this: wash before storing, skip curing, or bag onions for the freezer without pre-freezing them first.
- Toss it if: you see soft spots, smell sourness, feel stickiness on the skin, or find clumping in dried flakes.
Cure them right and most storage onions will carry you through winter with almost no effort.
Everything else, freezer bags or dehydrator jars, is just insurance for the varieties that were never going to hold that long anyway.