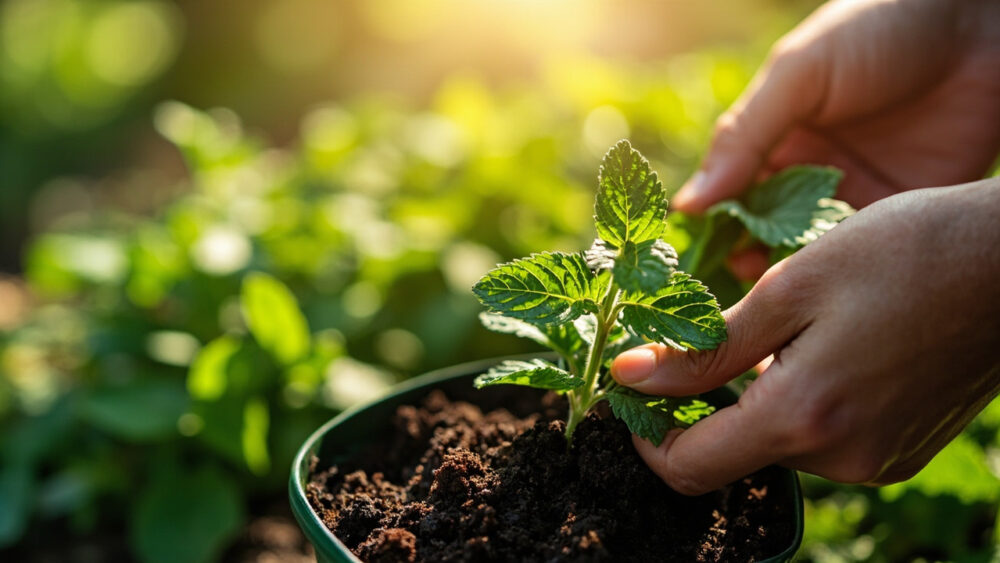
Cut a 4 to 6 inch piece of healthy mint stem just below a leaf node, strip the bottom leaves, and set it in a glass of water on a bright windowsill. Roots show up in 5 to 10 days, and the cutting is ready to pot into soil about 2 to 3 weeks after that. This is genuinely one of the easiest plants in the herb world to propagate this way, which is exactly why so many people still manage to mess it up.
Most failures with mint from cuttings trace back to one habit: leaving the cutting in water for too long, waiting for a root system that looks more impressive than it needs to be. There’s also a sign people misread completely, a wilted, sad-looking cutting in week one that actually has nothing wrong with it. And there’s a follow-up question almost everyone asks right after rooting works: can you just skip soil and grow mint in water forever. The honest answer surprises people.
Stick around for all of it, including the mistakes that quietly kill a summer’s worth of mint and the printable Mint at a Glance card at the bottom of this page, the kind of thing worth saving to your phone before you head back out to the garden.
Why Cuttings Beat Seeds for Mint, Every Time
Mint seed is unreliable. It germinates slowly, sprouts unevenly, and often doesn’t grow true to the parent plant, so the peppermint you thought you planted might come up tasting like something duller.
Cuttings sidestep all of that. A cutting is a clone. It has the exact flavor, leaf shape, and vigor of the plant you took it from, and mint roots so eagerly from a cut stem that it’s often faster than starting from a nursery seedling.
This is also why mint spreads like it does in the ground: any broken stem that touches soil can root on its own. You’re just doing on purpose what the plant already wants to do by accident.
That eagerness is the whole method, so let’s get into exactly how to use it.
Step by Step: Taking and Rooting the Cutting
Take the cutting
Choose a healthy, non-flowering stem, 4 to 6 inches long, from a plant that isn’t stressed or wilting. Cut just below a leaf node using clean scissors or pruning snips.
Strip the leaves from the bottom half of the stem, leaving just 2 to 4 leaves at the top. Those lower leaf nodes are where roots will actually form, and leaves left on that portion just rot in water or soil.
Choose your rooting medium
Plain water works well and lets you watch root development, which is satisfying and useful for beginners. A small glass or jar is enough, just make sure the stripped nodes are submerged and the leaves stay above the waterline.
Moist potting mix or a seed-starting mix also works, and roots slightly faster and sturdier this way since the roots never have to transition from water-roots to soil-roots. If you go this route, keep the mix consistently damp, not soggy, and consider covering the pot loosely with a plastic bag to hold humidity.
Give it the right conditions
Bright, indirect light is ideal, a windowsill that gets morning sun or filtered light all day. Direct, hot afternoon sun through glass can cook a rootless cutting fast. Room temperature, roughly 65 to 75°F, is the sweet spot; mint roots slowly below 60°F.
Change the water every 2 to 3 days if you’re rooting in water, since stagnant water grows bacteria that can rot the stem before roots ever form.
Now here’s what that first week actually looks like, and it isn’t always encouraging.
Week by Week: What to Actually Expect
If you assumed a rooting cutting should look perky the whole time, that guess is wrong more often than not. A freshly cut stem frequently droops in the first 24 to 48 hours. That’s transplant shock from losing its root connection, not a sign the cutting is dying. Leave it alone and keep the light indirect.
Days 5 to 10: small white root nubs appear at the leaf nodes underwater, or push visibly through the soil if you rooted directly in mix. This is the real turning point, not the drooping and not the wilting.
Days 10 to 21: roots lengthen to an inch or more and start branching. New leaf growth at the tip is your clearest sign the cutting has fully committed to living.
Week 3 to 4: the root system is dense enough to support the plant in soil, usually multiple roots at least 1 to 2 inches long.
Once you’re at that stage, timing the move to soil matters more than people expect.
When and How to Pot Up or Plant Outside
Pot up once roots are 1 to 2 inches long and there are several of them, not just one thin thread. Moving a cutting too early, with just a single hairlike root, is a common way to lose it during the transition.
Use a well-draining potting mix and a container with drainage holes, since mint hates sitting in waterlogged soil almost as much as it hates drying out completely. Plant the rooted stem about 1 to 2 inches deep, firm the soil gently, and water it in.
Keep the new transplant out of direct hot sun for 3 to 5 days to let it adjust, a mini hardening-off period, then move it into a spot with 4 to 6 hours of sun.
If you’re planting outside, wait until nighttime temperatures are reliably above 45 to 50°F and there’s no frost risk left in your forecast; mint is hardy in USDA zones 3 through 9 once established, but a fresh transplant with a small root system can still be set back by a cold night.
Space plants 12 to 18 inches apart if you’re growing more than one, and strongly consider a container even in the ground, since mint spreads by runners and will happily take over a bed within a season or two.
Getting this far feels like success, but a surprising number of cuttings still fail after rooting, not before.
Why Mint Cuttings Fail, and the Water-Forever Question
Most failures come down to a short list, and almost none of them are about the plant being difficult.
- Leaving leaves on the submerged stem: they rot and foul the water, taking the whole cutting down with them.
- Letting water go stagnant: change it every few days or the stem blackens at the base before roots ever form.
- Potting up too early: a single thread of root can’t support the demand of soil life. Wait for a real cluster.
- Too much direct sun, too soon: a rootless or freshly rooted cutting has no way to pull enough water to keep up with strong sun and wilts fast.
- Overwatering after transplant: soggy soil rots new roots just as fast as drought stresses them.
Now, back to that question everyone asks once rooting goes well: can mint just live in water permanently, skipping soil altogether. It can, for a while, and plenty of people keep a jar of mint on a windowsill for months. But water-grown mint stays smaller, produces thinner leaves with less flavor concentration, and eventually stalls out because water alone can’t supply everything soil provides long term. It’s a fine houseplant trick, not a real substitute for potting it up if you want mint that actually performs.
With the method, the timeline, and the failure points covered, here’s everything condensed into the version worth keeping on hand.
Mint at a Glance
- Best cutting length: 4 to 6 inches, taken just below a leaf node, from a healthy non-flowering stem.
- Rooting medium: plain water changed every 2 to 3 days, or moist potting mix kept consistently damp.
- Ideal conditions: bright indirect light, 65 to 75°F, no direct hot sun until rooted.
- Time to root: visible roots in 5 to 10 days, ready to pot in 3 to 4 weeks.
- When to pot up: once roots reach 1 to 2 inches with multiple branches, not just one thread.
- Planting depth and spacing: 1 to 2 inches deep, 12 to 18 inches apart, in a container or contained bed.
- Outdoor timing: after nighttime temps hold above 45 to 50°F, zones 3 through 9 once established.
Mint from cuttings is forgiving right up until you rush it. Give the roots time to catch up before you ask the plant to do anything else.