You harvest shallots when the foliage yellows and starts to flop over, usually 90 to 120 days after planting, well before the tops die back completely. That is the honest window, not a calendar date. Pull too early and you get small, wet bulbs that rot in storage; pull too late and the papery skin splits, inviting mold within weeks.
Most people ruin their shallot harvest not by picking the wrong week, but by making one specific mistake with the foliage before they ever get a trowel in the ground. There is also a sign gardeners misread constantly, one that looks like trouble but actually means the shallots are almost ready. And once you get them out of the ground, there is a step that decides whether they last four months or four weeks.
Stick with me through the ready signs, the exact timing window, and how to lift them without bruising the bulbs. At the bottom you will find a save-able Shallots at a Glance card with every number in one place.
The Real Ready Signs
Shallots tell you they are close well before they are done. The clearest tell is the foliage: it goes from upright and deep green to yellowed, thinner, and starting to lean over on its own weight.
Foliage flop, not foliage death
The mistake almost everyone makes is waiting for the tops to fully brown and collapse, the way you might with onions left to cure in the ground. Shallots do not need that. Once 50 to 75 percent of the leaves have yellowed and the clump starts to tip over, they are ready or close to it. Waiting for total die-back just gives soil moisture and rot organisms more time to work on the bulbs.
The neck softening
Feel the neck of each stem right where it meets the soil. A firm neck means still growing. A neck that has gone soft and slightly wrinkled, even while the leaf above is still greenish, is the sign everyone misreads as disease. It is not disease. It is the plant pulling energy out of the leaves and into the bulb, exactly what you want.
Once the necks go soft and the clump leans, the clock is running and timing gets specific.
The Timing Window, and What Early or Late Costs You
Shallots planted from sets in fall (in mild-winter zones, roughly zone 6 and warmer) are usually ready in late spring to early summer. Shallots planted from sets in early spring, as soon as soil can be worked, are typically ready 90 to 120 days later, in mid to late summer. Soil temperature matters more than the date on the wall: shallots want to finish bulbing as days lengthen and soil warms past 60°F, then signal harvest as that warmth pushes them toward dormancy.
Pull too early and the individual cloves inside each cluster will be small and underdeveloped, with skins too thin and moist to cure properly. They will taste fine fresh but will not store past a few weeks.
Wait too long past the point where most tops have yellowed and fallen, and the outer skins split, roots can start regrowing in wet soil, and the bulbs become far more likely to mold in storage. Once you see new green regrowth pushing up from a bulb that already flopped, that clump is done, harvest it that day.
Get the window right and the next question is how to actually get them out without wrecking the papery skin.
How to Harvest Without Damaging the Bulbs
Shallot skins bruise and tear more easily than you would expect, and any break in that skin is an open door for storage rot. Handle them like eggs, not potatoes.
- Check soil moisture first. Dig a day or two after rain or watering, not the same day, so the soil is workable but not muddy and clinging to the bulbs.
- Loosen, do not yank. Slide a garden fork or trowel in a few inches from the clump and lever upward gently. Pulling straight up on the leaves alone tears the neck and separates leaves from bulb without freeing the roots.
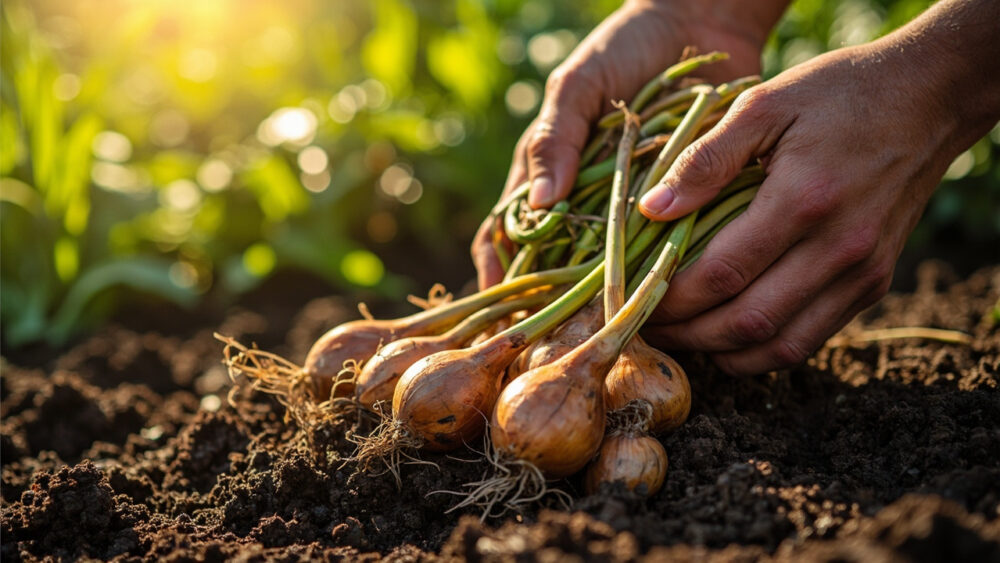
- Lift the whole clump. Shallots grow in clusters of several bulbs from one set, so you are lifting one root mass, not a single onion.
- Brush off, do not wash. Knock loose soil off with your hands or a soft brush. Water at this stage soaks into the skin and slows curing.
- Set them somewhere dry immediately. Do not leave harvested shallots piled in full sun for hours; the exposed necks and any nicked skins scorch and start to break down fast.
Getting them out of the ground clean is only half the job, what happens in the next two weeks decides how long they keep.
The First Few Days After Pulling
Fresh-pulled shallots are not storage-ready. They need to cure, and skipping this step is the second-biggest way people lose a harvest.
Spread them out in a single layer somewhere warm, dry, and shaded, with decent airflow: a covered porch, a garage with the door cracked, a shed with a fan. Direct sun is fine for the first hour to knock off surface moisture, but prolonged sun exposure heats and damages the bulbs.
Leave the tops and roots attached during curing. Cutting them off early opens wounds that invite rot before the neck has had a chance to seal itself naturally.
Curing takes two to three weeks. You will know it is done when the outer skins turn papery and rustle, the neck is fully dry and tight, and the roots have shriveled. Only then should you trim the tops to about an inch and cut the roots close to the bulb.
Cured properly, that harvest can feed you for months, but only if you store it right from here.
Keeping the Harvest Going: Storage and Next Season
Once cured, store shallots somewhere cool, dry, and dark, ideally 32 to 50°F with moderate humidity, in a mesh bag, basket, or old pantyhose that lets air move around them. A pile in a plastic bag traps moisture and turns the whole batch soft within days.
Sort before you store. Any bulb with a soft spot, split skin, or bruise from harvest should go into the kitchen for immediate use, not into long-term storage, since it will bring down everything around it.
Stored well, shallots commonly keep for four to six months, sometimes longer in a cool root cellar or unheated basement.
Save your biggest, firmest bulbs from this harvest as sets for next season instead of buying new ones. That habit alone will save you money and gradually adapts the crop to your own soil and climate.
Once you have got a batch cured and sorted, the whole process boils down to a handful of numbers worth keeping close.
Shallots at a Glance
- When to plant: fall in mild-winter zones (roughly zone 6 and warmer) for an early summer harvest, or early spring as soon as soil is workable for a mid to late summer harvest.
- Spacing and depth: plant individual sets 6 to 8 inches apart, in rows 12 inches apart, with the tip just barely covered or poking above the soil surface.
- Days to harvest: roughly 90 to 120 days from planting, depending on planting time and climate.
- Ready signs: 50 to 75 percent of foliage yellowed, tops starting to flop, and necks gone soft where they meet the soil.
- How to harvest: loosen with a fork, lift the whole clump, brush off soil without washing, and move bulbs out of direct sun right away.
- Curing time: 2 to 3 weeks in a warm, dry, airy, shaded spot with tops and roots still attached.
- Storage: 32 to 50°F, dry, dark, good airflow, typically keeps 4 to 6 months.
Get the foliage flop and the soft neck right, and the rest of this is just patience and dry air.
Rush the harvest or skip the cure, and you lose bulbs you already worked all season to grow.