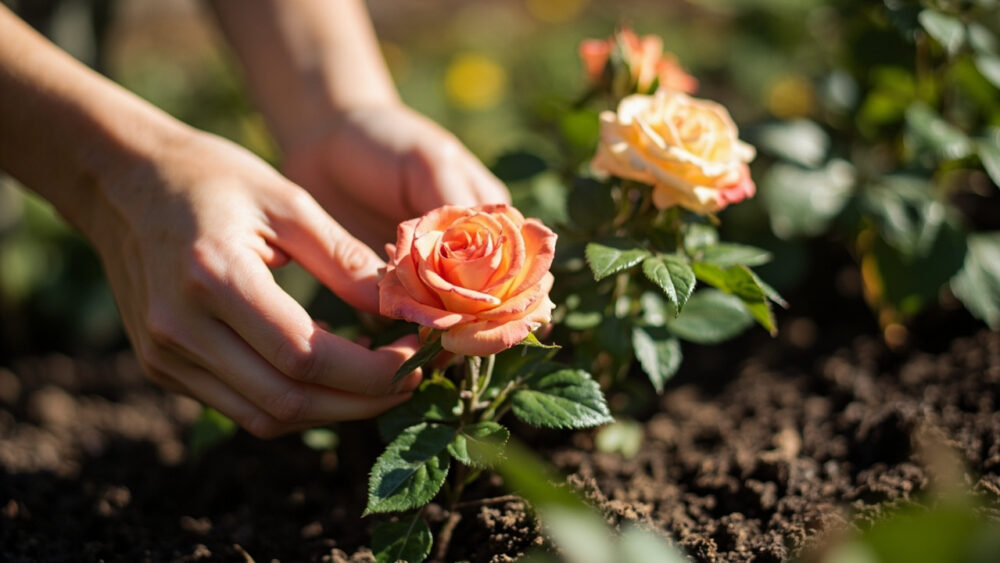
You grow miniature roses the same way you’d grow their full-size cousins, just scaled down: full sun, sharp drainage, a hole twice the width of the root ball, and consistent water so the small root system never fully dries out. Plant them two to three weeks after your last frost once soil hits about 60°F, or grow them in containers and skip the frost math entirely. Get those basics right and you’ll have blooms in six to eight weeks, but most people lose their plants before that from three specific mistakes.
The biggest one is potting soil. Nursery pots almost always come with a peat-heavy mix that dries out fast in a small root zone, and if you don’t deal with it at planting time, no amount of watering later fixes it. There’s also a sign of trouble everyone reads backwards: yellowing lower leaves. Most people water more. That’s often exactly wrong.
And there’s a question you’re about to ask the minute your first flush of blooms fades: do you cut them off, and if so, where? The honest answer surprises people who’ve only grown hybrid teas. All of it, plus the exact spacing, feeding schedule, and the save-and-reference Miniature Roses at a Glance card, is below.
When to Plant Miniature Roses
Timing depends on whether you’re planting bare-root or potted. Bare-root minis go in while still dormant, about four to six weeks before your last frost date, as soon as the soil can be worked and isn’t waterlogged. Potted, actively growing plants wait until two to three weeks after last frost, once nighttime temperatures stay reliably above 40°F.
Soil temperature matters more than the calendar. Push a thermometer 4 inches down; you want at least 55 to 60°F before roots will do any real work. Plant into cold, wet soil and the roots sit still while fungus gets a head start.
In zones 8 and warmer, fall planting works too, giving roots a full season to establish before summer heat. In zones 5 and colder, stick to spring.
Get the timing right and the next decision, where you actually put it in the ground, matters just as much.
Choosing the Spot and Prepping the Soil
Miniature roses want a minimum of six hours of direct sunand in hot climates, morning sun with light afternoon shade keeps blooms from bleaching. Less than six hours and you’ll get sparse, leggy growth and few flowers, no matter how well you feed them.
Drainage is non-negotiable. If a hole filled with water takes longer than a few hours to drain, amend heavily with compost or move to raised beds and containers. Roses tolerate a lot; standing water isn’t one of those things.
Now, the mistake that costs people their first season. That bagged potting mix the plant came in is often peat-based, and peat left in the root zone can repel water once it dries out even slightly, a condition called hydrophobic soil. When you plant, gently tease apart the outer inch of that root ball and blend it into the surrounding native soil rather than dropping it in intact.
Aim for a soil pH between 6.0 and 6.5. A bag of garden soil test strips or a basic meter tells you in minutes, and pelletized sulfur or lime can nudge it into range if you’re off.
Soil ready, sun confirmed, now it’s just a matter of getting the plant in correctly.
Planting Step by Step
- Dig the hole: twice as wide as the root ball or nursery pot, same depth or very slightly deeper.
- Check the graft union: if your mini is grafted (many are grown own-root, but check the tag), keep the union at or just above soil level in warm climates, buried 1 to 2 inches in zones that see hard freezes.
- Loosen the roots: tease apart the outer root mass, especially if it’s circling the pot, so roots grow outward instead of staying pot-bound.
- Backfill and firm: fill halfway, water to settle the soil, then finish filling and firm gently with your hands, not your foot.
- Space plants: 12 to 18 inches apart for beds. In a single container, one plant per 8 to 10 inch pot minimum.
- Water in deeply: a slow soak right after planting, enough to settle air pockets, not just a surface splash.
That first watering sets the tone for everything that comes next.
Watering and Feeding Through the Season
Water when the top inch of soil is dry to the touch, which in a container during summer heat can mean daily, and in the ground usually means twice a week. Deep, infrequent watering beats a light daily sprinkle every time, since it drives roots downward instead of keeping them shallow.
Here’s where that yellow-lower-leaves sign comes back in. If you assumed it meant more water, that guess kills more mini roses than drought does. Yellowing lower leaves on an otherwise healthy plant is far more often a nitrogen deficiency or simple leaf aging, not thirst. Check the soil first. If it’s still damp an inch down, skip the water and look at your feeding schedule instead.
Feed every three to four weeks during active growth with a balanced rose fertilizer or one labeled for flowering shrubs, following the label rate exactly since minis in small pots are easy to overfeed. Stop feeding six to eight weeks before your first expected fall frost so the plant can harden off rather than push tender new growth into cold weather.
Mulch 2 inches deep to hold moisture and keep roots cooler in summer.
Even with good watering and feeding, a few problems show up on almost every mini rose eventually.
Problems Most Likely to Strike
Powdery mildew is the one you’ll meet first, a white dusty coating on leaves and buds that thrives in humid air with poor circulation. Space plants for airflow, water the soil rather than the foliage, and if it takes hold, a fungicide labeled for powdery mildew on roses works when applied exactly per the label.
Black spot shows up as circular dark blotches with yellow halos, usually after wet weather. Remove and dispose of affected leaves, don’t compost them, and avoid overhead watering.
Aphids and spider mites both target new growth and undersides of leaves. A strong water spray knocks aphids back. For mites, look for fine webbing and stippled, dusty-looking leaves. Insecticidal soap applied per the label handles both in most home settings.
Japanese beetles, where they’re present, will skeletonize leaves and chew flowers to shreds in a single afternoon. Handpicking into soapy water in early morning, when they’re sluggish, controls light infestations without chemicals.
None of these are usually fatal if you catch them early, which is really just a matter of looking at the plant every few days instead of only when you water.
Handle the pests and disease, and you’re clear to focus on the part you actually planted this for.
When and How to “Harvest” the Blooms
Miniature roses bloom in cycles, typically six to eight weeks apart, starting six to eight weeks after spring planting and continuing until frost. The first flush is usually the heaviest.
Cut blooms for indoor display in early morning when they’re just starting to open, cutting at an angle above a five-leaflet leaf set, leaving at least two sets of leaves on the stem below the cut. This is also where that follow-up question gets answered honestly: after a bloom fades on the plant, deadhead it the same way, cutting back to the first five-leaflet leaf, rather than just snapping off the spent flower head. That cut is what signals the plant to push a new flowering stem instead of wasting energy on a seed pod called a hip.
If you skip deadheading, the plant will still rebloom eventually, just slower and with fewer flowers per cycle.
In fall, stop cutting and deadheading about six weeks before your first frost and let a few hips form. This helps the plant harden off for winter dormancy.
That’s the full cycle from planting to bloom, and here’s the whole thing condensed so you can find it again without scrolling.
Miniature Roses at a Glance
- When to plant: bare-root four to six weeks before last frost, potted plants two to three weeks after last frost, once soil hits 55 to 60°F.
- Sun and spot: at least six hours of direct sun, morning sun preferred in hot climates.
- Spacing and depth: 12 to 18 inches apart in beds, one plant per 8 to 10 inch pot, planted at the same depth as the nursery container.
- Soil: well-draining, pH 6.0 to 6.5, loosen peat-bound roots at planting so they knit into native soil.
- Water and feed: water deeply when the top inch of soil is dry, feed every three to four weeks during active growth, stop feeding six to eight weeks before first fall frost.
- Watch for: powdery mildew, black spot, aphids, spider mites, and Japanese beetles, caught early and treated per label directions.
- Blooms: first flush six to eight weeks after planting, repeat cycles every six to eight weeks, deadhead above a five-leaflet leaf to push reblooming.
Get the soil and sun right at planting and most of the rest of the season takes care of itself.
The plants that struggle almost always trace back to one of those two things, not bad luck.