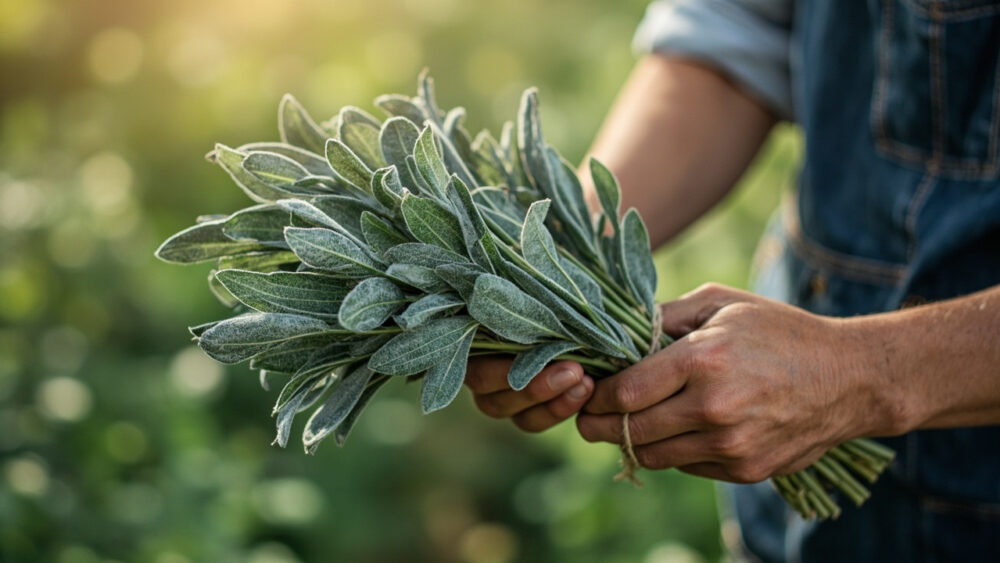
The fastest, most reliable way to dry sage is to cut whole stems in the morning after the dew burns off, bundle four or five stems together, and hang them upside down somewhere dark, dry, and airy for one to two weeks until the leaves crumble at a touch. That is the short version. Get the timing and airflow wrong, though, and you end up with sage that molds in the bundle or fades to a dusty, flavorless green that tastes like nothing.
Most people ruin their first batch the same way, and it is not the drying method they picked. It is when they cut the stems and how tightly they bundle them.
There is also a sign almost everyone misreads: they think leaves feel dry when they are still cool and slightly pliable, then seal them in a jar and watch mold show up a week later. And if you are wondering whether sage even needs drying at all versus freezing, that answer might surprise you. Stick with this, because the full Sage at a Glance card is waiting at the bottom with the exact timing, temps, and storage life you’ll want saved to your phone.
The Signs Your Sage Is Ready to Cut
Sage is ready to harvest for drying once the plant has enough leaf mass to spare, usually by its second growing season, though a vigorous first-year plant started early can give you a light harvest too.
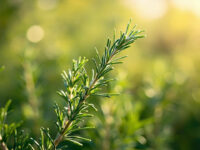
Look for stems that are fully leafed out, with leaves that are dusty gray-green and slightly fuzzy to the touch, not the pale, tender new growth at the tips. Older, lower leaves that have been on the plant a while carry the most concentrated oil and flavor.
The best flavor window is right before the plant flowers, when essential oil content peaks. Once purple-blue flower spikes appear, leaf flavor drops off and turns slightly bitter.
Skip harvesting in the week after rain or heavy watering, since wet leaves invite mold during drying no matter how you hang them.
Once you know what ready looks like, the next question is when in the season to actually make the cut.
Timing: Why the Calendar Date Matters Less Than the Plant
There is no single best month, because sage’s readiness depends on your climate and how the plant is growing, not the date on a calendar. In most regions, the best cutting windows are late spring through midsummer, before flowering, and again in early fall for a second lighter harvest.
Cut too early in spring, while the plant is still pushing thin new growth, and you get weak stems with low oil content that dry into brittle, weak-flavored flakes.
Cut too late, after a hard frost has hit the plant, and the leaves have already gone soft and dark, losing much of their aromatic punch before you ever get them on the drying rack.
If you are harvesting for a big year-end batch, plan your last major cut for at least four to six weeks before your first expected fall frost, which gives the plant time to recover a bit of growth before winter dormancy.
Get the season right and you are halfway to a good batch, but the cut itself is where a lot of people lose flavor they didn’t need to lose.
How to Harvest Sage Without Stressing the Plant
Cut in the morning, after dew has dried but before the day heats up, since this is when leaf oil concentration is highest and the plant is least stressed by heat.
Use clean, sharp snips rather than pulling or stripping leaves by hand, which tears stems and invites disease into the wound.
- Select stems that are at least six to eight inches long with several sets of mature leaves.
- Cut just above a leaf node, never into the woody base of the plant, leaving at least two thirds of the stem’s growth intact on the plant.
- Never remove more than a third of the plant in a single harvest, especially from an established shrub you want producing for years.
- Avoid cutting into bare, woody stems with no leaves, since sage is slow to regenerate from old wood and some cuts there simply will not resprout.
This is also the mistake that quietly ends a lot of sage plants after just one aggressive harvest season.
If you assumed harder cutting means a bigger harvest next time, that guess is backwards for sage. Sage is a woody perennial herb, and it does not regenerate from bare stems the way basil or mint does. Overharvest one season and you can be looking at a thin, patchy plant for the next two.
Once the stems are off the plant, what you do in the next hour matters almost as much as the cut itself.
Right After the Cut: Rinse, Sort, and Bundle
Rinse stems briefly under cool water only if they are visibly dusty or splashed with soil, then pat them dry completely with a towel.
Any lingering surface moisture is exactly what invites mold once the bundle is hanging, so do not rush this step.
Sort out any yellowed, spotted, or damaged leaves before bundling, since one bad leaf tucked into a bundle can spread rot to the healthy stems around it.
Gather four to six stems per bundle, no more, and secure the cut ends with string, a rubber band, or garden twine wrapped snug but not crushing.
Bundles thicker than that trap moisture in the center and dry unevenly, often molding from the inside before you ever notice a problem from the outside.
Now comes the part that actually determines whether this batch turns into good sage or a compost casualty.
Drying Sage the Right Way
Air Drying (the traditional method)
Hang bundles upside down in a dark, dry, well-ventilated space, a closet, pantry, or covered porch out of direct sun works well. Direct sunlight bleaches color and burns off the volatile oils that carry sage’s flavor.
Aim for a room around 60 to 75 degrees Fahrenheit with low humidity and some air movement, a small fan on low nearby speeds things along without blasting the leaves.
Expect one to two weeks for full dryness, faster in arid climates, slower anywhere humid.
Faster Alternatives
A food dehydrator set to 95 to 115 degrees Fahrenheit dries individual leaves in four to eight hours, a good option in humid climates where air drying risks mold.
An oven works in a pinch on its lowest setting with the door propped open, but ovens run hot fast and can cook the flavor right out of the leaf if you walk away.
The mold test almost nobody does: squeeze a leaf between your fingers. If it crumbles into powder with a dry snap, it is done. If it bends or feels cool and leathery, it still has moisture inside and needs more time, even if the outside looks crisp.
That squeeze test is also the answer to the storage question that comes right after drying.
After Drying: Storage That Keeps Flavor Intact
Strip dried leaves from the stems once they pass the crumble test, discarding the woody stems or saving them for smoking meat or starting a fire.
Store whole dried leaves rather than crushed ones whenever you can, since crushing early exposes more surface area to air and speeds up flavor loss.
Pack loosely into an airtight glass jar and keep it in a dark cupboard, away from stove heat and direct light. Properly dried and stored sage holds good flavor for about one year, though it stays technically usable well beyond that with slowly fading potency.
Label the jar with the harvest date, since sage does not announce when it has gone stale, it just quietly stops tasting like much.
If you want a steady supply instead of one big batch, the plant itself will tell you how to get it.
Keeping the Harvest Coming
Sage responds well to light, frequent cutting through the growing season rather than one aggressive chop.
Pinch or snip the top few inches of active stems every few weeks through late spring and summer, which also delays flowering and keeps leaf flavor from turning bitter.
Stop major harvesting about a month before your first fall frost so the plant can harden off before cold weather.
In colder zones, roughly zone 6 and below, established sage plants benefit from a light mulch layer over winter to protect the woody crown.
Do that, and the same plant can keep feeding your drying rack for five years or more.
Sage at a Glance
- Best time to cut: late spring through midsummer before flowering, and again lightly in early fall, at least four to six weeks before first frost.
- Best time of day: morning, after dew dries but before heat sets in.
- How much to take: no more than one third of the plant per harvest, cutting above a leaf node and never into bare woody stems.
- Bundle size: four to six stems per bundle, tied snug, hung upside down out of direct sunlight.
- Drying conditions: 60 to 75 degrees Fahrenheit, low humidity, some airflow, one to two weeks for air drying.
- Dehydrator setting: 95 to 115 degrees Fahrenheit, four to eight hours.
- Doneness test: leaves crumble to powder with a dry snap, not bendy or cool to the touch.
- Storage: whole leaves in an airtight jar, dark cupboard, good flavor for about a year.
Get the cut right and the airflow right, and sage practically dries itself.
Rush the squeeze test, and that one shortcut is what turns a good harvest into a moldy jar three weeks later.