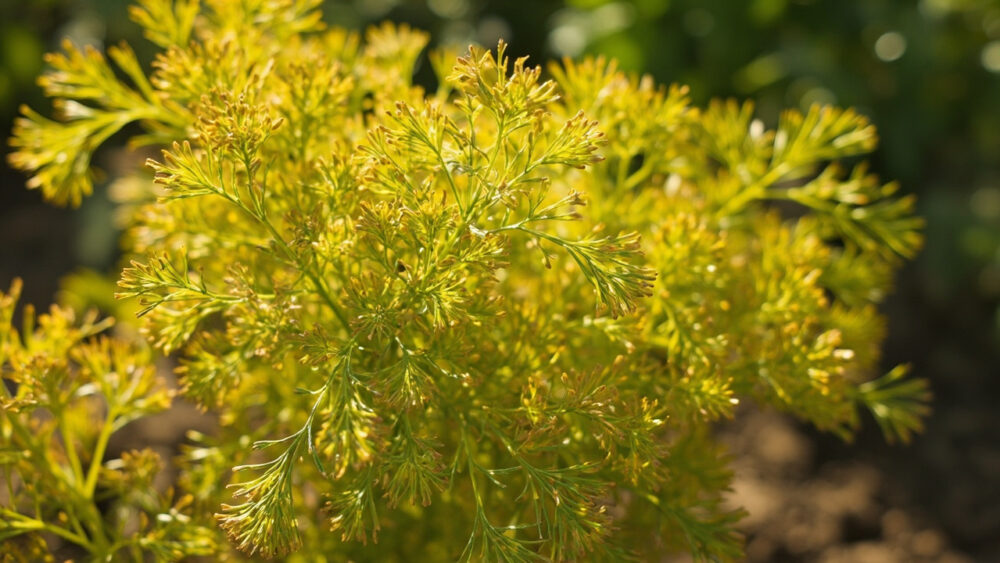
Most dill turning yellow is sitting in soil that stays too wet. Dill has a deep taproot that rots fast when the ground around it never dries out, and the first sign is always yellowing on the lower, older leaves. Pull back on watering, check that the spot drains, and you usually stop the slide within a week.
Here is the thing almost everyone gets wrong first: they assume yellow means the plant is hungry and reach for fertilizer. That usually makes it worse, not better. Overfeeding dill is nearly as common a cause as overwatering, and the two look almost identical from three feet away.
The real diagnosis depends on one detail, where on the plant the yellow started, and whether it is spreading up or staying put. Stick with me and you will also get the honest answer on whether a yellowing dill plant bounces back or whether you are better off starting a fresh batch of seed. The full save-able diagnosis checklist is waiting at the bottom, so you can run it at the plant in about two minutes.
Causes, Most to Least Likely
1. Overwatering or Poor Drainage
Confirm it: push a finger two inches into the soil. If it is still wet a day or more after your last watering, or the pot has no drainage holes, this is your cause. Yellowing starts low on the plant and the stems near the soil may feel soft or look dark.
Fix it by letting the top two inches dry out completely between waterings. If it is in a container, check for clogged or missing drainage holes and repot into fresh, fast-draining soil if the roots smell sour or look brown and mushy.
Get the water right and the next likely culprit is what you’re feeding it, not what you’re pouring on it.
2. Too Much Nitrogen Fertilizer
Confirm it: think back on feeding. If you have been fertilizing weekly, or used a high-nitrogen lawn or vegetable feed, that is likely it. Leaves often turn yellow while growth looks unusually soft, floppy, or overly lush right before it happens.
Dill is a lean feeder that grows fine in average soil and actually loses flavor with heavy fertilizing. Stop feeding entirely and flush the soil with plain water a few times to move excess salts through, then let the plant rest for two to three weeks.
If feeding was not the issue, the next place to look is what is happening below the soil line you cannot see.
3. Root-Bound or Crowded Roots
Confirm it: this hits container-grown or tightly spaced dill. Slide the plant out of its pot if you can. Roots circling the bottom in a dense mat, or seedlings spaced closer than 8 to 10 inches apart in the ground, confirm this one. Lower leaves yellow first as the plant cannot support its own top growth.
Thin crowded seedlings so each plant gets 8 to 12 inches of space, or move a root-bound plant into a container at least 12 inches deep, since dill’s taproot needs real room to run.
Space and root room fixed, but if the yellow has a pattern instead of a plain fade, look at nutrients next.
4. Nitrogen or Magnesium Deficiency
Confirm it: true nitrogen deficiency shows as an overall pale, uniform yellowing that starts on the oldest leaves and the plant looks generally weak and thin, not lush. Magnesium deficiency shows differently, yellowing between the veins while the veins themselves stay green, usually on older leaves.
This shows up most in poor, sandy soil or containers using old, depleted potting mix that has never been amended. Work in a balanced, light feed at half the labeled strength once, or mix in a small amount of compost, then hold off on more feeding for a few weeks.
If the plant is otherwise thriving and only the color is off, the cause might not be in the soil at all.
5. Natural Bolting and Aging
Confirm it: check for a thick central flower stalk topped with small yellow-green flower clusters. If it is bolting, the lower leaves yellow and die back on their own as the plant redirects energy into seed production. This is completely normal, especially in heat or with plants past 8 to 10 weeks old.
There is no fixing this because it is not a problem, it is the plant’s life cycle. Harvest what leaves you can before they go, and let the rest go to seed if you want dill to self-sow next year.
If your plant is young and has not flowered, though, something else is going on, and heat stress is worth ruling out.
6. Heat, Drought Stress, or Transplant Shock
Confirm it: check recent weather and watering history together. Hot spells above the mid-80s combined with inconsistent watering, or a recent transplant within the last one to two weeks, points here. Yellowing is often paired with wilting during the heat of the day that recovers by evening.
Water deeply and consistently rather than lightly and often, add mulch to keep roots cooler, and give transplants light afternoon shade for their first week or two.
Ruled out the environment too? A pest check is the last box to tick.
7. Pests, Especially Aphids
Confirm it: flip a few leaves over and look at stems near new growth. Clusters of small, soft-bodied insects, sticky residue, or fine webbing point to aphids or spider mites. Yellowing here tends to be patchy rather than starting cleanly at the bottom.
A strong spray of water knocks most populations back. For heavier infestations, an insecticidal soap or horticultural oil works well, and you should always follow the product label exactly for timing and application.
Once you have a suspect, the next step is confirming it against the others so you are not guessing.
How to Tell the Causes Apart
Where the yellow starts matters most. Overwatering, overfeeding, crowding, and true deficiency all begin on the oldest, lowest leaves and climb upward. Pest damage and heat stress tend to show up patchy or on newer growth instead.
- Soft, dark stems near the soil: overwatering or root rot.
- Lush, floppy growth before yellowing: too much fertilizer.
- Circling roots or crowded spacing: root-bound or too close together.
- Yellow between green veins: magnesium deficiency.
- Flower stalk present: natural bolting, not a problem.
- Wilting by afternoon, recovering by evening: heat or water stress.
- Sticky residue or visible bugs: pests.
Once you have narrowed it down, the next question is the one everyone actually wants answered.
Will It Recover?
Overwatered dill recovers well if you catch it before roots are fully mushy and black, usually within a week or two of correcting drainage. Once the taproot has rotted through, that plant is done and reseeding is faster than nursing it back.
Overfed dill almost always recovers within two to three weeks once feeding stops and salts flush out. Root-bound and crowded dill recovers quickly too, often showing new green growth within a week of transplanting or thinning.
True nutrient deficiency corrects in two to four weeks with light feeding. Heat and transplant stress resolve on their own once conditions even out, usually within a week.
Bolted dill will not un-bolt. That yellowing is permanent for that plant, though you can still harvest seed or let it self-sow. Pest-related yellowing recovers once the insects are controlled, but leaves that have already yellowed will not turn green again, only new growth will look right.
Knowing what to expect is half the battle, the other half is not ending up back here in a month.
How to Keep It From Happening Again
Plant dill in soil that drains fast and never let it sit in standing water. Raised beds or containers with real drainage holes solve most of this before it starts.
Skip regular fertilizing. Dill grown in average garden soil with a single light feeding at planting rarely needs more all season.
Give seedlings 8 to 12 inches of space from the start instead of thinning later, and choose a spot with at least 6 hours of sun but some relief from the most intense afternoon heat in hot climates.
Water deeply once or twice a week rather than a little every day, adjusting for rainfall, and mulch lightly to even out soil moisture.
Get those habits in place and yellowing becomes rare, but when it does show up, the checklist below settles it fast.
Diagnosis Checklist
- Check soil moisture two inches down: if wet and yellowing starts low, suspect overwatering, ease off watering and confirm drainage.
- Recall your feeding schedule: if you fed weekly or used a strong fertilizer, suspect nitrogen overload, stop feeding and flush with water.
- Check spacing and roots: if seedlings are closer than 8 inches or roots circle the pot, thin or repot for more room.
- Look for yellowing between green veins: if present, suspect magnesium deficiency, feed lightly once and wait three weeks.
- Look for a thick central flower stalk: if present, this is natural bolting, harvest what you can and let the rest be.
- Check recent heat and watering consistency: if inconsistent during a hot spell, water deeply and add mulch.
- Flip leaves and check stems for insects or residue: if found, treat with water spray or labeled insecticidal soap.
- Note whether yellowing is low and spreading up, or patchy on new growth, to match the pattern above.
- Give your fix seven to fourteen days before judging results, since dill responds on its own timeline, not yours.
Run through that list once and you will know exactly which dill problem you have, not just that you have one.
Fix the actual cause instead of the guessed one, and most dill plants green back up within two weeks.