Stem cuttings root faster and more reliably than any other method for Thanksgiving cactus. Twist off a section of three or four flat leaf-like segments, let the cut end dry for a day or two, then set it into slightly moist, fast-draining soil. That is the whole method behind how to propagate Thanksgiving cactus, and if you do nothing else right, doing that part right gets you most of the way to success.
But there are a few places this goes wrong even for people who have done it before. The biggest one is timing the moisture wrong, either drowning the cutting before it has roots to drink with, or leaving it so dry it shrivels before it ever gets the chance.
There is also a sign most people misread completely: a cutting that goes a little limp and dull in week one looks like it is dying, and it is usually doing exactly what it should. Stick with this and you will get the full week-by-week timeline, the honest answer to when it is safe to pot up, and a save-able Thanksgiving Cactus at a Glance card at the very bottom with everything worth keeping on your phone.
Why Stem Cuttings Beat Every Other Method
Thanksgiving cactus, like its cousin Christmas cactus, is a jungle cactus, not a desert one. It grows in a segmented, flattened chain, and each segment already has the machinery to become its own plant.
Division works too, but it means disturbing the whole root ball of a mature plant to pull off a rooted chunk, which is more traumatic for the parent and gives you a bulkier, harder-to-manage start. Seed propagation exists but is slow, unreliable for keeping true to the parent’s bloom color, and frankly not worth your time for a plant this easy to clone from a piece of itself.
A stem cutting is faster, gentler on the parent plant, and gives you a small, manageable start you can root in a spot no bigger than a coffee mug.
The rest of this comes down to getting the cutting, the medium, and the conditions right, in that order.
Step by Step: Taking and Rooting the Cutting
Taking the cutting
Choose a healthy segment chain from a plant that is not currently in bloom or budding, since cutting during flowering stresses the plant and often aborts the buds anyway. Twist off a section of three to four flat pads at a natural joint, using a gentle twist rather than a straight pull or a cut.
Twisting at the joint is cleaner and less likely to crush the tissue than scissors or a knife.
Curing the cut end
Set the cutting somewhere out of direct sun for two to three days, cut end up or lying flat. This lets the wound callus over, which is the single most skipped step and the one that causes the most rot.
Skip curing and you are planting an open wound directly into damp soil.
Rooting medium and planting depth
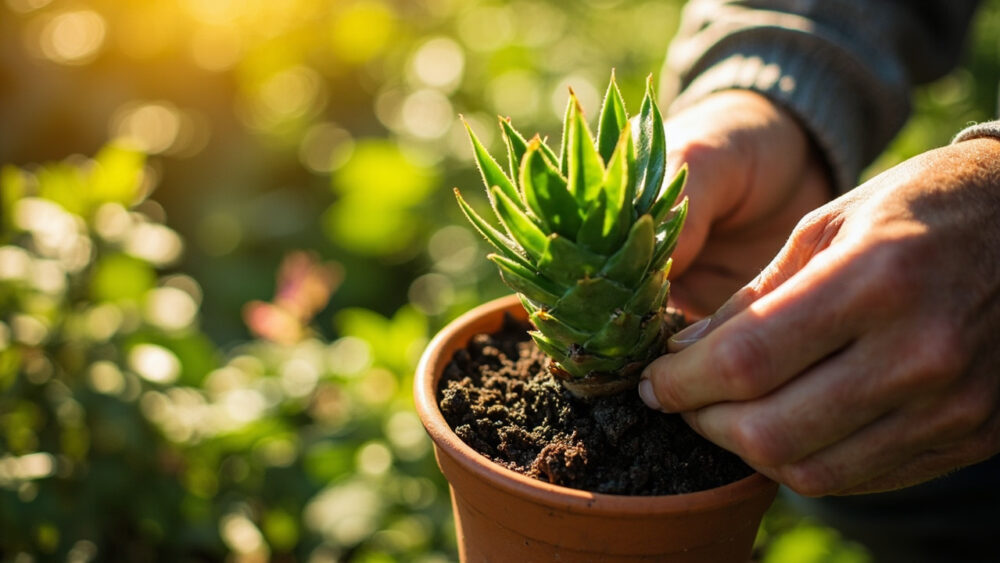
Use a mix that drains fast: a standard cactus or succulent soil, or your own blend of potting soil cut with perlite or coarse sand at roughly half and half. Push the bottom segment of the cutting about half an inch to an inch into the mix, just deep enough that it stands upright on its own.
Water lightly right after planting, then hold off until the top inch of soil is fully dry before watering again.
Get the depth and the dryness right here and the next few weeks are mostly just waiting.
What to Expect, Week by Week
If you assumed a healthy-looking cutting means it is rooting well, that guess is backwards more often than not. A cutting that stays plump, glossy, and upright for the first ten days is frequently the one that is quietly rotting at the base, because it has not lost enough moisture to need roots yet.
The cutting that looks slightly dull, a touch soft, maybe leaning a bit in week one or two, is usually the one doing exactly what it is supposed to do: pulling on its own stored moisture while it grows roots to replace it.
Week one to two: little visible change above soil, the segment may look slightly duller or softer.
Week two to four: a gentle tug meets slight resistance, meaning roots have started anchoring it.
Week four to six: new tiny growth may appear at the tip of the top segment, a reliable sign rooting succeeded.
Once you feel that resistance on a gentle tug, you have crossed the hardest part.
When and How to Pot Up or Plant Out
Thanksgiving cactus is a houseplant across nearly all US climates and only goes outside seasonally in the warmest zones, roughly 9 through 11, and even then only in shaded, protected spots. For everyone else, “planting out” means moving the rooted cutting into its own proper pot.
Wait for the resistance test to succeed and for a bit of new growth before repotting, generally four to six weeks after planting the cutting. Moving it too early undoes the rooting progress by disturbing fragile new roots.
Choose a pot only one size up from the rooting container, since jungle cacti actually prefer being slightly snug at the roots. Use the same fast-draining mix, and keep the plant in bright, indirect light, never direct hot sun, which scorches the flat segments.
Indoors, an east or north-facing window works well; outdoors in warm zones, dappled shade under a tree canopy mimics its native forest floor habitat.
Get it into the right pot and the right light, and the next challenge is just not undoing your own progress.
Why Most Attempts Fail, and the Fixes
Almost every failed Thanksgiving cactus cutting comes down to one of three mistakes, and all three are avoidable once you know what to look for.
- Rot from skipping the cure: planting a fresh, uncallused cut into moist soil invites rot within days. Always let the wound dry two to three days first.
- Overwatering out of anxiety: watering a cutting that has no roots yet just sits wet soil against a wound. Water lightly at planting, then wait for the top inch to dry completely.
- Panicking at the dull, soft look: pulling up a cutting in week one to check on it, because it looks like it is dying, disturbs whatever fragile root hairs have started. Leave it alone and check with a gentle tug instead, not an inspection.
Low light and cold drafts slow rooting further, so keep cuttings somewhere consistently 65 to 75°F with bright but indirect light, away from heating vents and cold windowsills.
Avoid these three mistakes and the cutting mostly roots itself.
Thanksgiving Cactus at a Glance
- Best method: stem cuttings of three to four segments, twisted off at a natural joint.
- When to take cuttings: anytime the plant is not in bud or bloom, ideally in spring or summer for fastest rooting.
- Curing time: two to three days out of direct sun before planting, to let the cut end callus over.
- Rooting medium: fast-draining cactus mix or potting soil cut half and half with perlite or coarse sand.
- Planting depth: half an inch to one inch, just deep enough to stand upright.
- Watering: light water at planting, then wait until the top inch is fully dry before watering again.
- Rooting timeline: gentle resistance to a tug by two to four weeks, visible new growth by four to six weeks.
The whole method rests on patience and a dry rooting medium, not fussing.
Leave the cutting mostly alone, and it will tell you when it is ready by holding firm in the soil.