Learning how to grow radishes is mostly about patience with timing, not effort. Sow seeds a half inch deep, an inch apart, in loose soil once your ground temperature sits between 45 and 75 F, and you will have edible roots in 3 to 5 weeks depending on the variety. That speed is exactly what trips people up.
Most radish failures are not disease or pests. They are a grower who let the roots sit two extra weeks “to get bigger” and pulled up something woody and hollow, or one who crowded the row and got all leaf and no bulb.
There is also a sign almost everyone misreads: a radish that suddenly sends up a tall central stalk isn’t thriving, it’s bolting, and once that happens the root is done putting energy into anything you want to eat. Stick with this guide and you will know exactly when to plant, how to space them so they actually bulb, and what that stalk really means. The full at-a-glance card, with every number saved in one place, is waiting at the bottom.
When to Plant Radishes
Radishes are a cool-season cropand they want to mature before real heat sets in. Direct sow 3 to 4 weeks before your last spring frost, as soon as soil can be worked and isn’t waterlogged. Soil temperature is the real gatekeeper, not the calendar: aim for 45 to 75 F, with 60 to 65 F as the sweet spot for fast, even germination.
In most zones you get a second window in late summer, 4 to 6 weeks before your first fall frost, and that fall crop is often sweeter and less likely to bolt than spring plantings.
Gardeners in mild-winter zones (roughly zone 8 and warmer) can often grow radishes straight through winter with light frost protection.
Get the timing right and the next decision, where you actually put them, matters almost as much.
Choosing the Spot and Prepping the Soil
Radishes want full sun to light shade, 4 to 6 hours minimum, and soil that is loose, well drained, and free of rocks and clumps down to at least 8 inches. That depth matters more than people expect: a root pushing against compacted clay or a buried stone forks, stalls, or grows sideways instead of down.
Work in an inch or so of compost before planting, but skip the fresh manure and go light on high-nitrogen fertilizer. Too much nitrogen buys you gorgeous leaves and a root that never bothers to size up.
A soil pH between 6.0 and 7.0 suits them fine; radishes are not fussy about fertility, they are fussy about texture.
Once the bed is loose and raked smooth, you are ready for the part everyone rushes.
Planting Radishes Step by Step
1. Sow direct, skip transplants
Radishes hate having their roots disturbed, so always sow seed directly where they will grow. Transplanting stunts or forks them almost every time.
2. Depth and spacing
Plant seeds a half inch deepabout 1 inch apart, in rows spaced 6 to 12 inches. This is the step that ruins most attempts: seed packets often get shaken out too thick, and a crowded row produces skinny, all-top radishes because the roots are competing for room.
3. Thin without mercy
Once seedlings show their first true leaves, thin to one plant every 2 to 3 inches. Yes, you are pulling perfectly healthy little seedlings. Do it anyway; the ones left behind will actually bulb.
4. Succession sow
Because radishes mature so fast, sow a short new row every 7 to 10 days through your spring window instead of one big planting, so you get a steady harvest instead of a glut that all bolts at once.
Get seedlings up and thinned, and the next job is keeping the soil consistently damp, not wet.
Watering and Feeding Through the Season
Even moisture is the single biggest factor in whether a radish is crisp or hot and cracked. Water enough to keep the top inch of soil consistently moist, roughly 1 inch of water per week, more in sandy soil or hot spells.
If you assumed inconsistent watering just makes radishes taste sharper, that guess is only half right. Drought stress followed by a heavy soak is what actually splits roots and turns them fiery and pithy inside, not simple variety genetics.
Skip heavy feeding. A light compost amendment at planting is usually enough. An extra dose of nitrogen mid-season pushes leaf growth at the root’s expense.
Mulch lightly with straw or shredded leaves to hold moisture and keep soil temperature from spiking, especially as spring warms toward radish bolting territory.
Keep that moisture steady, because the next section is where good watering habits get undone by pests you didn’t see coming.
Problems That Actually Strike Radishes
Flea beetles are the most common visible damage, leaving small round shot holes in the leaves. Floating row cover from the day you sow is the most reliable fix. Radishes grow fast enough that they often outrun light damage anyway.
Root maggots tunnel into the root itself and are worse in cool, wet spring soil. Row cover again helps, along with rotating where you plant brassicas (radishes are one) each season.
Cracked or forked roots almost always trace back to compacted soil or a rock in the root’s path, not disease.
Bolting, that sudden central flower stalk, is triggered by heat and long daylight, especially in radishes left too long or planted too late into warm weather. Once you see it, that root’s quality is finished. Harvest immediately if you want anything usable at all.
Handle those threats early and harvest becomes the easy part, if you know what you are actually looking for.
When and How to Harvest Radishes
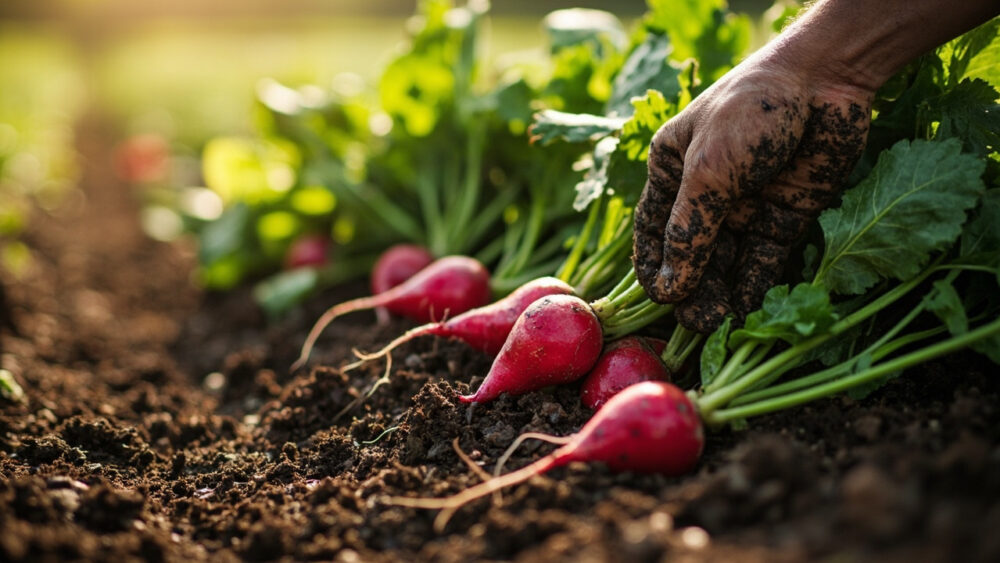
Most spring varieties are ready 21 to 30 days after sowingand the real tell is the shoulder of the root pushing up out of the soil, usually 3/4 to 1 1/2 inches across depending on variety. Push soil aside gently and check size with your finger rather than guessing from the greens.
This is the honest answer to the question most people are about to ask next: bigger is not better here. Radishes left in the ground past maturity go pithy, hollow, and hot fast, often within days once they hit peak size.
Pull a test radish from the row as soon as shoulders show. If it is undersized, give the row a few more days. If it is right, harvest the whole row within the week rather than letting stragglers oversit.
Twist off the tops (or trim them, leaving an inch of stem) if you are not eating them right away, since greens left on pull moisture from the root in storage.
Storage roots keep 1 to 2 weeks in the fridge in a perforated bag. The greens themselves are edible too, sauteed like a mild mustard green.
That is the whole cycle from seed to plate, and here is the entire thing condensed onto one card worth saving.
Radishes at a Glance
- When to plant: 3 to 4 weeks before last spring frost, or 4 to 6 weeks before first fall frost, once soil is 45 to 75 F.
- Depth and spacing: sow a half inch deep, 1 inch apart, thin to 2 to 3 inches once true leaves appear.
- Sunlight: full sun to light shade, 4 to 6 hours minimum.
- Soil: loose, well drained, free of rocks to 8 inches, pH 6.0 to 7.0, light on nitrogen.
- Water: consistent moisture, about 1 inch per week, never let it swing from dry to soaked.
- Time to harvest: 21 to 30 days for most spring varieties, check shoulders pushing above soil.
- Watch for: flea beetle shot holes, root maggots in cool wet soil, and bolting in heat, all best headed off with row cover and timely harvest.
Radishes reward speed and steady moisture more than fuss or fertilizer.
Pull one to check size before you commit the whole row, and you will rarely get it wrong.