You grow pumpkins by planting seeds directly in warm soil, about an inch deep, after all frost danger has passed, giving each plant a genuine 25 to 50 square feet of room to sprawl. Feed them heavily, water deeply and consistently, and count on 90 to 120 days from seed to a hard, deep-colored rind. That is how to grow pumpkins in one breath, but the details decide whether you get three good ones or a tangle of vines and no fruit at all.
Here is the mistake that wrecks most first attempts: crowding. Pumpkins look like a small seedling for about three weeks and then explode, and by the time you realize you planted them 3 feet apart instead of 8, it is too late to fix it.
There is also a sign almost everyone misreads in midsummer, big yellow flowers falling off with no fruit forming, and it is not disease and it is not your fault. And when harvest time comes, the “thump test” people swear by tells you almost nothing useful about a pumpkin.
Stick with me through each stage and you will avoid all three. Save-able details, including exact spacing and days to maturity, are waiting in the Pumpkins at a Glance card at the very bottom.
When to Plant Pumpkins
Wait until soil temperature holds at 65 to 70 Fchecked an inch or two down, and all frost risk has passed. That is typically one to two weeks after your last spring frost date, not the same weekend as your frost date. Pumpkin seed rots in cold, wet soil instead of germinating.
Count backward from your target harvest, too. Most pumpkins need 90 to 120 days, so if you want jack-o-lanterns ready by mid-fall, back-time planting from there rather than just from frost.
In short-season northern zones (roughly zone 5 and colder), start seed indoors in biodegradable pots two to three weeks before transplanting, since direct-seeding may not leave enough season. Everywhere zone 6 and warmer, direct seeding outperforms transplants because pumpkins hate having their roots disturbed.
Get the timing right and the next decision is where you put them.
Choosing the Spot and Prepping the Soil
Pumpkins want full sunsix to eight hours minimum, and room to run. Vining varieties can travel 10 to 15 feet, so this is not a bed decision, it is a yard-layout decision.
Work in a thick layer of compost or aged manure before planting, 2 to 4 inches tilled into the top 8 to 12 inches of soil. Pumpkins are heavy feeders, and thin soil shows up later as small fruit and pale leaves no matter how much you water.
Good drainage matters as much as fertility. If water puddles more than a few minutes after rain, build a raised mound or amend with coarse compost before you plant, because soggy roots invite rot fast.
Once the ground is ready, the actual planting takes ten minutes.
Planting Pumpkins Step by Step
1. Build your hills or rows
Mound soil into low hills about 12 inches across, spaced 4 to 8 feet apart depending on variety, or set rows 8 to 10 feet apart for vining types. Hills warm faster and drain better than flat beds.
2. Sow the seed
Plant seeds 1 inch deep, four to five per hill, in a small circle a few inches apart. Water in well.
3. Thin ruthlessly
Once seedlings show their second true leaf, cut down all but the two strongest per hill. This is the step people skip because pulling healthy seedlings feels wasteful, but overcrowded roots stunt every plant in the group.
4. Give bush types their due, too
Compact or bush varieties still need 4 to 6 feet per plant. They are smaller vines, not small plants.
Seeds in the ground is the easy part; keeping the plants fed through summer is where most of the real work happens.
Watering and Feeding Through the Season
Pumpkins need about 1 to 1.5 inches of water a weekmore during fruit set and hot stretches. Water deeply at the base rather than overhead, since wet leaves invite powdery mildew.
Feed with a balanced fertilizer or compost tea early on to build vine growth. Once flowers appear, switch to something lower in nitrogen and higher in phosphorus and potassium, because too much nitrogen late gives you jungle vines and few pumpkins.
Now, about those big yellow flowers dropping off with no fruit behind them. If you assumed that means something is wrong with the plant, that guess is wrong and it is the single most common false alarm in pumpkin growing.
Pumpkins produce separate male and female flowers, and the first flush is almost always all male. Males open, feed the bees, and drop, exactly as designed. Female flowers show up about a week or two later and are easy to tell apart, they have a small round swelling at the base that becomes the fruit.
Once you see female flowers opening and bees working the patch, fruit set follows within days.
Problems That Actually Cost You a Harvest
Squash vine borers and squash bugs are the two pests that do the most real damage. Vine borers tunnel into stems near the base, causing sudden wilting of an otherwise healthy-looking vine; squash bugs cluster on leaves and suck them dry. Row covers early in the season, removed once flowers need pollinator access, are the best cultural defense, and if infestations get bad, an insecticide labeled for squash crops applied exactly per the label is the next step.
Powdery mildew, a white dusty coating on leaves, shows up in humid weather or from overhead watering. Improve airflow, water at the soil line, and treat early with a fungicide labeled for it if it spreads fast.
Blossom end rot and small, misshapen fruit usually trace back to inconsistent watering or poor pollination, not disease at all. Hand-pollinating with a small brush, moving pollen from a male flower’s center to a female flower’s center in the morning, fixes weak fruit set fast.
Handle the pests and the pollination, and the plant will do the rest, right up to the moment you have to decide when it is actually done.
When and How to Harvest Pumpkins
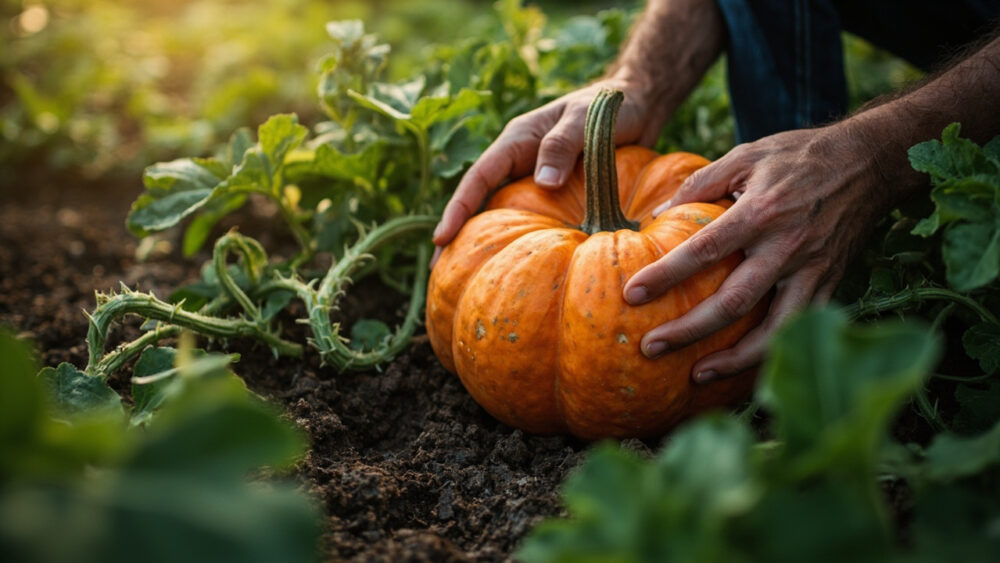
A pumpkin is ready when its rind has turned fully to its mature color and resists a fingernail pressand the vine near the fruit has started to dry and turn brown or tan. That is the real signal, not the thump test, which mostly tells you the pumpkin is hollow inside, which every pumpkin is.
Leave 3 to 4 inches of stem attached when you cut it free. A pumpkin pulled off by its stem or with a stub too short will not store well and often rots within weeks.
Cure harvested pumpkins in a warm, dry spot around 80 F for 10 days if you can manage it, then store somewhere cool and dry, 50 to 55 F, out of direct sun. Properly cured and stored, many varieties hold two to three months.
If frost is coming and some pumpkins are still pale or greenish, harvest them anyway rather than losing them, they simply will not keep or taste as good as ones that matured fully on the vine.
Everything you need to remember from all of that fits on one card, right here.
Pumpkins at a Glance
- When to plant: direct-seed once soil hits 65 to 70 F and frost risk has passed, usually one to two weeks after your last frost date.
- Spacing: 4 to 8 feet between hills for vining types, 4 to 6 feet for bush varieties, thinned to two strong seedlings per hill.
- Depth: sow seed 1 inch deep, four to five seeds per hill before thinning.
- Water: 1 to 1.5 inches per week, deep and at the base, more during flowering and fruit set.
- Days to maturity: 90 to 120 days depending on variety, so plan planting date backward from your target harvest.
- Harvest sign: deep, fully mature rind color, resists a fingernail press, vine near the fruit turning brown.
- Cut and cure: leave 3 to 4 inches of stem, cure at about 80 F for 10 days, then store cool and dry at 50 to 55 F.
Get the spacing right and the harvest timing right, and pumpkins mostly grow themselves.
The vine will make plenty of mistakes look forgivable. Crowding and picking too early are the two that are not.