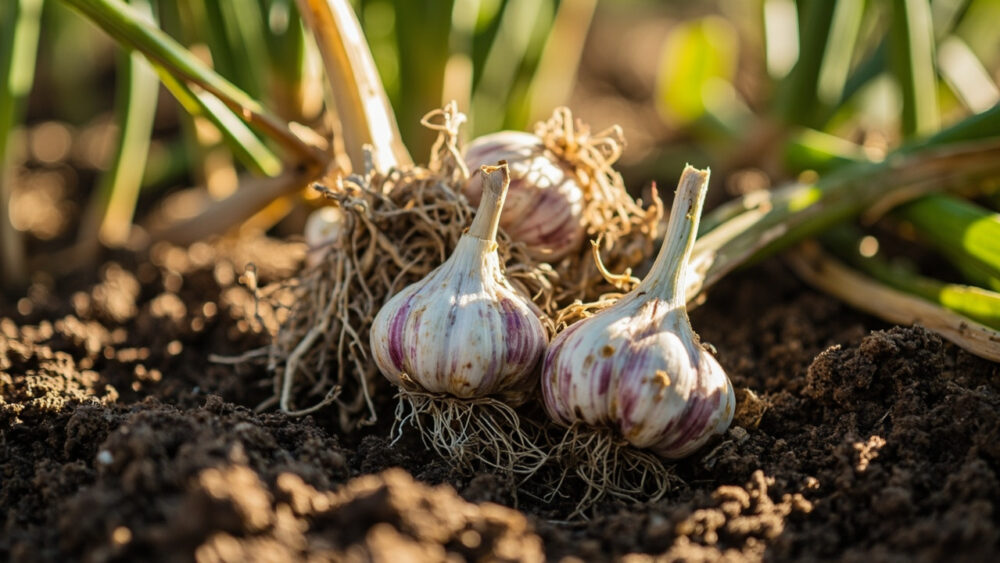
Pull your garlic when the bottom third to bottom half of the leaves have browned and died back but five or six leaves up top are still green. For most gardeners that lands in late June through July, roughly seven to nine months after fall planting depending on your climate. Wait for all the leaves to go brown and you have already lost quality, not gained it.
Here is what trips people up. Garlic gives you a narrow window, maybe ten to fourteen days, where it is genuinely ready, and the plant does not send up a flare to announce it. You have to go look and get your hands in the dirt.
Most guides tell you to just count leaves and call it done. That is half the answer. The other half is what a late harvest actually costs you, why the bulbs you dig a week too early never catch up in storage, and the one curing mistake that rots a whole batch after all that patient waiting. All of that is below, and I have put a save-able Garlic at a Glance card at the very bottom so you do not have to hunt for the numbers twice.
The Real Ready Signs, Not Just “Leaves Turn Brown”
Leaf color is the headline sign but it lies if you read it alone. A whole plant that browns fast because of drought stress or disease is not the same as a plant maturing on schedule.
Leaf count and color
Count green leaves from the top down. Five to six healthy green leaves remaining, with the lower five or six brown and dry, is the sweet spot. Each green leaf corresponds to a wrapper layer around the bulb, so a plant with only two green leaves left has already burned through its papery protection.
The scrape test
Pull back soil from one bulb in the row, just enough to see it, without lifting the whole thing. Cloves should look plump and defined through the skin, not smooth and round like a single undivided bulb. A bulb that still looks like one solid ball has weeks to go.
Read both signs together and you will rarely be surprised.
Early, On Time, or Late: What Each Actually Costs You
This is the follow-up question everyone has right after “is it ready” and most articles skip it. Timing mistakes in either direction are not minor.
Harvest too early and the cloves are undersized with loose, underdeveloped skins. They will not cure well and they will not store past a month or two before shriveling.
Harvest too late, past the point where most leaves have browned, and the bulb has already started to split its wrapper. Cloves separate inside the skin, sometimes pop through it, and that bulb is done keeping. It will mold in storage within weeks instead of lasting months.
Weather matters too. A wet stretch right at harvest time can mimic late-stage die-back, so if leaves brown fast after heavy rain, do the scrape test before you trust the leaves alone.
Getting the window right is only half the job, how you actually get the bulbs out of the ground matters just as much.
How to Harvest Without Wrecking the Bulb
The mistake that costs people the most, more than timing, is grabbing the leaves and yanking. Garlic stems snap clean off the bulb far more easily than people expect, and once that stem is gone you have lost your handle and your curing method both.
- Stop watering about one to two weeks before your expected harvest date so the soil firms up and the bulbs are not sitting wet.
- Loosen the soil first. Slide a garden fork or spade in six to eight inches away from the stalk and lever up gently before you pull anything.
- Lift, do not yank. Grip low on the stem near the soil line and ease the bulb up and out.
- Brush off loose soil with your hand or a soft brush. Do not rinse bulbs with water at this stage.
- Handle them like eggs. Fresh-dug garlic bruises easily and bruised spots are where rot starts in storage.
Rough handling right now is invisible today and obvious in six weeks, when that bruised bulb turns soft while its neighbors are still solid.
The First 48 Hours Decide How Long It Lasts
What you do immediately after digging matters almost as much as when you dug. This is the step people rush because the hard part feels finished.
Get bulbs out of direct sun within an hour or two of pulling them. Sitting in the field on a hot afternoon sunscalds the wrappers and that damaged skin will not protect the clove in storage.
Move them somewhere shaded, dry, and airy right away. Do not wash them, do not trim anything yet, and do not stack them in a bucket where they will sweat.
Lay bulbs out with stems and roots intact, in a single layer or loosely bundled, with air able to move around every bulb. Crowding is how one soft bulb takes down the ones next to it.
That shaded spot is just step one, real curing takes weeks, not hours.
Curing: The Step That Actually Determines Storage Life
If you assumed harvesting is the finish line, that assumption is what leads to garlic that goes soft by winter. Curing, not harvesting, is what actually locks in shelf life.
Cure in a dry, shaded, well-ventilated spot for three to four weeks. A garage, covered porch, or airy shed works. Direct sun and high humidity are both the enemy here.
Leave stems and roots attached during the entire cure. Cutting them early opens a wound at exactly the point where rot and mold get in.
You will know curing is done when the outer wrappers are fully dry and papery and the neck where the stem meets the bulb is tight and dry, not soft or green.
Once cured, trim roots close and cut stems to an inch or two above the bulb, or braid softneck varieties if you like the look. Store cured garlic somewhere cool, dry, and dark, and it will hold anywhere from six months to nearly a year depending on variety, hardneck typically shorter, softneck typically longer.
Set aside your biggest, healthiest bulbs now, because that decision quietly sets up next year’s entire crop.
Keep the Cycle Going
Garlic does not regrow from harvested bulbs, so “keeping the harvest coming” really means planting your next crop from the best of this one. Save cloves from your largest, most disease-free bulbs for fall planting.
Garlic goes into the ground in fall, roughly four to six weeks before your ground freezes hard, so it can root before winter and bulb up the following summer. Skip storage-bought garlic from the grocery store for replanting since it is often treated to prevent sprouting and may not suit your climate anyway.
That planting decision closes the loop, but you still want the numbers in one place before you head back out to the garden.
Garlic at a Glance
- When to plant: four to six weeks before your ground freezes in fall, giving roots time to establish before winter dormancy.
- When to harvest: when the bottom third to half of leaves have browned and five to six green leaves remain, typically late June through July.
- Ready sign to check by hand: scrape soil from one bulb and confirm distinct, plump cloves rather than one smooth undivided mass.
- Depth and spacing when planting: cloves two inches deep, pointed end up, spaced four to six inches apart in rows twelve inches apart.
- Water cutoff before harvest: stop watering one to two weeks ahead so soil is firm and dry at digging time.
- Curing time: three to four weeks in a dry, shaded, airy spot with stems and roots left on.
- Storage life once cured: roughly six months for hardneck types, up to nine to twelve months for softneck types, kept cool, dry, and dark.
Watch the leaves, confirm with the scrape test, and handle every bulb gently from the ground to the curing rack.
Get those two things right and garlic is one of the most forgiving crops you will ever grow.