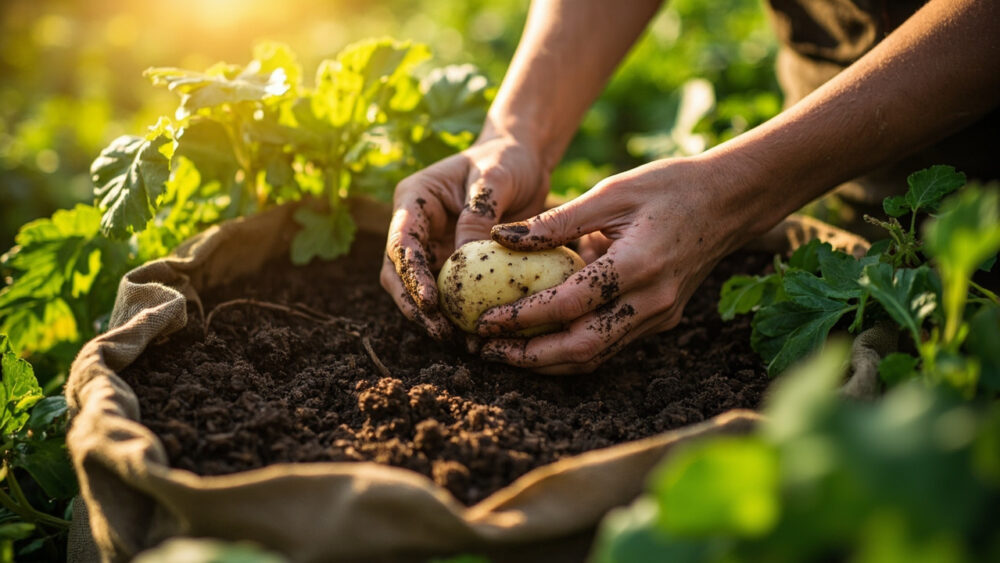
Here is how to grow potatoes in containers: use a 15 to 25 gallon pot or grow bag with drainage holes, plant seed potato pieces 4 inches deep in 8 to 10 inches of soil, then keep burying the emerging stems with more soil until the container is full. Potatoes actually prefer containers to open ground in a lot of ways, since you control the soil completely and harvest is just a matter of dumping the pot over.
But there is a mistake that wrecks most first attempts, and it has nothing to do with the potato itself. It is planting too deep, too early, and in a container that never gets refilled as the plant grows.
There is also a sign most people misread completely: they think the plant flowering means the potatoes are ready. It does not mean that, not exactly, and I will tell you what actually signals harvest time further down. Stick with me through the growing steps and you will find the save-able Potatoes at a Glance card at the very bottom with every number in one place.
When to Plant Potatoes in Containers
Potatoes go in the container 2 to 3 weeks before your last expected frost, once soil temperature has climbed to at least 45°F. Containers actually give you an edge here, since a dark plastic or fabric pot warms up faster than garden soil and you can drag it under cover if a hard freeze threatens.
In cooler zones (3 through 5), aim for mid to late spring. In zones 6 through 8, late winter to early spring works, and warm zones 9 and up can often plant in fall or winter for a spring harvest.
A light frost nipping the top growth will not kill the plant, it just sets it back a bit and new shoots come from the seed piece. A hard freeze on unprotected young growth is a different story and can kill the top growth outright.
Get the timing right and the next decision is what you’re actually growing them in.
Choosing the Container and Prepping the Soil
Size matters more than material here. A container under 15 gallons will limit you to a small harvest no matter how well you tend it, since potato roots and tubers need real volume to spread into.
Grow bags, half whiskey barrels, and stock tanks all work well because they drain freely and let you add soil in stages. Whatever you choose, it needs holes in the bottom; potatoes rot fast in waterlogged soil.
Skip garden soil straight from the yard. Use a loose mix of potting soil cut with compost, or a 50/50 blend of compost and a peat or coir-based potting mix. Potatoes want soil that is loose, well-draining, and slightly acidic, in the 5.0 to 6.5 pH range.
Good soil sets the stage, but the way you plant into it decides whether you get six potatoes or sixty.
Planting Potatoes Step by Step
This is where most containers grown go wrong, and it is fixable if you know the sequence.
1. Cut and cure your seed potatoes
Use certified seed potatoes, not grocery store potatoes, which can carry disease and are often treated to resist sprouting. Cut larger seed potatoes into chunks with at least one or two eyes each, then let the cut sides dry and callus for a day or two before planting. This callusing step prevents rot.
2. Start with a shallow base
Add only 8 to 10 inches of soil to the bottom of your container, even if the container is 24 inches tall. This is the part almost everyone skips, filling the pot full on day one, and it is the single biggest reason yields disappoint.
3. Space and plant
Set seed pieces cut-side down, eyes facing up, about 10 to 12 inches apart, roughly 4 inches deep. In a 20 to 25 gallon container you can usually fit 3 to 5 pieces.
4. Hill as it grows
Once stems reach about 6 to 8 inches tall, add more soil or mulch to bury the lower two-thirds, leaving just the top leaves exposed. Repeat every couple of weeks as it grows until the container is full. This hilling is what triggers more tubers to form along the buried stem.
Get the hilling rhythm right and watering is the next thing that decides whether those tubers actually swell.
Watering and Feeding Through the Season
Potatoes in containers dry out faster than potatoes in the ground, so check soil an inch down every day or two once the weather warms. It should feel like a damp sponge, never soggy, never bone dry.
Inconsistent watering is what causes hollow heart and misshapen, cracked tubers, so aim for steady moisture rather than a good soak followed by days of neglect. Containers need this consistency more than in-ground beds do.
Feed at planting with a balanced organic fertilizer or compost worked into the base soil. Once flowering starts, switch to something lower in nitrogen and higher in potassium, since too much nitrogen late in the season pushes leafy growth at the expense of tubers.
Even with perfect watering and feeding, a few problems show up almost every season, and knowing them early saves the harvest.
Problems That Actually Show Up in Container Potatoes
Green patches on tubers near the soil surface mean sunlight reached them; this makes the flesh mildly toxic and bitter, so cut those parts away or discard badly greened potatoes. Consistent hilling prevents this entirely.
Colorado potato beetles and their orange egg clusters on leaf undersides are the most common pest. Hand-pick beetles and eggs early and often, since a small population left alone can defoliate a plant fast. For heavier infestations, an insecticidal product labeled for potato beetles works, applied exactly per the label.
Late blight and other fungal issues show up as dark, water-soaked spots on leaves, usually after cool, wet stretches. Improve airflow, avoid overhead watering late in the day, and remove affected foliage promptly. A fungicide labeled for blight can help if caught early, again following the label exactly.
Wilting despite moist soil, combined with soft, foul-smelling tubers at harvest, points to rot from waterlogged soil rather than underwatering, which is why drainage holes matter so much.
Handle these issues as they appear and the plant will tell you, through its own foliage, when it is finally done.
When and How to Harvest
Here is the part everyone gets wrong: flowering is not the harvest signal. Flowers just mean the plant has enough energy to reproduce, and small “new potatoes” may be ready shortly after, but the real full harvest comes later.
Watch the foliage instead. When the lower leaves yellow and the whole plant starts dying back, that is the sign maincrop tubers have reached full size, usually 70 to 120 days after planting depending on the variety.
For new potatoes, a small, thin-skinned early harvest, you can dig gently along the edges about 2 to 3 weeks after flowering and take a few without disturbing the rest.
For the full harvest, stop watering once foliage dies back and let the soil dry out for a week or two. This toughens the skins for storage. Then simply tip the container over onto a tarp and sort through the soil by hand.
Cure harvested potatoes in a cool, dark, well-ventilated spot for 1 to 2 weeks before storing, which toughens the skin further and extends storage life for months.
All of that comes together in the quick-reference card below, worth saving before you head back out to the containers.
Potatoes at a Glance
- When to plant: 2 to 3 weeks before last frost, once soil hits at least 45°F.
- Container size: 15 to 25 gallons minimum, with drainage holes in the bottom.
- Planting depth and spacing: seed pieces 4 inches deep in 8 to 10 inches of starter soil, spaced 10 to 12 inches apart.
- Hilling: add soil every 2 weeks as stems grow, burying two-thirds of new growth each time.
- Water needs: consistently damp soil, checked every 1 to 2 days, never soggy or bone dry.
- Harvest signal: lower leaves yellowing and foliage dying back, roughly 70 to 120 days after planting.
- Curing: 1 to 2 weeks in a cool, dark, ventilated spot before long-term storage.
Get the hilling and the harvest timing right and everything else about container potatoes is forgiving.
When in doubt, trust the leaves, not the flowers, to tell you when to dig.