The right time to prune a redbud is right after it finishes flowering in spring, while you can still see the branch structure and before it pushes full leaf. If you’re learning how to prune redbud trees because yours looks overgrown or lopsided, the short version is this: remove no more than a quarter of the live canopy, cut back to a collar or a healthy junction, and never touch it in late summer or fall.
That’s the safe answer. Here’s what most people get wrong anyway. There’s one cut redbud owners make almost every time that costs them next year’s entire bloom, and it has nothing to do with timing.
There’s also a sign of trouble on the trunk that homeowners mistake for normal bark texture, and by the time they notice it’s often past the easy fix. Stick around for both, plus the save-and-check Redbud Trees at a Glance card at the bottom with every number in one place.
When to Prune, and the Window You Can’t Get Back
Prune redbuds within two to four weeks after the flowers drop, once you can see new leaves starting but before the canopy fills in. This is a spring-flowering tree that sets next year’s flower buds during the current summer, so any pruning done in late summer, fall, or winter cuts off wood that was already carrying next spring’s show.
If you assumed winter is the safe pruning season because that’s the rule for most shade trees, that guess costs you a season of flowers on a redbud. Winter pruning won’t kill the tree, but you’ll be cutting blind, without leaves or flowers to show you the structure, and you’ll remove buds that took all summer to form.
The only exception is dead, damaged, or diseased wood. That comes off any time you spot it, no waiting required.
Get the timing right and the next question is what you actually need in hand before you make a cut.
Tools and the One Prep Step Everyone Skips
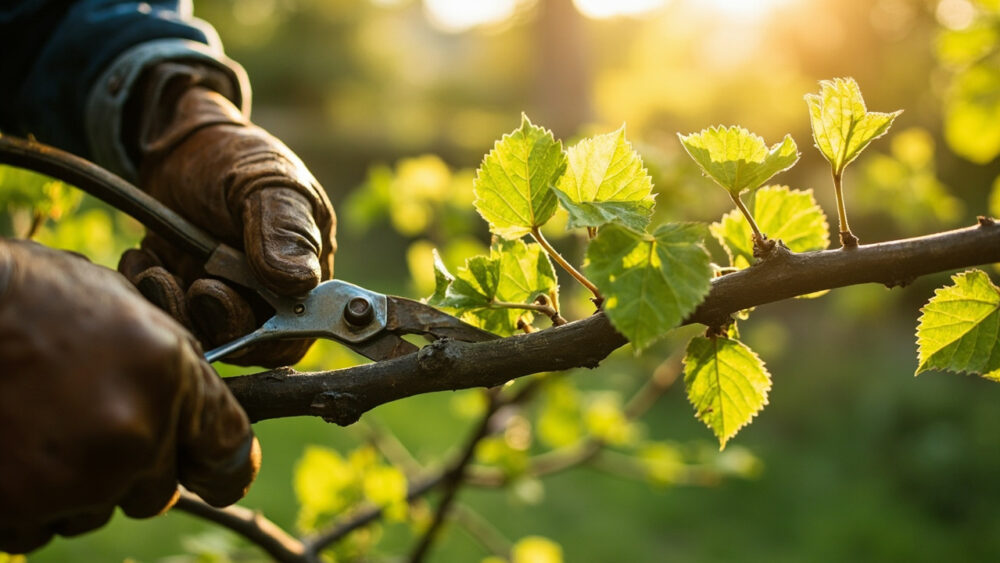
You need bypass pruners for anything under about half an inch thick, loppers for branches up to an inch and a half, and a pruning saw for anything bigger. A pole saw helps if you’re reaching into a mature tree over 15 feet.
Sanitize your blades before you start and again between cuts if you’re removing anything that looks diseased. Redbuds are prone to a handful of cankers and verticillium wilt, and dirty blades are one of the easiest ways to spread that from one branch, or one tree, to the next. A quick wipe with rubbing alcohol between diseased cuts is enough.
The prep step people skip is simply standing back and looking at the whole tree from ten feet away before the first cut. Redbuds have a naturally low, spreading, multi-trunk habit, and it’s easy to start snipping branch by branch without a plan, then realize halfway through that you’ve made the canopy lopsided.
Once you’ve looked at the whole shape, you’re ready for where the cuts actually go.
How to Prune a Redbud Step by Step
Start with the three D’s
Remove anything dead, damaged, or diseased first. Cut back into healthy wood, at least a few inches past any discolored or cracked tissue, so you’re not leaving a stub that can rot inward.
Cut back to the collar, not flush to the trunk
Every branch has a slightly raised ring of tissue where it meets the trunk or a larger limb, called the collar. Cut just outside that collar, never flush against the trunk. A flush cut removes the tissue that would otherwise seal the wound, and it heals far slower and invites decay.
Thin crossing and rubbing branches
Redbuds throw a lot of low, angled branches, and it’s common for two to cross and rub bark off each other over time. Pick the stronger, better-placed branch and remove the other back to its point of origin.
Correct weak or narrow crotches
Branches that meet the trunk at a tight, narrow angle (much less than 45 degrees) are the ones most likely to split in wind or heavy ice. If you catch these while the tree is young, remove or shorten them early. On a mature tree, only take out narrow crotches if they’re genuinely at risk, since large removals on old wood heal slowly.
Stop at a quarter of the canopy
Take no more than 25 percent of the live canopy in a single season. Redbuds tolerate pruning well, but a hard cut-back in one go stresses the tree and triggers a flush of weak, whip-like water sprouts instead of a nicely shaped canopy.
Make the cuts, step back again, and compare the shape to what you pictured before you started.
What Happens After You Cut
Expect some new growth right at the cut sites within a few weeks, especially if the tree is young and vigorous. Thin, upright shoots called water sprouts are normal after any real pruning and can simply be rubbed off by hand or clipped while they’re still soft, usually within the same season.
Cut surfaces on a healthy redbud seal over on their own. You do not need pruning paint or wound sealant; research on tree wound care has shown for decades that sealants trap moisture more often than they prevent decay, and a clean collar cut heals better left alone.
Here’s the sign people misread. A patch of slightly sunken, darker, or cracked bark near a pruning cut or lower trunk is not “just how redbud bark looks.” That’s often the early stage of canker or dieback, and it’s worth watching closely over the following month rather than assuming it’s cosmetic.
If a cut site or nearby bark looks worse a month later instead of drying and calming down, that’s your cue to look harder at disease, which is exactly where the biggest pruning mistakes usually trace back to.
The Mistakes That Cost You Flowers, Shape, or the Whole Tree
- Pruning in fall or winter: removes next spring’s flower buds before they ever open.
- Flush cuts against the trunk: strip away the collar tissue and slow healing, inviting rot.
- Taking more than a quarter of the canopy at once: triggers stress sprouts instead of clean regrowth.
- Topping or heavily heading back main leaders: ruins the tree’s natural vase shape permanently, since redbuds don’t respond to topping the way hedges do.
- Dirty tools on diseased wood: spreads canker and wilt from branch to branch.
- Ignoring dark, sunken bark near old cuts: lets early disease establish before you’ve noticed a real problem.
Every one of those is avoidable, and every one of them is more common than a bad pruning cut itself.
All of that boils down to a handful of numbers worth keeping on your phone.
Redbud Trees at a Glance
- When to prune: two to four weeks after flowers drop in spring, once new leaves start but before full canopy fills in.
- When to avoid pruning: late summer, fall, and winter, except to remove dead, damaged, or diseased wood immediately.
- How much to remove: no more than 25 percent of the live canopy in a single season.
- Where to cut: just outside the branch collar, never flush against the trunk or a larger limb.
- Tools needed: bypass pruners under half an inch, loppers up to an inch and a half, a pruning saw for anything larger.
- Wound care: none needed, clean cuts seal on their own; skip pruning paint or sealant.
- Warning sign to watch: dark, sunken, or cracked bark near a cut or lower trunk that doesn’t improve within a month.
Prune within a month of bloom, take a quarter at most, and cut to the collar every time.
Get those three right and everything else about pruning a redbud takes care of itself.