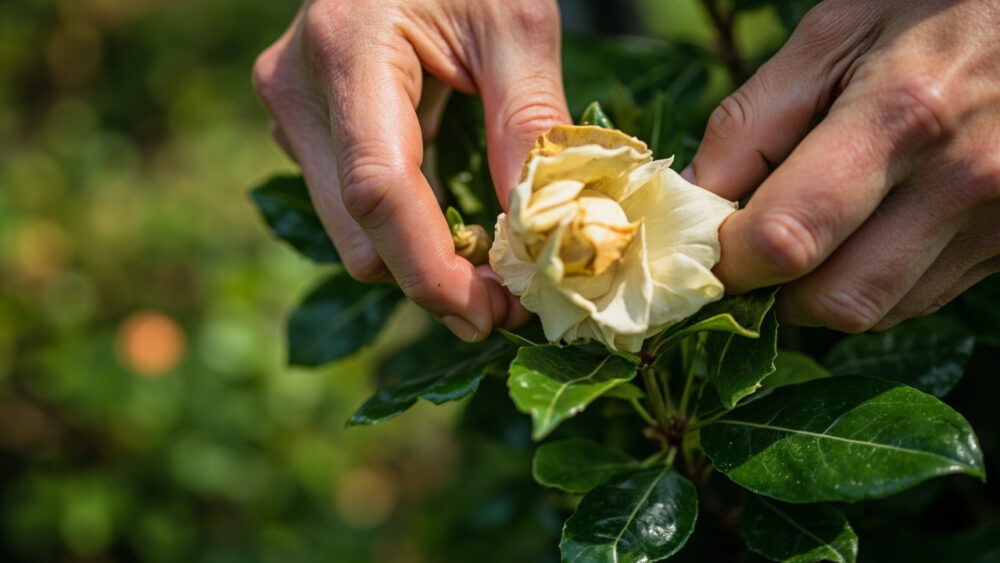
Deadhead gardenias by snapping or snipping off each spent bloom right where it joins the stem, as soon as the petals brown and go limp, rather than waiting for a whole flush to fade. Do this through the entire bloom season and you get cleaner plants, less brown mush hanging around, and often a second push of flowers. But how to deadhead gardenias well has less to do with the snip itself and more to do with where you cut, because gardenias set next year’s buds close to where this year’s flowers just were.
That last part is the trap. Cut in the wrong spot or at the wrong time and you can remove next season’s flowers along with this season’s spent ones, and you won’t find out until next year comes up bloomless.
There’s also a timing mistake that costs people an entire second flush, a tool habit that bruises the wood and invites disease, and an honest answer about whether deadheading actually makes a gardenia rebloom or just makes it look tidier. All of it is below, and the quick-reference card you can screenshot before you walk outside is at the very bottom.
When to Deadhead, and When to Leave It Alone
Deadhead as each flower fades, not on a schedule. Gardenia blooms go from white to cream to a papery tan-brown over a few days, and that browning stage is your signal. Pull or cut it then, continuously through the bloom window, which for most gardenias runs late spring into summer, with some reblooming types (like Kleim’s Hardy or repeat-flowering selections) tossing out a second smaller flush in late summer.
Stop deadheading once you’re within six to eight weeks of your first expected fall frost. New buds formed after that point often won’t mature before cold weather, and cutting late-season growth just wastes the plant’s energy and can nick the buds that were going to open next spring.
If your gardenia is still setting occasional flowers into early fall, let those last ones finish naturally instead of chasing every spent bloom.
Once you know the calendar side, the tools matter more than most people think.
The Tools and the One Prep Step That Matters
Use clean, sharp bypass pruners or your fingers. Gardenia stems are soft enough that a firm pinch between thumb and forefinger removes most spent blooms cleanly, no tool required, which is honestly how I deadhead ninety percent of mine.
For blooms with a thicker woody base, switch to pruners rather than tearing the stem, since tearing leaves a ragged wound that heals slower and opens the door to fungal issues in humid weather.
Wipe your blade with rubbing alcohol between plants, or between cuts if you’ve been working on a diseased branch. That’s the one prep step people skip, and it’s how fungal problems like botrytis blight hop from one gardenia to the next in a mixed bed.
Tools sorted, here’s exactly where the cut goes.
Step by Step: Where to Cut and How Much to Take
- Locate the spent bloom and follow its stem back to the first set of full, healthy leaves.
- Cut or pinch just above that leaf set, taking only the flower and its short stub of stem, nothing more.
- Leave the leaves and any small side shoots below your cut completely alone, since next year’s flower buds form in those leaf joints.
- Work the whole plant in one pass rather than one flower at a time over days, so you’re not repeatedly disturbing the same branches.
- Drop the spent blooms in the trash or compost, not left sitting on top of the mulch, where they hold moisture against the crown.
That’s genuinely the whole technique, and it takes longer to explain than to do.
What to Expect Afterward
If you assumed deadheading forces a gardenia into a big second bloom flush the way it does with roses or dahlias, that guess overpromises. Gardenias respond mildly at best, some reblooming varieties give you a smaller second wave, most one-time bloomers just look neater and channel a little more energy into leaf and root growth instead.
The honest payoff of deadheading gardenias is plant health and appearance, not a guaranteed flower show. Spent blooms left on the plant turn to brown mush that can mat against leaves and hold moisture, which is exactly the environment botrytis and other fungal issues want.
Expect the cut points to callus over within a few days with no sealant or wound paint needed. Gardenias don’t require it, and product on the cut can actually trap moisture against the wound.
Deadheading right is only half the job, the mistakes are what actually cost you flowers.
The Mistakes That Cost You Next Year’s Blooms
Cutting too far back is the single biggest mistake. Gardenias set next year’s buds in the leaf axils just below this year’s flowers, so a cut that removes several inches of stem “to be tidy” can take those future buds with it. Snip the flower, stop there.
Deadheading too late in the season is the second one, and it’s sneaky because the plant looks fine afterward. Cuts made inside that six-to-eight-week pre-frost window remove wood that was quietly forming next spring’s buds, and you won’t see the damage until bloom time rolls around and the plant is disappointingly bare.
A few other habits that quietly undercut the whole effort:
- Yanking blooms off without checking the stem, which can strip bark or tear into next year’s bud sites on woodier growth.
- Skipping deadheading entirely during humid, rainy stretches, which is exactly when spent blooms rot fastest and fungal spores spread to healthy flowers and leaves.
- Confusing deadheading with pruning and taking whole branches when only the flower needed to come off. Real structural pruning is a separate job, done right after the main bloom flush ends, not mixed into daily deadheading.
- Using dirty shears on a plant that already has yellowing or spotted leaves, spreading a problem instead of just tidying flowers.
Get the timing and the cut location right and gardenia deadheading is one of the lowest-risk, highest-payoff five minutes you’ll spend in the garden all week.
Gardenias at a Glance
- When to deadhead: continuously as each bloom browns, from late spring through summer, stopping six to eight weeks before your first fall frost.
- Where to cut: just above the first full leaf set below the spent flower, taking only the bloom and its short stem.
- Tools needed: clean bypass pruners or clean fingers, wiped with rubbing alcohol between plants.
- What not to touch: the leaves and leaf joints just below the cut, since next year’s buds form there.
- Expected result: tidier plant and better disease resistance, with only a mild or occasional second bloom flush on repeat-flowering varieties.
- Biggest mistake: cutting several inches of stem instead of just the flower, which removes next season’s buds.
- Second biggest mistake: deadheading too close to first frost, which sacrifices next spring’s flowers for no real benefit now.
Snip the flower, leave the leaves, stop before frost. That one habit keeps a gardenia blooming for years instead of just one good season.