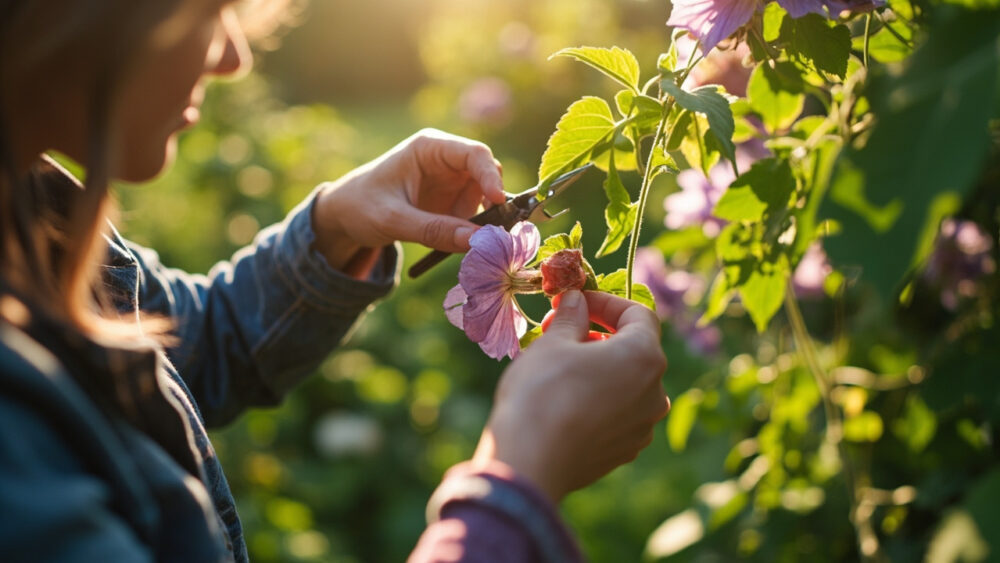
You deadhead clematis by snipping the spent flower and its short stem back to the first healthy leaf node below it, right after the petals fade and before the plant wastes energy forming seed heads. Most types benefit from this all season long, every time a bloom fades, not just once. Do it with clean bypass pruners and you can push a repeat-blooming clematis into a second or third flush by midsummer.
That part is simple. The part that trips people up is figuring out which clematis they actually have, because deadheading a spring bloomer the wrong way can wipe out next year’s flowers entirely. There’s also a fluffy seed head most gardeners cut off out of habit that is actually one of the best-looking features of the plant in fall.
Stick with this and you’ll get the full sequence: when to cut and when to leave it alone, the one prep step almost everyone skips, the step-by-step, what normal recovery looks like, and the mistakes that cost people their whole bloom season. There’s a save-able Clematis at a Glance card waiting at the bottom for the next time you’re standing in front of the vine with pruners in hand and no memory of any of this.
When to Deadhead, and When to Leave It Alone
Timing depends on which pruning group your clematis falls into, and this is the detail most people skip entirely. Group 1 clematis (early bloomers like montana and alpina types) flower on old wood in spring. Group 2 (large-flowered hybrids that bloom in late spring and again in late summer) flower on both old and new wood. Group 3 (late bloomers like viticella and most jackmanii types) flower only on new wood put up that same year.
For deadheading purposes specifically, the rule is simpler than the pruning groups suggest. Snip off any fading flower on any type, any time, right down to the first strong leaf below it. That never hurts next year’s show.
Where people go wrong is confusing deadheading with hard pruning. Deadheading removes just the spent bloom. Cutting deep into the vine’s framework in the wrong season, especially on a Group 1 spring bloomer, is what actually costs you flowers, because you’re removing the old wood that was about to bud.
That distinction between snipping a flower and cutting into wood is exactly where the next mistake usually starts.
The Tools and the One Prep Step That Matters
You need sharp bypass pruners, and for thinner stems a pair of snips works even better since clematis stems are hollow and crush easily under dull blades. Wipe the blades with rubbing alcohol before you start, especially if you’ve been in other plants that day. Clematis wilt, a fungal problem that can take down a whole vine, spreads easily on dirty tools.
The prep step almost nobody does: trace the stem back from the flower before you cut anything. Clematis vines tangle themselves into a mess of overlapping growth, and it’s easy to snip what looks like a spent bloom’s stem only to find you’ve cut a stem that was also carrying three unopened buds further down.
Take thirty seconds to follow the stem with your fingers before the blade touches it.
What to Have on Hand
- Clean bypass pruners or floral snips
- Rubbing alcohol or a disinfectant wipe for the blades
- A small bucket or bag for the trimmings, since clematis debris left on the crown can invite rot
With the tools clean and the stem traced, you’re ready for the actual cut.
How to Deadhead Clematis Step by Step
Once a bloom has browned, curled, or dropped most of its petals, it’s done and won’t reopen. That’s your signal.
Step 1: Find the First Healthy Leaf Node Below the Flower
Follow the flower’s short stem down until you hit a leaf or a leaf axil (the little joint where a leaf meets the stem) that still looks green and firm. That’s your cutting point.
Step 2: Cut Just Above That Node
Make a clean angled cut about a quarter inch above the leaf node, taking only the flower and its immediate stem. You are not shortening the vine, just removing the finished bloom.
Step 3: Check for Hidden Buds Before You Toss the Trimming
Glance at what you just cut off. If you see a swelling bud on the piece you removed, you cut too deep. It happens. Learn the look and check more carefully next time.
Step 4: Repeat Down the Vine
Work your way around the whole plant rather than doing one side and quitting. Spent blooms hidden in the back of the vine still drain energy even if you can’t see them from the porch.
Do this every few days during peak bloom rather than saving it up for one big session.
What to Expect After Deadheading
On a repeat-blooming Group 2 or a vigorous Group 3 clematis, expect new buds to start showing within two to four weeks, especially if the plant is getting consistent moisture and at least a half day of sun. The regrowth won’t be as dense as the first flush, but it’s real.
If you assumed deadheading forces an immediate rebloom, that’s the wrong expectation and it sets people up to think they failed. Clematis needs to grow a bit of new stem first, then set new buds on that growth. The reward is a few weeks out, not a few days.
On true one-time spring bloomers, don’t expect a second flush at all. Deadheading there is mostly about tidiness and preventing the plant from pouring energy into seed instead of root and vine growth for next year.
Which brings up the one seed head you actually want to leave alone.
The Mistakes That Cost You Flowers
Mistake one: hard-pruning a Group 1 clematis in spring thinking it’s deadheading. Montana and alpina types bloom on last year’s wood. Cut that wood back hard in spring and you remove the flowers before they even open. Deadhead these lightly right after bloom instead.
Mistake two: shearing off the fall seed heads on purpose or by accident. Many clematis, especially viticella types, produce silvery, feathery seed heads after the last flush that look striking through autumn and into winter. If you deadhead every single spent bloom right up until frost, you lose that display. Leave the last round of flowers alone starting in early fall.
Mistake three: cutting into a stem you haven’t traced. Covered above, but it’s worth repeating because it’s the most common way people accidentally remove next month’s flowers along with this week’s spent one.
Mistake four: dirty pruners. Clematis wilt doesn’t always show up right away, and by the time a stem collapses overnight it’s too late to trace it back to the cut that caused it.
Get the timing and the cut right consistently, and the card below is everything you need saved for next season.
Clematis at a Glance
- When to deadhead: anytime a bloom fades during the growing season, stopping in early fall to let the last flowers form seed heads.
- Where to cut: just above the first healthy leaf node below the spent flower, never deep into the woody framework.
- How much to remove: only the flower and its short stem, a quarter inch above the node.
- Know your pruning group first: Group 1 blooms on old wood in spring, Group 2 blooms on old and new wood, Group 3 blooms on new wood only, and this changes how you handle bigger cuts, not light deadheading.
- Expect rebloom in: two to four weeks on repeat-blooming types, with consistent water and at least a half day of sun.
- Tool care: clean bypass pruners wiped with alcohol between plants to avoid spreading clematis wilt.
- What to leave alone: the final flush of blooms in early fall, so the silvery seed heads can form for winter interest.
Deadhead lightly, trace before you cut, and know your bloom type before you get ambitious with the pruners.
Get those three right and clematis forgives almost everything else.