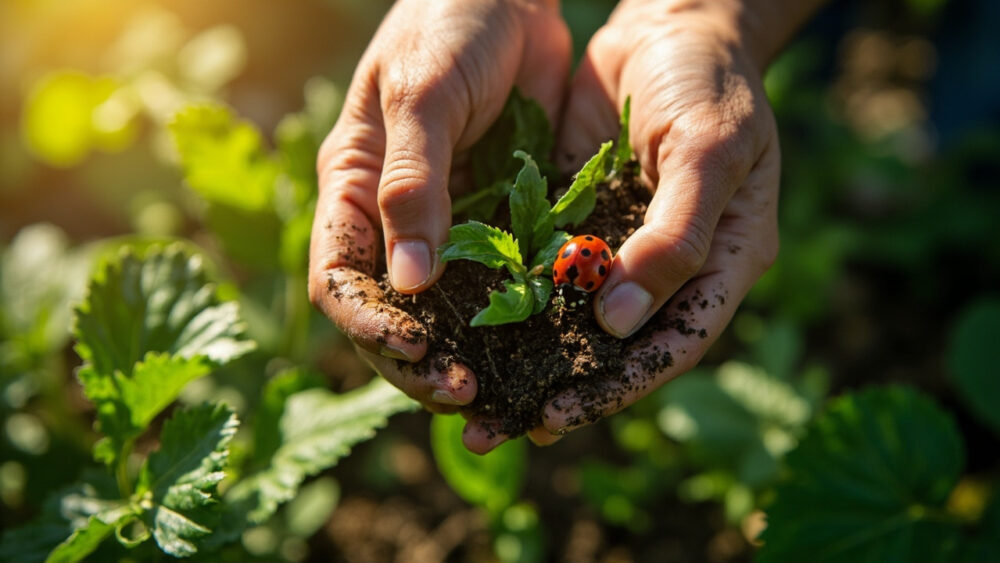
The fastest way to attract ladybugs is to stop killing their food supply and start planting what they actually eat when aphids are scarce. Ladybugs go where aphids, mites, and pollen are abundant, and they leave fast if you spray anything or offer nothing but bare mulch. Get the food source and shelter right and you can have a working population within a few weeks of warm weather.
Most people get this backwards from the start. They buy a bag of ladybugs online, dump them in the yard at the wrong time of day, and wonder why every last one is gone by morning.
There is also a sign most gardeners misread completely, a bug that looks nothing like the cartoon red ladybug but is doing exactly the job you want. Stick around and I will tell you what that is, walk through the setup that actually holds a population instead of losing it overnight, and give you a save-able Wildlife at a Glance card at the bottom with the numbers worth keeping on your phone.
What Actually Draws Ladybugs In (and What Chases Them Off)
Ladybugs are hunting for two things: prey and pollen. Adult ladybugs eat aphids, mites, and small soft-bodied insects, but they also need pollen and nectar to fuel egg-laying, especially early in the season before aphid populations build up.
Flat, open flowers work best because ladybugs have short mouthparts. Dill, fennel, yarrow, sweet alyssum, cosmos, and calendula are reliable draws. Anything in the carrot family (dill, fennel, cilantro left to flower) is a near-guarantee if you let a few plants go to bloom instead of harvesting everything.
The single fastest repellent is any broad-spectrum insecticide, including many “organic” ones like pyrethrin sprays. They kill ladybugs and their larvae right alongside the aphids you were trying to get rid of, which defeats the entire point.
Get the plants and the truce with pesticides right, and the next question is what a working ladybug setup actually looks like on the ground.
Setting Up a Yard Ladybugs Will Actually Stay In
Start with a mixed planting, not a single bed. Ladybugs need overlapping bloom times, so plant a spring bloomer (alyssum, early yarrow), a summer bloomer (cosmos, dill, calendula), and let one herb bed go to flower on purpose.
Space flowering strips every 10 to 15 feet through a vegetable garden rather than clustering them in one corner. Ladybugs and their larvae are not strong fliers over long distances, so scattered pollen sources spread the coverage.
Leave some aphids alone. This feels wrong, but a light aphid presence on a few sacrifice plants (nasturtiums work well for this) is what keeps ladybugs fed and breeding instead of passing through and leaving.
Add shallow water. A dish with pebbles and a half inch of water, refreshed every day or two, gives them a place to drink without drowning.
Skip the bagged ladybugs sold for release. Store-bought ladybugs are usually wild-collected, often carry parasites, and the vast majority fly off within 48 hours because releasing them doesn’t fix the reason your yard wasn’t holding any in the first place.
Once the planting and water are in place, timing decides whether any of this pays off this season or next.
Timing: When Ladybugs Show Up and When to Set the Trap
Ladybugs become active once daytime temperatures hold consistently above 55 to 60°F, which for most of the U.S. lines up with two to four weeks after the last frost. Adults overwinter in leaf litter, under bark, and in garden debris, then emerge hungry.
Plant your pollen sources 3 to 4 weeks before that emergence window so blooms are already open when the ladybugs come looking. If you plant flowers the same week you see the first ladybug, you are already behind; annuals like alyssum and calendula need that lead time to flower.
Aphid populations typically spike in late spring on new growth, which is exactly when ladybug egg-laying peaks. This is the six-to-eight-week window where the whole system either clicks into place or quietly fizzles.
Here is the sign most people misread: if you assumed the orange and black beetle covered in tiny spots on your milkweed or roses is a pest, that guess costs you the very insect you are trying to attract. Ladybug larvae look like small spiky alligators, usually black or dark gray with orange markings, and they eat far more aphids per day than the adults do. Squashing them because they look “buggy” and unfamiliar is one of the most common ways people undo their own effort without realizing it.
Get the timing and the larvae identification right, and the mistakes that actually sink most attempts are still worth naming plainly.
The Mistakes That Quietly Undo the Whole Effort
Spraying anything, even at night. Broad-spectrum pesticides and many fungicides drift onto flowers and kill ladybugs and larvae on contact or through residue for days afterward. If you must treat a real infestation, use insecticidal soap or neem spot-treated directly on the pest colony, follow the product label exactly, and never spray open blooms ladybugs are actively working.
Over-mulching and over-tidying. Bare, weed-free, heavily mulched beds look neat but offer zero winter shelter. Ladybugs overwinter in leaf litter and garden debris, so a fall cleanup that removes every leaf and stem removes their housing too.
Buying ladybugs instead of growing habitat. Already covered above, but it deserves repeating because it is the number one thing people try first and the number one thing that fails.
Killing the larvae by mistake. Covered above too, and it is common enough that it is worth checking any orange-and-black “weird bug” against a photo before you remove it.
Planting only one flower type. A single stand of one species blooms for two to three weeks and then the food source disappears. No overlap means ladybugs move somewhere else.
Avoid these five and you are most of the way to a self-sustaining population, but self-sustaining only happens if you keep the habitat going past the first good week.
Keeping the Population Going Year After Year
The honest answer to the follow-up question you are probably about to ask: no, this is not a one-time setup. Ladybug numbers rebuild every season based on whether last year’s overwintering sites and this year’s bloom timing both hold up.
Leave a strip of garden messy on purpose. A section with leaf litter, dead stems, and loose bark left standing over winter is the single best thing you can do for spring numbers, better than any purchased habitat box.
Stagger plantings so something is blooming from the first warm week through fall. Succession planting dill and cilantro every three to four weeks keeps pollen available continuously instead of in one short burst.
Tolerate a low-level aphid presence permanently, not just in spring. A garden with zero aphids ever is a garden with no reason for ladybugs to stay.
Do this consistently for two or three seasons and the population compounds, since ladybugs that overwinter successfully in your yard return to lay eggs in the same area come spring.
That compounding effect is exactly what the quick-reference card below is built to help you protect.
Wildlife at a Glance
- When to plant pollen sources: 3 to 4 weeks before your last frost date passes, so blooms are open when ladybugs emerge.
- Best flowers: dill, fennel, yarrow, sweet alyssum, cosmos, and calendula, planted in staggered bloom times.
- Ideal temperature for activity: daytime highs consistently above 55 to 60°F.
- Spacing: flowering strips every 10 to 15 feet through vegetable beds rather than one concentrated patch.
- What to avoid completely: broad-spectrum insecticides and pyrethrin sprays, which kill ladybugs and larvae along with the target pest.
- What to leave alone: a light aphid presence on sacrifice plants, and a section of leaf litter or dead stems left standing over winter.
- What not to buy: bagged, store-bought ladybugs for release, since most fly off within 48 hours and habitat fixes the problem for good.
Grow the food, skip the sprays, and leave one corner of the yard alone this winter.
That is the whole system, and it is the part that actually works.