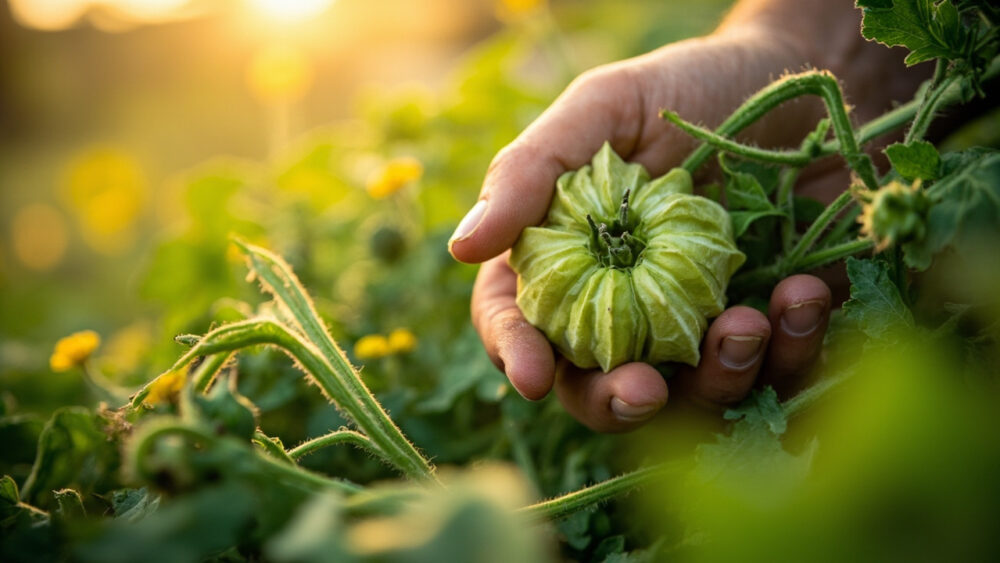
Growing tomatillos means giving them the same warm-season treatment as tomatoes, planting after your last frost into soil that has warmed to at least 60°F, spacing plants 2 to 3 feet apart, and planting at least two of them since tomatillos will not set fruit alone. Get those four things right and the rest is mostly staying out of the plant’s way. Get the pollination part wrong, which is the mistake that sinks most first attempts, and you will have a jungle of healthy vines with beautiful papery husks and nothing but empty air inside them.
There is also a harvest sign almost everyone misreads. A full, tight husk does not mean a ripe fruit, and a lot of gardeners pick too early because the papery lantern looks done.
How to grow tomatillos successfully comes down to timing, spacing, feeding, and knowing what a truly ripe fruit looks and feels like, and I’ll walk through all of it below. Stick around to the end for the save-able Tomatillos at a Glance card with every number in one place.
When to Plant Tomatillos
Tomatillos are warm-season plants with zero frost tolerance, just like their tomato cousins. Wait until nighttime temperatures reliably stay above 50°F and soil has warmed to 60°F or better, usually 1 to 3 weeks after your last spring frost date.
In cooler zones (5 and below), start seed indoors 6 to 8 weeks before your last frost and transplant out once nights warm. In zones 7 and up, you can direct seed once soil is warm, though transplants still get you a head start.
Planting into cold soil is how you end up with a stalled, sulking plant that sits there for a month doing nothing.
Choosing the Spot and Prepping the Soil
Tomatillos want full sun, 6 to 8 hours minimum, and they get big: 3 to 4 feet tall and just as wide, with a sprawling habit if left unstaked. Give them room or plan to cage them.
Soil should be loose, well-drained, and moderately fertile. Work in 2 to 3 inches of compost before planting. Heavy clay that stays soggy will rot roots; raised beds or mounded rows fix that fast.
A soil pH between 6.0 and 7.0 suits them fine, and they are not fussy about it the way some crops are.
Once the bed is ready, the planting itself takes ten minutes.
Planting Tomatillos Step by Step
- Depth: Set transplants slightly deeper than they sat in the pot, burying an inch or two of stem, which encourages extra roots along the buried section, same trick as tomatoes.
- Spacing: 24 to 36 inches apart, in rows 3 feet apart. Crowding is the second-biggest mistake after the pollination problem; airflow matters a lot here.
- Minimum two plants: Tomatillos are largely self-incompatible, meaning one plant’s flowers usually cannot fertilize themselves. Plant at least two, ideally different plants from the same variety or two different varieties.
- Support: Drop a tomato cage or stake in at planting time, before roots spread, so you are not fighting the plant later.
- Water in: Soak thoroughly right after planting to settle soil around the roots.
Once they’re in the ground, the plant does most of the work, but the next few weeks decide how much fruit you actually get.
Watering and Feeding Through the Season
Tomatillos want consistent moisture, about 1 to 1.5 inches of water a week between rain and irrigation. Uneven wateringdrought then flood, causes blossom drop and split fruit, the same way it does in tomatoes.
Check soil an inch down. If it’s dry there, water. Mulch with 2 to 3 inches of straw or shredded leaves to even out moisture and cut down on weeding.
Feed lightly. A balanced fertilizer at planting time, then a side-dressing of compost or a low-nitrogen feed once flowers appear, is enough. Too much nitrogen buys you a huge leafy plant with disappointing fruit set, which is not the trade you want.
Feed the plant right and it will reward you, but only if pollinators show up to finish the job.
Why Tomatillos Fail to Set Fruit (The Real Answer)
If your plant is flowering heavily but husks stay flat and empty, it is almost never a soil or water problem, it’s pollination. Tomatillo flowers need cross-pollination from a genetically different plant of the same species, and bees have to do the work.
The fix is two or more plants, planted close enough that pollinators visit both, plus tolerating bee activity rather than spraying broadly during bloom.
Beyond pollination, watch for a few common culprits:
- Flea beetles: tiny shot-holes in leaves. Row covers early, insecticidal soap if it gets bad, following the product label.
- Hornworms: large green caterpillars stripping leaves fast. Hand-pick them off in the evening.
- Blossom end rot: dark sunken spots on fruit bottoms, from inconsistent watering more often than calcium deficiency. Even out irrigation first.
- Early blight or leaf spot: yellowing, spotted lower leaves in humid weather. Improve airflow, avoid overhead watering, remove affected leaves.
Handle those and you’re mostly clear to just wait for the harvest window.
When and How to Harvest Tomatillos
A husk filling out and turning papery does not mean the fruit inside is ripe, that’s the sign that trips people up. The real cue is the fruit filling the husk completely and the husk starting to split or turn tan and dryusually 65 to 100 days from transplant depending on variety.
Color matters too. Most common varieties ripen to a pale green or yellow-green, not the deep green you see in stores, which is actually picked underripe on purpose for a tarter flavor. Purple varieties turn deep purple when ready.
Gently squeeze the husk. A ripe fruit feels firm and fills the papery covering snugly. If the fruit rattles loosely inside a dry husk, it has gone past peak and turned mealy or started dropping on its own, which is actually how you’ll know harvest season has arrived if you miss the first wave: ripe fruit drops to the ground.
Pick continuously through the season, every few days once fruiting starts, to keep the plant producing until frost ends things.
All those numbers, spacing to harvest signs, are worth having in one place, which is exactly what’s next.
Tomatillos at a Glance
- When to plant: after last frost, once soil hits 60°F and nights stay above 50°F, 1 to 3 weeks past frost date.
- Spacing: 24 to 36 inches apart, rows 3 feet apart, minimum two plants for pollination.
- Planting depth: bury an inch or two of stem on transplants for extra root growth.
- Sun and soil: full sun, 6 to 8 hours, well-drained soil enriched with 2 to 3 inches of compost, pH 6.0 to 7.0.
- Water: 1 to 1.5 inches per week, consistent moisture, mulch to prevent swings.
- Days to harvest: 65 to 100 days from transplant, depending on variety.
- Ripeness sign: husk fills tight then splits or turns tan, fruit color pales to green-yellow or purple depending on type.
Two plants, warm soil, and even water solve almost every problem this crop throws at you.
Everything else is just picking them before the husks beat you to it.