Plant creeping jenny in spring or early fall once soil is workable and warmed a bit past chilly, spacing plants 12 to 18 inches apart in a hole no deeper than the container it came in, then water it in well and keep the soil moist for the first two to three weeks while roots establish. That is the whole job in one sentence. Getting the *result* you actually want, thick chartreuse or green carpet instead of a few sad sprigs, depends on details most guides skip.
Here is what nobody tells you upfront: the mistake that kills most creeping jenny plantings is not neglect, it is over-planting into shade thinking it will “fill in eventually.” It might, or it might sit there thin and leggy for two years while you wonder what you did wrong. There is also a sign on the leaves that everyone misreads as disease when it is actually a light problem, and an honest answer about how fast this stuff spreads that you deserve before you plant it near anything you like.
Stick around for the save-and-screenshot Creeping Jenny at a Glance card at the very bottom. It has the numbers you will want again next week when you forget them.
When to Plant Creeping Jenny
The best window is spring, once your last frost has passed and soil temperature sits above roughly 50°F, or early fall, at least six weeks before your first expected frost so roots get established before cold shuts things down. Creeping jenny (Lysimachia nummularia) is hardy in USDA zones 3 through 9, and established plants shrug off winter cold with no protection needed.
Spring planting gives you a full season of spread before winter. Fall planting works almost as well in milder zones, but skip it if you are in zone 3 or 4 and your first frost is closing in, since young roots won’t have time to anchor.
Summer planting is possible but riskier. Heat stresses new transplants fast, so if you must plant in July or August, do it in the evening and expect to water more often.
Timing gets the roots off to a good start, but where you put those roots matters even more.
Choosing the Spot and Prepping the Soil
Creeping jenny tolerates a wide range of light, from full sun to fairly deep shade, but the color you get depends on it. Full sun gives you tight, bright chartreuse foliage. Shade gives you looser growth and a deeper green.
If you assumed pale or yellowish leaves in a shady spot mean disease or nutrient troublethat guess sends a lot of people chasing fertilizer they do not need. It is usually just light. Golden cultivars planted in heavy shade will green up and stretch, not because something is wrong, but because that is the plant adjusting.
Soil matters less than most ground covers. Creeping jenny handles average, sandy, or clay soil and even tolerates soggy spots that kill other plants, which makes it a genuine fix for that one low, wet corner of the yard nothing else survives in.
Work an inch or two of compost into the top 6 inches of soil before planting if your dirt is compacted or poor. It is not required, but it speeds establishment.
One more thing before you dig: decide now if you actually want this plant to spread, because that decision shapes everything downstream.
Planting Creeping Jenny Step by Step
Whether you are working from small nursery pots, plugs, or divisions pulled from an existing patch, the technique is the same.
1. Space plants 12 to 18 inches apart
Tighter spacing, closer to 8 to 10 inches, fills in faster if you want quick coverage for erosion control or a bare slope. Wider spacing saves money and patience if you are covering a large area and can wait a full season.
2. Dig holes no deeper than the root ball
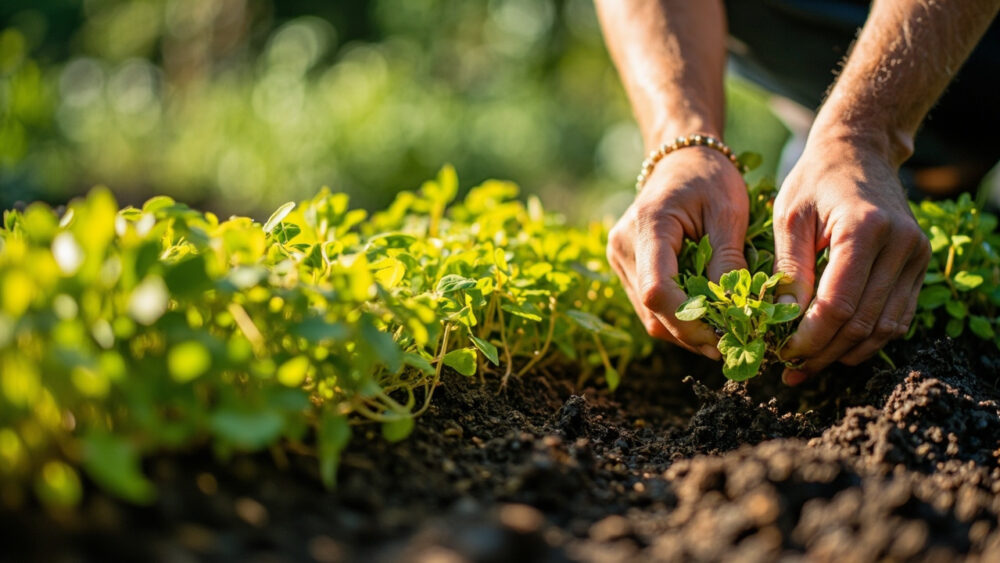
The crown, where stems meet roots, should sit level with or just barely below the surrounding soil. Bury it too deep and stems rot; plant too high and roots dry out and stall.
3. Loosen the roots before setting the plant in
If roots are circling tightly in the pot, tease them apart with your fingers. This one step prevents the plant from staying root-bound and stunted for its first year.
4. Backfill and firm gently
Press soil around the roots enough to remove air pockets, but do not compact it hard. You want contact, not concrete.
5. Water immediately and deeply
Soak the whole planting area right after backfilling, not just around each individual plant. This settles soil into remaining gaps and gives roots moisture to grow into right away.
Get the plant in the ground correctly and the next few weeks are mostly about not messing with it too much.
Watering and Feeding Through the Season
Keep soil consistently moist for the first two to three weeks after planting, watering whenever the top inch of soil feels dry to the touch. This is the establishment window where most failures actually happen, not from disease but from drying out between waterings.
Once established, usually by the six-week mark, creeping jenny becomes quite drought-tolerant and actually prefers to dry out slightly between waterings in most conditions. It also tolerates consistently damp soil far better than most ground covers, which is part of why it is a go-to for boggy spots and stream edges.
Feeding is optional and easy to overdo. A light application of balanced, slow-release fertilizer in spring is plenty. Too much nitrogen pushes soft, floppy growth that mats down and rots in humid weather.
Skip fertilizer entirely if your soil is already decent. This plant does not need coddling to perform.
Water and feeding are the easy part; the real test is what happens once it starts actually spreading.
Problems to Head Off Before They Start
Here is the honest answer to the question you were about to ask: yes, creeping jenny spreads aggressively, rooting at every leaf node as stems creep along the soil. In the right (or wrong) conditions it can travel well beyond where you planted it, climbing into lawns, flower beds, and neighboring containers.
The fix is not avoiding the plantit is containing it from day one. Plant it where hardscape, a deep edging barrier, or a container naturally stops the spread, or commit to trimming runners back once or twice a season with shears or a mower pass along the border.
In several regions, including parts of the Pacific Northwest and the northeastern U.S., creeping jenny has escaped cultivation into wetlands and waterways, so avoid planting it near natural streams, ponds, or drainage ditches that connect to wild areas. Check whether it is flagged as invasive in your specific state before planting near any water feature.
Slugs and snails will chew leaves in damp, shady plantings, leaving ragged holes. Handpicking at dusk or using a labeled slug bait according to package directions handles most infestations.
Root rot shows up as blackened, mushy stems in soil that stays waterlogged with no drainage at all, which is different from the wet-tolerant conditions this plant actually enjoys. If you see that, thin the planting and improve drainage rather than watering more.
Creeping jenny is considered mildly toxic to pets if ingested in quantity. If your dog or cat eats a significant amount and shows vomiting, drooling, or lethargy, call your veterinarian rather than waiting it out.
Manage the spread early and the rest of this plant’s life is refreshingly low-maintenance.
When Creeping Jenny “Matures” and What That Looks Like
There is no harvest here in the vegetable-garden sense, but there is a clear finish line for coverage. Expect a thin, spotty look for the first 6 to 10 weeks after planting, then a visible thickening as runners knit together, usually by the end of the first full growing season at 12 to 18 inch spacing.
Small cup-shaped yellow flowers appear in late spring through summer, especially in sunnier spots, though the plant is grown for foliage and the flowers are a bonus, not the point.
Full, carpet-dense coverage typically arrives in year two. If you want more plants for another area, division is simple: lift a rooted section anytime during the growing season and replant it, no special timing required.
That patience in year one is the trade for a plant that needs almost nothing from you in year two and beyond.
Creeping Jenny at a Glance
- When to plant: spring after last frost with soil above about 50°F, or fall at least six weeks before first frost.
- Spacing: 12 to 18 inches apart for eventual fill, 8 to 10 inches for faster coverage.
- Planting depth: crown level with the surrounding soil, never buried deep.
- Light: full sun for tight chartreuse growth, shade for looser deep green growth.
- Water: keep consistently moist for the first two to three weeks, then water when the top inch dries out.
- Hardiness: USDA zones 3 through 9, tolerant of both wet soil and drought once established.
- Watch for: aggressive spread past borders, slug damage in shady wet spots, and check local invasive plant status before planting near natural water.
Get the roots in at the right depth and the spacing right, and creeping jenny does the rest without asking much of you.
The only real decision is deciding now how far you are willing to let it go.