Growing aloe vera comes down to three things: a container or bed with sharp drainage, bright light for most of the day, and watering so infrequently it feels almost neglectful. Get those right and an aloe will sit happily on a windowsill or patio for years, throwing off babies you can pot up and give away. Get them wrong, usually by watering like it’s a houseplant that wants to stay moist, and you’ll watch it turn to mush from the base up.
Here’s what trips people up before they even realize it: the pot matters more than almost anything else you’ll do. Plastic pots and no drainage holes kill more aloes than cold ever does. There’s also a sign everyone misreads, thin, curling, reaching leaves get blamed on underwatering when it’s almost always a light problem, and the honest truth about those famous gel-filled leaves: harvesting too early or too aggressively can set a young plant back for a year.
Stick with me through soil, planting, watering, and the problems that actually show up, and I’ll give you a save-able Aloe Vera at a Glance card at the bottom with every number in one place.
When to Plant Aloe Vera
Aloe vera is not frost-anchored the way vegetables are, since most people grow it in a pot that can move indoors. But if you’re planting outdoors in the ground, wait until nighttime temperatures are reliably staying above 40°F and there’s no frost risk left in the forecast. That’s roughly two to three weeks after your last frost date in most regions.
Zone matters a lot here. Aloe vera is only reliably winter-hardy outdoors in zones 9 through 11. Everywhere colder, it lives in a container that summers outside and winters on a bright windowsill or under grow lights.
If you’re potting up a nursery plant or a pup someone gave you, timing barely matters as long as it’s not the dead of winter with low light. Spring through late summer is easiest because the plant is actively growing and recovers from transplant stress fast.
Once you know when, the next question is where.
Choosing the Spot and Prepping the Soil
Aloe wants at least 6 hours of bright light a day. Outdoors that means full sun to light afternoon shade in hot climates; indoors it means a south or west-facing window, and even then a plant that’s spent months indoors will often need supplemental light in winter.
Drainage is non-negotiable. Aloe roots sitting in wet soil for more than a day or two start to rot, and rot doesn’t reverse. Use a cactus or succulent potting mix, or make your own with roughly two parts regular potting soil to one part coarse sand or perlite.
If you’re planting in the ground in a warm-winter zone, raised beds or slopes help enormously. Heavy clay is the enemy; amend it with coarse grit or plant in a mound if you’re stuck with dense soil.
The container you choose is where most people get it wrong before they’ve even planted anything.
Planting Aloe Vera Step by Step
The pot itself decides more of your success than the soil recipe does. Terracotta or unglazed clay pots wick moisture away from roots, which is exactly what aloe wants. A drainage hole is mandatory, not optional.
Step-by-step planting
- Choose the container: pick one only slightly larger than the root ball, about 1 to 2 inches of clearance on each side. Too much extra soil holds moisture the roots can’t use, which invites rot.
- Add drainage material: a layer of coarse gravel or broken pottery at the bottom helps, though it’s the soil mix and the hole that do the real work.
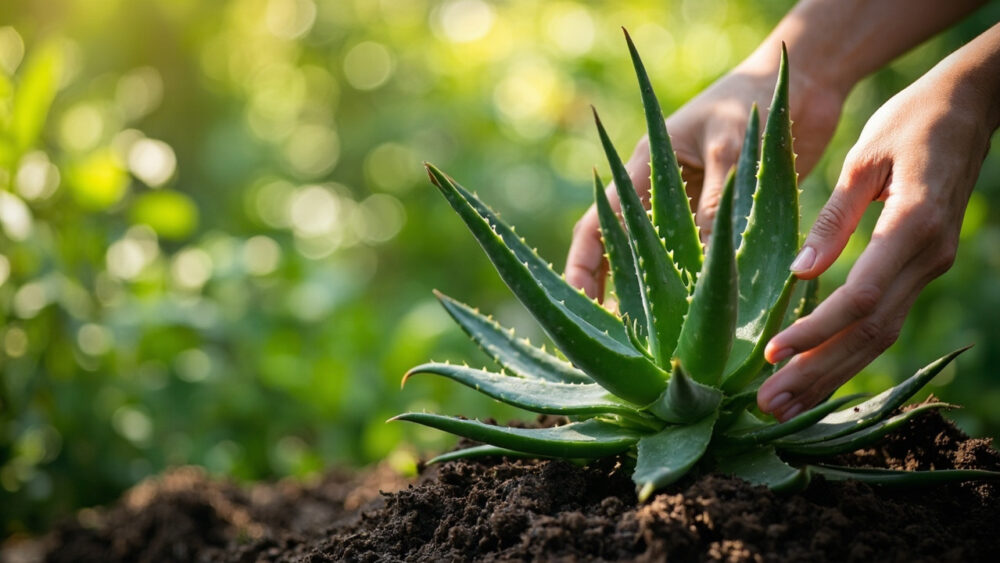
- Set the depth: plant so the base of the leaves sits right at soil level, no deeper. Burying the crown is a slow death sentence.
- Space multiples: if planting several or setting pups into a bed, give each plant 12 to 18 inches so mature rosettes, which can reach 12 to 24 inches across, don’t crowd each other.
- Firm and settle: press soil gently around the roots, then leave it dry for 3 to 5 days before the first watering. This lets any damaged roots callus over instead of rotting the moment they touch moisture.
That dry waiting period feels wrong to almost every new grower, and it’s exactly why it works.
Watering and Feeding Through the Season
If you assumed thin, stretched, pale leaves mean the plant is thirsty, that guess kills more aloes than drought ever does. That look is almost always low light, not low water. The plant is stretching toward a sun it can’t find. The actual watering rule is simpler than people expect.
Water only when the soil is completely dry at least an inch or two down, then soak it thoroughly and let it drain fully. In summer that might mean every 2 to 3 weeks. In winter, when growth slows way down, it can stretch to once a month or longer.
Squeeze a leaf gently, if it feels firm and plump, the plant has reserves and does not need water yet. Soft, deflated, or wrinkled leaves are the real thirst signal.
Feeding is optional and light. A diluted, balanced houseplant fertilizer once or twice during the active growing season is plenty. Aloe evolved for lean, gritty soil and heavy feeding does more harm than good.
Even with good watering habits, a few problems show up often enough to plan for.
Problems That Actually Show Up
Root rot is the big one, and it’s almost always from overwatering, poor drainage, or both. The base of the plant goes soft and dark, and leaves collapse from the center outward. There’s no home fix for advanced rot. If it’s caught early, unpot it, cut away any mushy roots, let it dry out for several days, and repot in fresh dry mix.
Mealybugs and scale are the most common pests, showing up as small white cottony clusters or brown bumps at leaf bases. Wipe them off with a cotton swab dipped in rubbing alcohol, or treat with an insecticidal soap, following the product label exactly.
Sunscald, oddly, is a real risk too, especially if a plant grown indoors gets moved straight into full outdoor sun. Leaves develop brown or reddish patches. Harden it off over 7 to 10 days, giving a little more direct sun each day.
One honest note on toxicity: aloe vera’s outer leaf and latex layer is mildly toxic to cats, dogs, and horses if chewed or eaten, and can cause vomiting, diarrhea, or lethargy. If you suspect a pet has eaten part of the plant, contact your veterinarian rather than waiting to see what happens.
Handle the plant right and avoid these traps, and you’ll get to the part everyone’s actually growing it for.
When and How to Harvest Aloe Vera
Here’s the part almost nobody gets right on the first try: harvest from mature outer leaves, not the young center growth, and don’t touch a plant younger than about 2 to 3 years old or smaller than 8 to 10 inches across. A plant harvested too early or too hard stalls out and can take a full year to recover its size.
Choose thick, fully grown lower leaves at the base of the rosette. Cut close to the stem with a clean, sharp knife rather than tearing, which damages the plant.
Take no more than two or three leaves at a time, and let the plant recover for several weeks before taking more. Stand the cut leaf upright for a few minutes to let the yellowish sap drain out. That sap, not the clear inner gel, is the part that can irritate skin or stomach if eaten in quantity.
Slice the leaf open lengthwise and scoop the clear gel for topical use. Aloe vera rarely blooms indoors, but mature outdoor plants in warm climates send up a tall flower spike with tubular yellow or orange blooms in spring, a sign the plant is well established and thriving.
Everything you need to keep straight is right below, saved in one place.
Aloe Vera at a Glance
- When to plant: anytime spring through late summer, or after nighttime temps stay above 40°F for outdoor planting in zones 9 through 11.
- Light needs: at least 6 hours of bright light daily, a south or west-facing window indoors, full sun to light afternoon shade outdoors.
- Soil and pot: fast-draining cactus mix, unglazed terracotta with a drainage hole, snug rather than oversized.
- Planting depth and spacing: crown at soil level, never buried, 12 to 18 inches between plants if grouping several.
- Watering rule: soak thoroughly only when soil is fully dry an inch or two down, roughly every 2 to 3 weeks in summer, monthly or less in winter.
- Main threats: root rot from overwatering, mealybugs and scale, sunscald on plants moved too fast into direct sun.
- Harvest timing: wait until the plant is 2 to 3 years old and 8 to 10 inches across, then take only two or three mature outer leaves at a time.
The whole plant hinges on one habit: water rarely, water deeply, and let it dry out completely in between.
Everything else, the light, the pot, the soil, exists to support that one rule.