Learning how to grow bell peppers comes down to three things most people get wrong: they plant too early into cold soil, they starve the plant of phosphorus and potassium while dumping on nitrogen, and they pick green peppers when they were actually growing toward red, yellow, or orange the whole time. Fix those three and peppers are one of the easier fruiting vegetables in the garden. They just need heat, patience at the start, and steady moisture the whole way through.
There is a stretch in early summer where the plants seem to just sit there, not growing, not dying, doing nothing you can see. That is normal and it is also the exact moment most gardeners panic and overcorrect with fertilizer or start yanking at green fruit that was never going to ripen for another three or four weeks.
Stick with me through planting, feeding, and the pest that ruins more pepper crops than anything else, and at the bottom you will find a save-able Bell Peppers at a Glance card with every number in one place.
When to Plant Bell Peppers
Bell peppers are tropical plants pretending to be annual vegetables, and they will not forgive a cold start. Wait until nighttime temperatures stay reliably above 55°F and soil temperature is at least 65°F, which is usually two to three weeks after your last spring frost date, not right on it like tomatoes.
If you garden in zone 5 or 6, that often means late May to early June. In zones 8 to 10, you can go earlier, sometimes April, and get a second fall crop started in midsummer.
Start seed indoors 8 to 10 weeks before that transplant window, since pepper seed is slow, taking 10 to 21 days to germinate even at a warm 80°F. Buying transplants skips that wait entirely, which is why most home gardeners buy rather than start peppers from seed.
Getting the timing right matters less than getting the soil right, and that is where most seasons are actually won or lost.
Choosing the Spot and Prepping the Soil
Peppers want a minimum of 6 to 8 hours of direct sun and soil that drains well but holds some moisture, roughly the texture of a good chocolate cake crumb when you squeeze a handful.
Work in 2 to 3 inches of compost before planting. This is the step people skip, and it is the reason so many pepper plants stay stunted all summer no matter how much water they get.
Soil pH between 6.0 and 6.8 is the target. If you have grown tomatoes or eggplant in that bed the past two years, move peppers somewhere else. All three share soilborne diseases and pests, and rotating breaks that cycle.
Once the bed is built, the actual planting takes five minutes.
Step by Step: Planting Bell Peppers
- Harden off transplants for 5 to 7 days, setting them outside a little longer each day so they do not sunburn or stall from transplant shock.
- Dig a hole slightly deeper than the pot, about 1 inch deeper than the transplant was growing, no deeper. Peppers do not root along a buried stem the way tomatoes do.
- Space plants 18 to 24 inches apartwith rows 24 to 36 inches apart. Crowded peppers get less airflow and more disease.
- Set the plant in, backfill, and water in immediately with about a half gallon per plant to settle the soil and knock out air pockets.
- Stake or cage nownot later. Bell pepper branches are brittle and snap easily once loaded with fruit.
Once they are in the ground, the plant’s first job is doing almost nothing, and that is exactly when you need to leave it alone.
The Slow Start Everyone Misreads
If you assumed a stalled, non-growing pepper plant means it needs more fertilizer or more water, that guess causes more damage than it fixes. Peppers genuinely pause for two to three weeks after transplanting while they build root mass before putting energy into top growth.
During this stretch, resist heavy feeding. Extra nitrogen right now pushes leafy growth at the expense of the root system you actually need.
What actually helps is consistency: even soil moisture, no waterlogging, no dry-out swings. Peppers dropping flowers is almost always a moisture or heat-stress issue, not a fertility one.
Once roots are established, the plant’s real appetite kicks in, and that is where feeding strategy matters.
Watering and Feeding Through the Season
Water peppers about 1 to 1.5 inches per weekwhether from rain or irrigation, checking soil 2 inches down; if it is dry there, water. Inconsistent watering, wet then bone dry, causes blossom end rot and split fruit far more than any nutrient deficiency does.
Feed with a fertilizer lower in nitrogen and higher in phosphorus and potassium once flowering starts, something in a 5-10-10 range or a tomato-and-pepper formula, following the label rate. Too much nitrogen all season gives you a bush full of leaves and almost no peppers.
Mulch with 2 to 3 inches of straw or shredded leaves to even out soil moisture and temperature, which matters more for peppers than for almost any other vegetable you will grow.
Feed and water right, and the plant still has to survive what is coming for it in the garden.
Problems Worth Watching For
The single biggest pepper killer is blossom drop and fruit drop from heat stresswhich happens when daytime temps push past 90°F or nights stay above 75°F. There is no fix mid-heatwave except shade cloth and patience; flowers will return when temperatures moderate.
Aphids and pepper maggots show up as curled leaves or small holes in fruit. For most home gardens, a strong water spray and encouraging ladybugs handles light aphid pressure. If you need a pesticide, follow the product label exactly.
Blossom end rot, a dark leathery patch on the fruit’s bottom, is caused by inconsistent watering interrupting calcium uptake, not a lack of calcium in the soil itself. Even watering fixes it going forward, though affected fruit will not recover.
- Yellowing lower leaves: often overwatering or nitrogen deficiency, check soil moisture first.
- Wilting despite wet soil: check for root rot or a stem lesion at soil level.
- Sunscald on fruit: white, papery patches from too much direct exposure after pruning too many leaves away.
Get the plant through pests and heat, and the only question left is when to actually pick.
When and How to Harvest
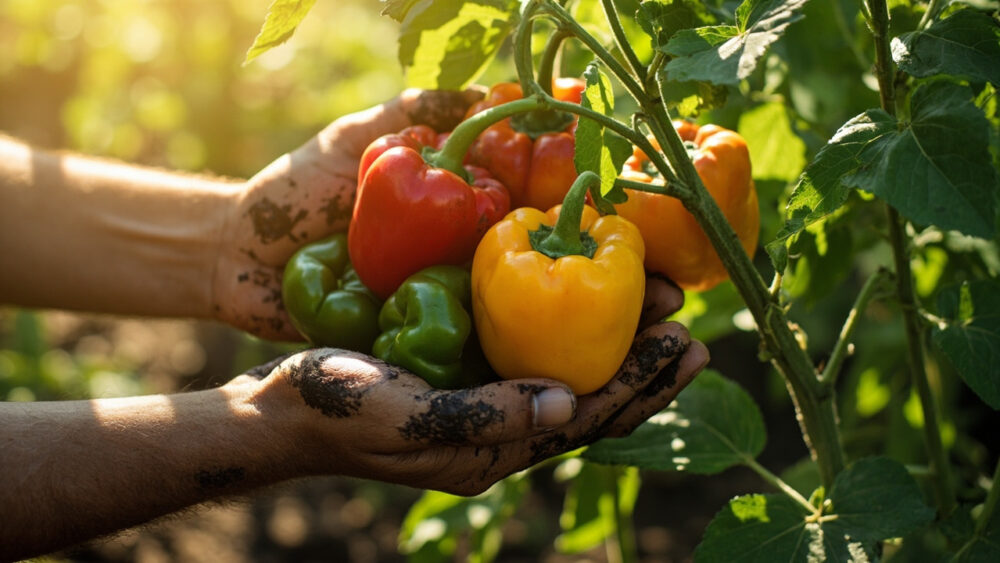
Here is the honest answer to the question every pepper grower eventually asks: green peppers are not a separate variety, they are unripe. Bell peppers left on the plant will keep changing color, to red, yellow, orange, or purple depending on the cultivar, and sweeten as they do.
You can harvest green anytime after the fruit reaches full size and firm walls, usually 60 to 75 days after transplanting. But if you want the full sweet flavor and color, wait another 2 to 3 weeks for it to turn.
Cut, do not pull, using pruning snips or a sharp knife, leaving a short piece of stem attached. Pulling tears the brittle branch and can take next season’s fruit set with it.
Picking a few peppers, even green ones, actually encourages the plant to set more flowers, so regular harvest through the season pays off in total yield.
Bell Peppers at a Glance
- When to plant: transplant 2 to 3 weeks after last frost, once nights stay above 55°F and soil hits at least 65°F.
- Spacing and depth: 18 to 24 inches apart, set only about 1 inch deeper than the pot.
- Sun and soil: 6 to 8 hours direct sun, well-drained soil enriched with 2 to 3 inches of compost, pH 6.0 to 6.8.
- Watering: 1 to 1.5 inches per week, kept consistent, mulched to prevent swings.
- Feeding: low-nitrogen, higher phosphorus and potassium fertilizer once flowering begins.
- Common problems: blossom drop from heat above 90°F, blossom end rot from uneven watering, aphids.
- Harvest: 60 to 75 days after transplant for full-size green fruit, another 2 to 3 weeks on the plant for full ripe color, cut rather than pull.
Peppers reward patience more than effort. Get the timing and water right, then let the plant take the slow road to color on its own schedule.