Here is how to regrow green onions from scraps: save the white root end with roots still attached, sit it in an inch of water on a sunny windowsill until new green shoots appear in 4 to 7 days, then move it into soil once roots hit an inch or two long for a plant that keeps producing for months instead of just one cutting.
That part is genuinely easy, which is exactly why so many people quit after one round. The mistake that ruins most attempts happens at the soil transfer, not the water jar. There is also a sign on the cut end that tells you whether a scrap is even worth saving, and most people never look for it, plus an honest answer to the question you are about to ask anyway: why your regrown onions get skinnier every harvest instead of staying fat like the ones you bought.
All of it is below, including a save-able Green Onions at a Glance card at the very bottom with the numbers you will actually want on your phone next time you are standing at the sink with a handful of trimmed roots.
Which Scraps Are Actually Worth Saving
Not every trimmed end will regrow. The sign to check is the root cluster itself: if the white base still has firm, pale roots attached and the very center of the cut top looks solid rather than slimy or hollowed out, it will regrow reliably.
Onions that have gone soft, yellow, or slippery at the base are done. So are ones cut so close that no root nub remains.
Keep about half an inch to an inch of white stem above the roots when you trim your green onions for cooking, specifically so you have something left to regrow.
Once you know which scraps qualify, the next question is timing, and this is where outdoor planting gets confused with the windowsill step.
When to Plant Green Onion Scraps Outdoors
The water-glass stage works on any windowsill year-round, indoors, regardless of season. Moving the rooted scrap into outdoor soil or a permanent container is the step tied to weather.
Green onions tolerate cold far better than most vegetables. You can transplant them outside as soon as the soil is workable and nighttime temperatures stay reliably above about 25°F, which in most zones is 2 to 4 weeks before your last spring frost date.
In zones 7 and warmer, they will often overwinter outside and keep growing through mild winters with no protection at all.
If your ground is still frozen or waterlogged, keep the rooted scraps in a pot indoors near a bright window and just transplant later; nothing is lost by waiting.
Soil and light matter as much as timing, so let’s get the bed right before you plant a single scrap.
Choosing the Spot and Prepping the Soil
Green onions want at least 6 hours of direct sun and loose, well-draining soil. Heavy clay that stays soggy is the fastest way to rot the roots you worked to regrow.
Work in an inch or two of compost before planting, and aim for a soil pH in the 6.0 to 7.0 range, which is where most vegetable garden soil already sits without amendment.
Raised beds and containers work just as well as ground soil, as long as there is at least 6 inches of depth for roots to run.
A wide, shallow container is actually better than a deep narrow pot, since green onions spread more than they dive.
With the bed ready, the actual planting takes about two minutes per scrap, and the technique is where most people undersell themselves.
Step-by-Step Planting
- Root first: stand the trimmed white base in about an inch of water, roots down, in a glass or jar on a bright windowsill.
- Wait for growth: change the water every 2 to 3 days and watch for new green shoots and roots lengthening to 1 to 2 inches, usually within a week.
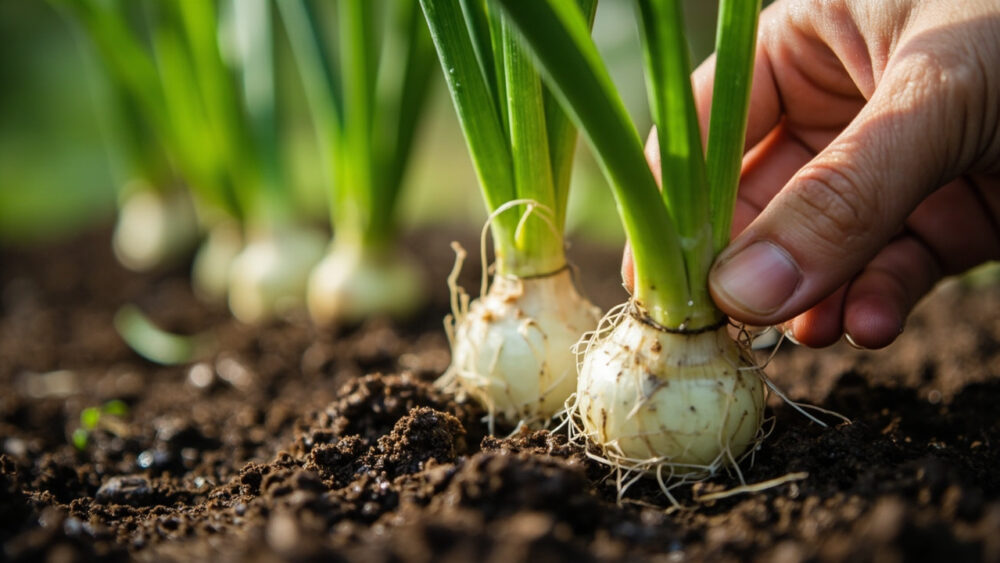
- Dig the hole: plant each rooted base about 1 to 2 inches deep, deep enough to cover the root mass and the very base of the white stem, no deeper.
- Space them out: set individual scraps 2 to 4 inches apart so bulbs and stems have room to widen.
- Firm and water: press soil gently around the base and water immediately so there are no air pockets around the roots.
That two-minute job is also exactly where the season gets decided.
The Transplant Mistake That Costs a Whole Batch
If you guessed the biggest failure point was picking a bad scrap, that is a fair guess, but it is not the real culprit. The mistake that ruins most attempts is planting the rooted scrap too deep or burying the green shoot tip itself in soil.
Cover the white base and roots, but let the point where green meets white sit right at soil level. Bury that junction and the shoot will rot or stall instead of pushing new growth.
The second version of the same mistake is transplanting straight from water to bone-dry soil. Water thoroughly at planting and keep the soil evenly moist for the first week while roots adjust.
Get the depth and that first week of moisture right, and the plant does almost everything else on its own from here.
Watering and Feeding Through the Season
Green onions like consistently moist soil, not wet soil. Water when the top inch feels dry to the touch, which in most climates is every 2 to 3 days, more often in containers or hot weather.
Let them dry out repeatedly and the stems turn tough and bitter; keep them waterlogged and the roots rot, so aim for the middle.
Feed lightly once new growth is a few inches tall. A balanced liquid feed or diluted fish emulsion every 3 to 4 weeks is plenty. Heavy nitrogen pushes floppy, pale growth instead of firm stems.
If you are growing in the same container for multiple cuttings, refresh with an inch of new compost every couple of months since the original soil gets depleted fast with repeat harvests.
Fed and watered right, the main threats left are pests and disease, and the good news is green onions face fewer of either than most vegetables.
Problems to Watch For
Green onions are genuinely low-trouble, but a few issues do show up.
Thrips show as silvery streaks on the leaves and are the most common pest. A strong water spray or insecticidal soap applied per the product label usually keeps them in check.
White rot or basal rot shows as soft, mushy, foul-smelling bases, almost always from overly wet, poorly drained soil. There is no cure once it sets in, so pull and discard affected plants and improve drainage before replanting.
Yellowing tips on outer leaves are often just normal aging as the plant redirects energy to new growth, not a sign of disease.
Keep the soil well-drained and the leaves dry when you water, and you will sidestep nearly everything on this list.
Why Regrown Onions Get Thinner Every Round
Here is the honest answer to the question you were about to ask: yes, onions regrown from the same scrap repeatedly do get thinner and less vigorous with each cutting, and that is normal, not a sign you are doing something wrong.
Each regrowth pulls on the stored energy in that root base, and a bulb-less scrap has limited reserves to keep rebuilding from.
You will typically get 2 to 4 good harvests from a single scrap before growth slows noticeably and stems come in noticeably thinner.
At that point, the fix is not more fertilizer, it is starting fresh scraps from your next bunch, which keeps a steady rotation going with zero cost.
When and How to Harvest
Green onions are ready to cut once stems reach 6 to 8 inches tall, which usually takes 3 to 4 weeks after transplanting into soil, sometimes faster in warm weather.
Cut, don’t pullif you want the plant to regrow again: snip stems about an inch above the soil line, leaving the roots and base intact.
Harvest outer stems first if you want continuous cutting over weeks rather than one big harvest all at once.
If left unharvested long enough, especially in warm weather, green onions will bolt and send up a round white flower head. The stems get tough and lose flavor once this happens, so treat a flower stalk as your sign to harvest immediately or let a few go to seed on purpose.
Once you have got a rhythm of cutting and regrowing, the whole process boils down to a handful of numbers worth keeping.
Green Onions at a Glance
- When to root scraps: anytime indoors in a glass of water, no season restriction.
- When to transplant outside: 2 to 4 weeks before your last spring frost, once soil is workable and nights stay above about 25°F.
- Planting depth: 1 to 2 inches, covering roots and white base only, keeping the green-white junction at soil level.
- Spacing: 2 to 4 inches apart, in a sunny spot with at least 6 hours of direct light and well-draining soil.
- Watering: when the top inch of soil feels dry, roughly every 2 to 3 days, avoiding soggy soil.
- Time to harvest: 3 to 4 weeks after transplanting, once stems reach 6 to 8 inches tall.
- Harvest method: cut an inch above the soil to allow regrowth, expect 2 to 4 good rounds per scrap before starting fresh.
Get the planting depth right and keep the soil evenly moist, and everything else about regrowing green onions takes care of itself.
Start a new batch every time you cook, and you will never buy a bunch of green onions again.