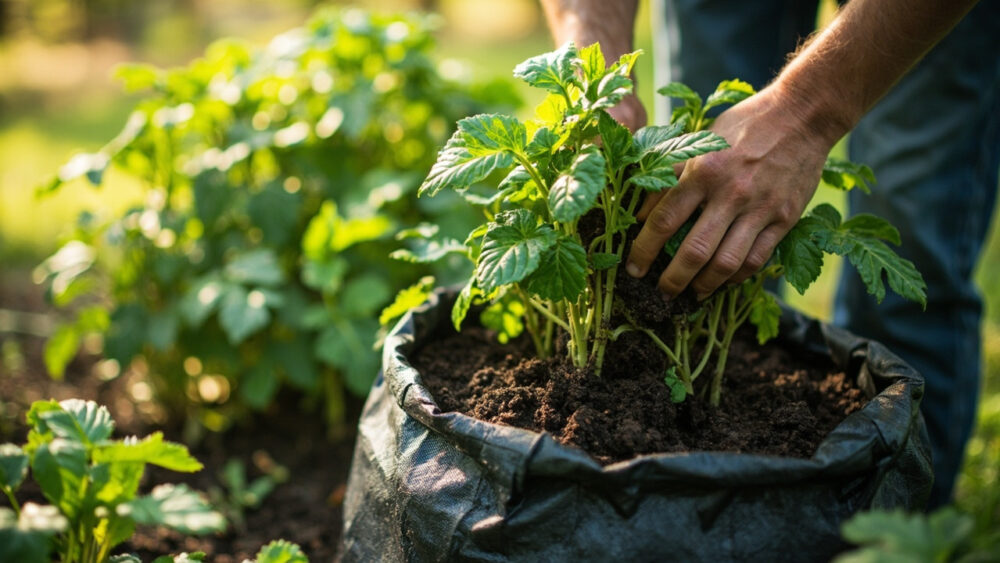
Growing potatoes in grow bags means starting with 4 to 6 inches of soil in the bottom of a 10 to 25 gallon fabric bag, planting seed potato pieces cut two days earlier, and hilling more soil up around the stems every time they grow another 4 to 6 inches until the bag is full. Do that and you get a clean, easy harvest by just tipping the bag over. It sounds almost too simple, and that simplicity is exactly why most people mess it up.
The mistake that ruins the majority of bag potato attempts is not underwatering. It is planting too deep too soon, then never hilling again after that, so the plant spends its whole season with no room to make new tubers.
There is also a sign most people misread entirely: when the foliage flops over and starts yellowing, most gardeners assume disease and panic. Usually it just means dig me up.
Stick with this and by the bottom you will have the full Potatoes at a Glance card, saved to your phone, covering timing, spacing, feeding, and the harvest signal in one place.
When to Plant Potatoes in Grow Bags
Potatoes go in the bag two to three weeks before your average last frost date, once soil temperature has climbed to at least 45°F, ideally 50 to 60°F. Bags actually give you an edge here over ground planting, because fabric bags warm up faster in spring sun than garden soil does.
Cold, wet soil is the real enemy, not frost on the leaves. A light frost nipping the first shoots is annoying but rarely fatal, since new growth pushes up from the seed piece again. Rotting seed potatoes in cold, soggy soil is fatal, and you do not get a second try.
In zones 3 to 6, plant mid to late spring once the ground has lost its winter chill. In zones 7 to 10, you can plant earlier, and many gardeners there also get a second crop in late summer for fall harvest.
Get the timing right and the next decision is where that bag actually sits.
Choosing the Spot and Prepping the Bag
Potatoes want six or more hours of direct sun a day. Less than that and you will still get a plant, just a disappointing number of small tubers under it.
Pick a spot on solid, level groundnot gravel or a wobbly deck board, because a full bag of wet soil is heavy and top-heavy plants topple in wind if the base shifts. Concrete or pavers work fine and drain well.
Use a loose, well-draining mix rather than dense garden soil straight from the yard. A blend of quality potting mix with compost worked in, roughly two-thirds mix to one-third compost, gives roots the air and drainage they need inside a bag’s tighter space.
Fabric bags in the 10 to 25 gallon range work best. Smaller bags dry out fast and limit yield hard; anything much larger gets awkward to hill and heavy to move.
Soil sorted, bag sized right, now the part everyone gets slightly wrong: the actual planting depth.
Planting Potatoes in a Grow Bag Step by Step
If you assumed you plant potatoes deep right from the start the way a lot of advice implies, that guess is why so many bags end up with only three or four tubers each. The trick is starting shallow and building depth over the season, not front-loading it.
Step by step
- Cut your seed potatoes into pieces with at least one or two healthy eyes each, then let the cut sides dry and callus for one to two days before planting. Planting a fresh wet cut invites rot.
- Fill the bag with 4 to 6 inches of soil in the bottom, no more.
- Set the seed pieces cut-side down, eyes up, spaced 8 to 10 inches apart around the bag.
- Cover with another 3 to 4 inches of soiljust enough to bury them, and water in well.
- Roll the bag’s sides down so you are only working with the filled portion for now. This is the step almost everyone skips, and it matters, because an unsupported empty rim collapses soil out sideways later.
From here the plant does the next part of the work, and your job becomes hilling on schedule.
Watering, Feeding, and Hilling Through the Season
Once shoots reach 4 to 6 inches tall, unroll the bag a bit and add 3 to 4 more inches of soil, burying two-thirds of the plant and leaving just the top leaves exposed. Repeat this every time growth pushes up 4 to 6 inches again, until the bag is filled to within 2 to 3 inches of the top.
Each hilling gives the plant more buried stem, and buried stem is where new tubers form.
Water consistentlyaiming for evenly moist soil, never soggy and never bone dry. Bags dry out faster than garden beds, so in hot weather that often means checking daily and watering every day or two once the plants are large. Stick a finger 1 to 2 inches down; if it comes out dry, water.
Uneven watering, wet then drought then wet again, is what causes hollow heart and lumpy, cracked tubers later.
Feed with a balanced fertilizer at planting, then switch to something lower in nitrogen and higher in potassium once flowering starts. Too much nitrogen late in the season buys you gorgeous foliage and a mediocre harvest underneath it, since the plant keeps investing in leaves instead of tubers.
Get the hilling and watering rhythm right and most problems below never get the chance to start.
Problems That Actually Show Up in Bags
Grow bags dodge a few classic potato problems, particularly soil-borne diseases and certain grubs, since you are starting with fresh mix each year instead of the same patch of garden soil. But bags bring their own short list of trouble.
Blight shows up as dark, water-soaked spots on leaves, usually after a stretch of humid, wet weather. Space bags apart for airflow and avoid overhead watering late in the day to keep leaves drier.
Colorado potato beetles and aphids still find container plants just as easily as ground ones. Check leaf undersides weekly and hand-pick beetle larvae early, since a small infestation caught fast beats a fungicide or pesticide application later. If it does get ahead of you, follow the product label exactly on any treatment you choose.
Green shoulderstubers that turn green near the surface, mean sunlight reached them. That is a hilling gap, not a disease, and it is exactly the flip side of that flopped-foliage sign from the intro: too little soil cover shows up as green tubers, too much time in the ground past maturity shows up as the plant collapsing on its own.
Green potato skin contains higher levels of solanine and should be cut away or the tuber discarded rather than eaten, since solanine in quantity is toxic. If a pet ever eats a significant amount of green potato or raw potato plant material, call a veterinarian rather than waiting to see what happens.
Handle those few risks and the last real skill left is knowing exactly when to stop waiting and dig.
When and How to Harvest
For new, small, thin-skinned potatoes, you can start digging gently along the edges about 7 to 8 weeks after planting, once flowers appear. For a full main crop with storage-worthy skins, wait until the foliage yellows and dies back on its own, typically 90 to 120 days from planting depending on variety.
That flopping, yellowing foliage from the intro is not a disease scare most of the time. It is the plant telling you it is done making tubers and starting to shut down, which is your harvest signal.
Stop watering about a week or two before you plan to harvest. This lets the skins toughen up, called curing in place, which matters a lot if you want the crop to store rather than get eaten in the next week.
Harvest itself is the one genuinely easy part of bag growing: tip the bag on its side onto a tarp, or simply dump it, and sift the soil with your hands. No fork, no digging blind and stabbing tubers by accident the way you can in ground beds.
Let harvested potatoes air dry for a few hours out of direct sun, brush off loose soil without washing, and store in a cool, dark, well-ventilated spot for the longest keeping.
Potatoes at a Glance
- When to plant: two to three weeks before last frost, once soil hits at least 45°F, ideally 50 to 60°F.
- Bag size: 10 to 25 gallon fabric bags, level solid ground, six or more hours of sun.
- Planting depth and spacing: start with 4 to 6 inches of soil, seed pieces 8 to 10 inches apart, cover with 3 to 4 inches more.
- Hilling: add 3 to 4 inches of soil every time growth reaches 4 to 6 inches tall, until the bag is nearly full.
- Watering: keep evenly moist, check daily in heat, never let it swing between soggy and bone dry.
- Feeding: balanced fertilizer at planting, then lower nitrogen and higher potassium once flowering starts.
- Harvest: new potatoes 7 to 8 weeks after flowering begins, main crop 90 to 120 days once foliage yellows and dies back, tip the bag to harvest.
If you only remember one thing, remember to keep hilling until the bag is nearly full, since that buried stem is where your harvest actually comes from.
Get that right and grow bags will out-produce a lot of garden beds for the space they take up.