Culantro grows best from seed or nursery starts set out after your last frost, in rich, moist soil with a few hours of shade from the hottest afternoon sun. It is slower and fussier to germinate than its cousin cilantro, but once established it tolerates heat and humidity that would send cilantro straight to bolting. How to grow culantro successfully comes down to patience at the start and consistent moisture the rest of the way.
Most people who try this crop for the first time give up on it during germination, convinced the seed is dead when it is actually just doing what culantro seed does. There is also a common misread on the leaves themselves, gardeners assume the long, saw-toothed leaves mean the plant is bolting or stressed when that is simply its normal shape. And there is a real answer to the question you are probably about to ask next: no, culantro is not the same plant as cilantro, and treating it like cilantro is what costs most people their harvest.
Stick with this guide through planting, feeding, problems, and harvest, and save the Culantro at a Glance card at the bottom for the numbers you will want again next season.
When to Plant Culantro
Wait until night temperatures are reliably above 50°F and the soil has warmed to at least 60 to 65°F before direct seeding or transplanting outdoors. That is usually two to four weeks after your last spring frost, depending on your zone. Culantro is happiest in zones 7 through 11 as an outdoor annual or short-lived perennial; further north, treat it as an annual or grow it in containers you can bring inside.
If you are starting seed indoors, begin six to eight weeks before your last frost date, since germination alone can take two to three weeks.
That slow, patchy start is normalnot a sign of bad seed or a mistake on your part. Culantro seed simply germinates unevenly and takes its time even under good conditions.
Get the timing right and the next decision is where you put it.
Choosing the Spot and Prepping the Soil
Culantro wants part shade, especially where summers run hot. Four to six hours of morning sun with afternoon shade is close to ideal; in cooler northern gardens it will tolerate more sun.
It also wants soil that stays consistently moist, which is the opposite of what many herbs prefer. Work two to three inches of compost into the top six to eight inches of soil before planting.
Good drainage still matters even though this plant likes wet feet more than most herbs. Soggy, compacted soil that never dries at all will rot the roots just as fast as drought will scorch the leaves.
Once the bed is ready, the planting itself is straightforward if you follow the right depth and spacing.
Planting Culantro Step by Step
1. Sow or transplant at the right depth
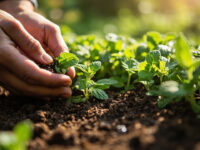
Sow seed about a quarter inch deep, barely covered, since culantro seed needs some light exposure to germinate reliably. If transplanting starts, set them at the same depth they were growing in their pots.
2. Space generously
Give plants 8 to 12 inches apart in rows spaced 12 to 18 inches apart. Culantro forms a rosette that spreads wider than a young plant suggests, and crowded plants stay smaller and bolt to seed faster.
3. Water in immediately
Soak the bed right after planting and keep the top inch of soil consistently damp until germination or until transplants show new growth, usually two to three weeks.
4. Mulch around the base
A one to two inch layer of mulch holds moisture and keeps soil temperature steadier, which matters more for this plant than for most herbs you have grown before.
Getting plants in the ground is the easy part, keeping them alive through summer is where culantro separates itself from cilantro.
Watering and Feeding Through the Season
Culantro needs steady moisture, more than almost any other common culinary herb. Let the top inch of soil dry and you will see the leaf edges start to curl and brown within a day or two in hot weather.
Water deeply two to three times a week in average conditions, more often during heat waves or in containers, which dry out faster than ground beds.
Feed lightly with a balanced fertilizer or a nitrogen-leaning one every four to six weeks, since this is a leafy crop and rewards a bit more nitrogen than a flowering herb would.
An inch or two of mulch and a soaker hose or drip line will save you more plants than any fertilizer will.
Even with good watering habits, a few problems show up often enough that you should know them before they surprise you.
Problems That Actually Show Up
The two real threats to culantro are drought stress and slow-moving pests, not disease, if drainage is decent.
- Leaf edges browning and curling: almost always inconsistent watering, not a pest or disease. Water more deeply and mulch.
- Slugs and snails: common in the same moist, shaded conditions culantro loves. Handpick in the evening or use a labeled slug bait according to the product directions.
- Aphids on new growth: knock them off with a strong spray of water first, and use insecticidal soap per the label if they persist.
- Root rot in heavy, waterlogged soil: yellowing lower leaves and a mushy base are the tell. Improve drainage before you plant again. There is usually no saving an affected plant.
- Bolting to seed in the second year: normal life cycle, not a disease, and it signals harvest time is ending.
None of these are dealbreakers if you catch them early, and catching them early is mostly about knowing what to expect.
Once the plant is established and healthy, the only real question left is when to start cutting it.
When and How to Harvest Culantro
Start harvesting once plants have at least five or six mature leaves, usually 75 to 100 days after sowing from seed, sooner from transplants. That long timeline is the honest trade-off for culantro’s heat tolerance and stronger, more concentrated flavor compared to cilantro.
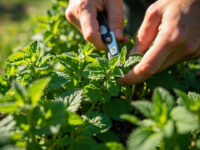
Cut outer leaves at the base with scissors or your fingers, leaving the inner rosette to keep producing. Regular harvesting, taking no more than a third of the plant at a time, encourages new leaf growth rather than pushing the plant toward flowering.
In its first year, culantro behaves as a biennial in warm climates and may flower and set seed in its second year, sending up a tall central stalk. Once that happens, leaf quality drops and it is time to let a few plants go to seed for next season or start fresh.
You have got the whole timeline now, from seed tray to cutting board, so here is everything worth pinning to your phone.
Culantro at a Glance
- When to plant: two to four weeks after last frost, once soil is 60 to 65°F, or start seed indoors six to eight weeks early.
- Best zones outdoors: 7 through 11 as an annual or short-lived perennial, elsewhere grow as an annual or in containers.
- Light and soil: part shade with four to six hours of morning sun, rich soil amended with two to three inches of compost.
- Spacing and depth: sow a quarter inch deep, space plants 8 to 12 inches apart in rows 12 to 18 inches apart.
- Watering: keep soil consistently moist, water deeply two to three times a week, more in heat or containers.
- Harvest window: begin at 75 to 100 days once plants have five or six mature leaves, cut outer leaves and leave the center growing.
- Biggest risk: letting soil dry out, which browns leaf edges faster than any pest or disease will.
Keep the soil steadily damp and give it shade from harsh afternoon sun, and culantro will outlast cilantro in your garden by months.
Everything else about growing it well is just patience during those slow first few weeks.