Creeping phlox is planted in spring or early fall, spaced 12 to 18 inches apart in full sun with sharp drainage, and once it’s rooted in it needs almost no fuss beyond a spring haircut after bloom. If you’re standing over a nursery flat right now wondering how to grow creeping phlox without wasting a planting season, the short version is: get the timing right, don’t bury the crown, and resist the urge to feed it like a vegetable.
Here’s what trips people up. Most gardeners plant it too deep, which rots the woody crown before it ever spreads. Almost everyone misreads the sparse, twiggy look in early spring as a dead plant and rips out something that was about to bloom its head off. And there’s a question you haven’t asked yet but will: no, it doesn’t need “cutting back” the way you’d deadhead a perennial, it needs something closer to a buzz cut, and the timing on that matters more than people think.
Stick with this one and you’ll get the full planting-to-bloom picture, including the mistake that kills more mats than any pest does. The save-able Creeping Phlox at a Glance card is waiting at the bottom once you’ve got the details.
When to Plant Creeping Phlox
Spring planting works best two to three weeks after your last frost date, once soil has warmed and stopped being a cold, soggy mess. Fall planting works too, ideally six weeks before your first hard frost, giving roots time to settle before the ground freezes.
Soil temperature matters more than the calendar. You want it consistently above 50°F a few inches down, which you can check with a simple soil thermometer or just by feel: if it’s still cold and clammy, wait.
In colder zones (3 to 5), spring planting is safer since fall-planted starts may not root deeply enough before winter heaving. In zones 6 and up, fall planting often gives you a head start on next spring’s bloom.
Get the timing right and the next decision, where you actually put it, becomes a lot less forgiving of mistakes.
Choosing the Spot and Prepping the Soil
Creeping phlox wants full sunat least 6 hours a day. In partial shade it survives but blooms thin and leggy, which is often mistaken for disease when it’s really just a light problem.
Drainage is the real make-or-break factor. This plant evolved on rocky slopes and screes, and it does not tolerate wet feet. If water puddles in the spot 30 minutes after a hard rain, amend with coarse sand or fine gravel, or move to a raised bed, slope, or rock wall pocket instead.
Work the top 6 to 8 inches of soil loose and mix in a couple inches of compost if your soil is heavy clay. Skip heavy manure or rich amendments here; overly fertile soil actually reduces bloom and encourages floppy, disease-prone growth.
Good drainage solves more phlox problems before they start than any spray ever will.
Planting Creeping Phlox Step by Step
1. Time it right
Plant on a mild, overcast day if you can. Hot sun on transplant day stresses new roots before they’ve had a chance to grip.
2. Dig the hole to match the root ball, not deeper
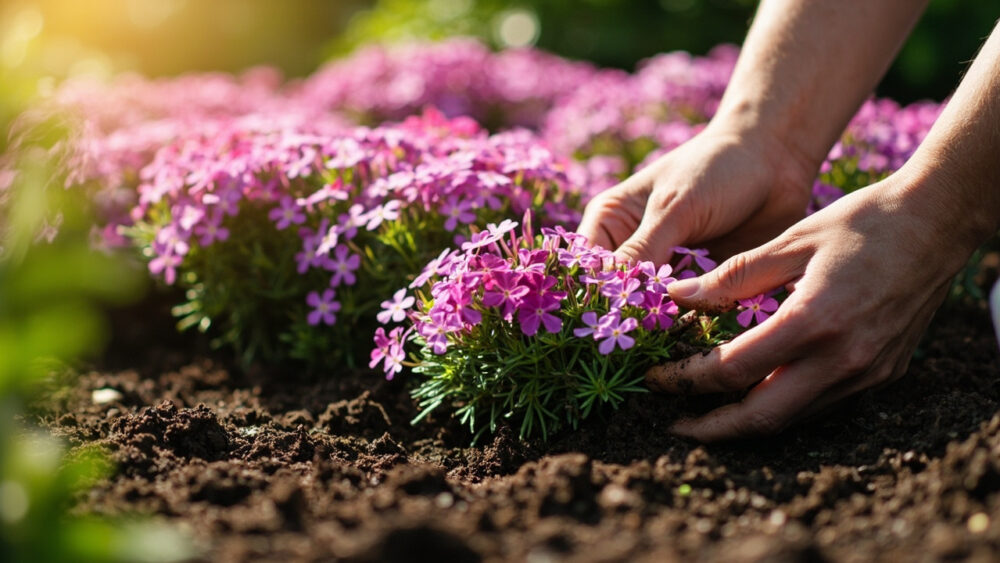
Dig a hole the same depth as the nursery pot and about twice as wide. The crown, where stems meet roots, should sit right at soil level, never buried. This is the single most common planting mistake, and it’s slow to show: buried crowns rot quietly over weeks, and by the time the plant collapses, it’s too late to fix.
3. Space for the mat it will become
Space plants 12 to 18 inches apart. It looks sparse on day one. Within one to two growing seasons those gaps disappear as each plant spreads into a dense, trailing mat.
4. Backfill and water in
Firm the soil gently around the roots, no stomping, then water slowly until the area is evenly moist a few inches down.
5. Mulch thin
Add a thin layer, no more than an inch, of gravel or fine bark mulch around the base. Keep it off the crown itself.
Get through planting day without burying the crown and you’ve already dodged the mistake that ends most attempts.
Watering and Feeding Through the Season
Water new plantings two to three times a week for the first three to four weeks, enough to keep soil lightly moist but never soggy. Once established, usually by the second month, creeping phlox is genuinely drought-tolerant and needs supplemental water only during extended dry spells, roughly once a week in hot weather with no rain.
Feeding is where restraint pays off. A light application of a balanced, slow-release fertilizer in early spring as new growth starts is plenty. Skip nitrogen-heavy feeds entirely; they push leafy growth at the expense of flowers and make the mat more prone to rot and fungal problems.
If you assumed sparse, twiggy stems in early spring mean the plant died over winter, that guess costs a lot of healthy plants their spot in the garden. Creeping phlox often looks half-dead right before it leafs out and blooms. Scratch a stem lightly with your fingernail, and if you see green underneath, it’s alive and about to perform.
Once the water and feeding rhythm is set, the next thing to watch for is what actually goes wrong.
Problems That Actually Strike, and How to Head Them Off
Root and crown rot from poor drainage or a buried crown is the number one killer, and it’s usually fatal by the time you notice wilting, since the damage started underground weeks earlier. Prevention, not treatment, is the real fix here: get the drainage and planting depth right from day one.
Powdery mildew shows up as a grayish-white coating on leaves, usually in humid weather with poor air circulation. Thin overcrowded patches by dividing them, and avoid overhead watering late in the day. A fungicide labeled for powdery mildew on ornamentals can help if it’s caught early. Follow the product label exactly.
Spider mites cause stippled, dusty-looking foliage in hot, dry stretches. A strong water spray every few days usually knocks populations down before they need anything stronger.
Deer and rabbits mostly leave creeping phlox alone, though very young transplants can get nipped. None of these problems are difficult if you catch them early.
The good news is that a plant this tough rewards you fast once it’s past its first season, and that reward shows up as bloom.
When Creeping Phlox Blooms, and the Trim That Actually Matters
Creeping phlox blooms in early to mid spring, typically for three to six weeks, in shades of pink, purple, white, or blue depending on variety. There’s no “harvest” here in the vegetable-garden sense. The payoff is the bloom itself, and the plant tells you it’s peaking when the mat is fully covered edge to edge in flowers with almost no green showing through.
Right after bloom fades is when that buzz-cut trim comes in. Shear the whole mat back by about a third to a half using hedge shears or a string trimmer on a high setting. This isn’t optional tidying. It’s what keeps the center from going woody and bare over the next few years.
Skip that trim for two or three seasons running and you’ll get a donut-shaped plant, full around the edges, dead and woody in the middle, that’s much harder to rescue than to prevent.
Everything you need to keep this plant thriving year after year boils down to a handful of facts, and they’re all below.
Creeping Phlox at a Glance
- When to plant: spring, two to three weeks after last frost, or fall, about six weeks before first hard frost, once soil is consistently above 50°F.
- Where: full sun, at least 6 hours daily, with sharp, fast drainage. Avoid low spots that hold water.
- Spacing and depth: 12 to 18 inches apart, crown level with the soil surface, never buried.
- Watering: two to three times a week until established, roughly weekly during dry spells once mature.
- Feeding: one light dose of balanced, slow-release fertilizer in early spring. Skip nitrogen-heavy feeds.
- Bloom window: early to mid spring, lasting three to six weeks.
- Key maintenance: shear back by a third to a half right after bloom every year to prevent a woody, bare center.
Get the crown depth and drainage right on day one, and creeping phlox pretty much takes care of itself from there.
Everything else is just timing the yearly trim so it keeps rewarding you instead of going bare in the middle.