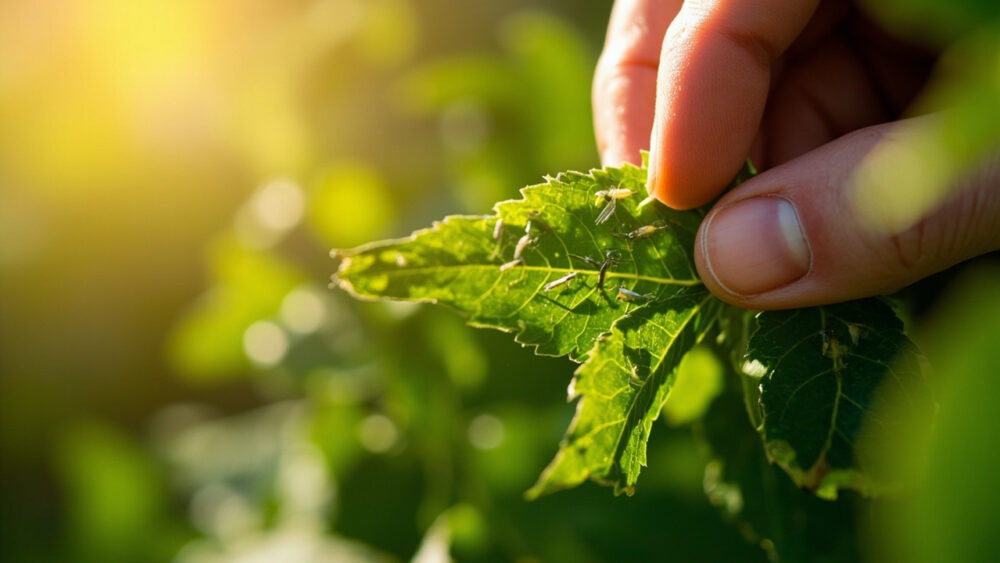
If your leaves have papery silver or tan streaks with tiny black flecks scattered across them, you’ve got thrips, and the fix is a combination of knocking down the current population and breaking their breeding cycle in the soil and on the plant. How to get rid of thrips almost always means insecticidal soap or horticultural oil applied thoroughly every 5 to 7 days for at least three rounds, because thrips reproduce fast and one spray never gets them all. Skip a round and you start over.
Most people blame spider mites first, since both cause stippled, faded leaves. Wrong pest, wrong fix, and the delay costs you a generation of thrips eggs hatching while you spray for the wrong bug.
There’s one detail on the plant, where the damage is concentrated and what’s hiding in the flowers, that tells you exactly which stage of thrips you’re dealing with and how bad the infestation already is. Stick around for the honest recovery outlook too, because thrips damage doesn’t reverse, only new growth does. The full diagnosis checklist is at the bottom, save it before you walk back out to the plant.
Most Likely Causes, Ranked
1. Thrips feeding directly on leaf and petal tissue
This is the default cause and the reason you clicked this article. Confirm it by tapping a leaf or flower over a white sheet of paper or paper towel. Thrips are slender, 1/16 inch or smaller, tan to dark brown, and they’ll wriggle visibly on the white background within seconds. The damage itself looks like silvery or bronze streaking with black dots (that’s their excrement) concentrated near leaf veins and along petal edges.
The fix is insecticidal soap or horticultural oil, sprayed to cover both leaf surfaces and worked into flower buds, since that’s where thrips hide during the day. Repeat every 5 to 7 days for three to four applications minimum. Always follow the product label exactly for mixing and timing.
But thrips don’t just feed, they also lay eggs inside plant tissue, which is where the real problem starts.
2. Eggs and larvae already embedded in leaf tissue
If you sprayed once and the damage kept spreading a week later, this is why. Female thrips insert eggs directly into leaf and stem tissue, invisible to the eye, and a single spray only kills the adults you can see. Confirm it by watching for fresh streaking on leaves that were clean a week ago, even after treatment. That’s larvae hatching out on schedule.
The fix is the repeat schedule, not a stronger spray. Thrips go from egg to adult in as little as one to two weeks in warm conditions, so three or four applications spaced a week apart catch each new hatch before it can lay more eggs.
This is also why timing your applications to weather matters more than most people realize.
3. Pupae sheltering in soil or mulch
Thrips don’t spend their whole life on the plant. A portion of the population drops to the soil surface to pupate, which means anything you spray on foliage never touches them. Confirm this is contributing by checking whether new adults keep appearing even after leaf surfaces test clean under a hand lens.
The fix is treating the soil surface and mulch layer, not just the plant. A light drench of insecticidal soap at the base, or replacing the top inch of mulch after a heavy infestation, removes their hiding spot. For potted plants, letting the topsoil dry out fully between waterings also disrupts pupation, since thrips pupae prefer slightly moist conditions.
Soil-stage thrips are the reason outdoor plants near weedy areas keep getting reinfested, which brings up the next cause.
4. Reinfestation from nearby weeds or infested plants
Thrips fly, and they move fast between plants when their current food source declines, which is often right after you spray. Confirm this by checking neighboring plants, especially weeds, grasses, and anything flowering nearby. Onion, garlic, and many ornamental flowers are favorite thrips hosts.
The fix is treating the whole area, not just the one plant you noticed damage on first. Pull nearby weeds, especially flowering ones, and inspect other susceptible plants within a few feet. If you brought a new plant home recently, it’s the likely original source.
Reinfestation looks identical to a failed treatment, so ruling it out matters before you assume your spray schedule failed.
5. Heat and drought stress amplifying the damage
Thrips populations explode in hot, dry conditions, and stressed plants show damage faster and more severely than well-watered ones. This isn’t a separate pest problem, but it changes how bad the visible symptoms look. Confirm it by checking soil moisture an inch down. If it’s bone dry and the plant has been through a hot stretch, drought stress is compounding the thrips damage.
The fix is consistent watering alongside your thrips treatment, not instead of it. A well-hydrated plant tolerates thrips feeding better and pushes out replacement growth faster.
Now that you know what’s plausible, here’s how to actually tell them apart on your specific plant.
How to Tell the Causes Apart
Location matters most. Active adult feeding shows up as fresh streaking on new growth and flower petals. Larvae damage tends to cluster near leaf veins on slightly older leaves. Soil-stage issues show as a steady low-level population that never fully goes away between sprays, rather than a spike.
- Damage concentrated on flowers and buds: active adults, check flowers first with the tap test.
- New streaking appearing weekly on previously clean leaves: larvae hatching from embedded eggs.
- Population persists despite clean foliage: pupae in soil or mulch.
- Damage spreading to nearby plants you hadn’t treated: reinfestation from outside the original plant.
- Damage severe but visible thrips counts low: heat or drought stress amplifying existing feeding.
Once you know which one you’ve got, the next question is whether the plant actually bounces back.
Will It Recover?
The honest answer is that existing damage never reverses. Silvered, streaked leaves stay that way for the rest of their life. What recovers is new growth that emerges after you break the thrips cycle.
For active feeding and larvae, expect visibly cleaner new growth within two to three weeks of consistent treatment, assuming you complete the full spray schedule. Flowering plants often abort damaged buds and push fresh ones, which is a good sign, not a setback.
For soil-stage infestations, recovery takes longer, often four to six weeks, since you’re working through overlapping generations.
Cut your losses on severely stippled, curled, or distorted leaves. Prune them off once new clean growth appears elsewhere on the plant. It saves the plant’s energy and removes leftover eggs at the same time.
Recovery is realistic here, but only if you don’t stop treatment after the first application looks like it worked.
How to Keep It From Happening Again
Inspect new plants before they go anywhere near your garden or houseplant collection. Quarantine anything questionable for a week or two and check flowers and new growth with a hand lens.
Keep weeds down around vulnerable plants, especially flowering weeds, since they’re a constant thrips reservoir.
Yellow or blue sticky traps near susceptible plants catch adults early, before populations build enough to cause visible damage.
Avoid over-fertilizing with high-nitrogen feeds, since lush, soft new growth is exactly what thrips prefer to feed and lay eggs on.
Consistent watering through hot stretches keeps plants less attractive to thrips in the first place.
None of this is complicated, but skipping it is how thrips become a recurring problem every summer instead of a one-time fix.
Diagnosis Checklist
- Tap a leaf or flower over white paper, look for tiny tan or dark brown insects wriggling within seconds.
- Check flower buds and petal edges first, since active adults concentrate there during the day.
- Look for silvery or bronze streaking with small black specks, that combination confirms thrips over mites or fungus.
- Note whether new leaves show fresh streaking weekly, that points to larvae still hatching from eggs.
- Check soil moisture an inch down, dry soil plus hot weather means drought stress is amplifying the damage.
- Inspect nearby weeds and plants for the same symptoms, ruling out reinfestation before blaming a failed spray.
- Spray insecticidal soap or horticultural oil on both leaf surfaces and into buds, following the label exactly.
- Mark your calendar for repeat sprays every 5 to 7 days, minimum three rounds.
- Prune off severely damaged leaves once clean new growth appears, do not prune before that.
- Set a sticky trap nearby to monitor whether adult numbers drop after each treatment round.
Run through this at the plant and you’ll know within two minutes which cause you’re dealing with.
Treat it on schedule, and clean growth is usually only a few weeks away.