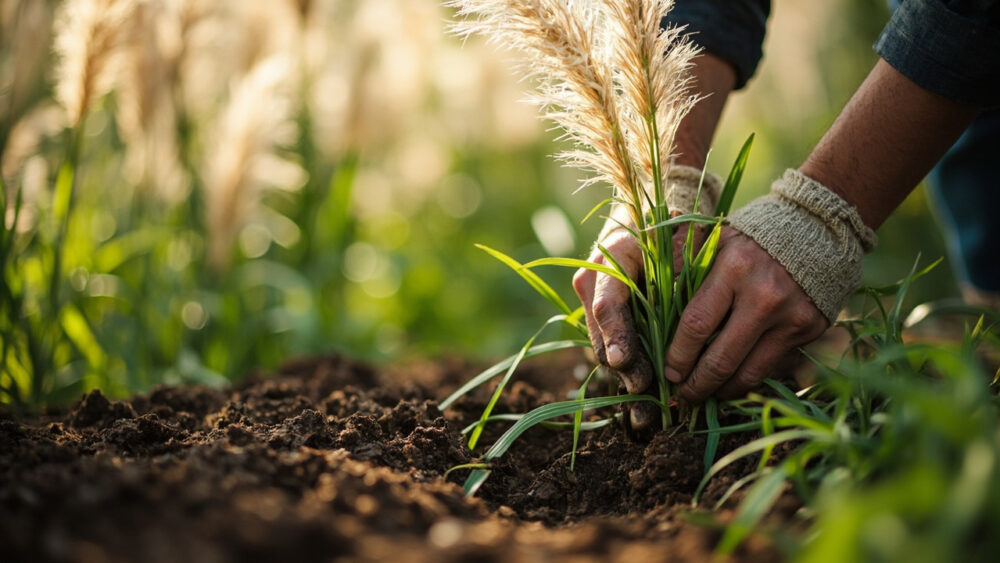
Growing pampas grass starts with planting a container-grown clump in spring after your last frost, in full sun, spaced 6 to 10 feet from anything else you care about. Give it a full growing season to establish before you expect much size, and by year two or three you’ll have a mound 6 to 10 feet tall topped with those creamy plume flower heads everyone plants it for. That’s the short version, but there are a few places this goes wrong badly enough to cost you the whole plant.
The mistake that trips up most first-timers isn’t in the planting, it’s in the sizing. People tuck pampas grass into a spot that looks generous now and end up fighting a razor-edged eight-foot-wide monster three years later.
There’s also a sign everyone misreads in year one: a pampas grass clump that looks small and unimpressive its first season is not failing, it’s building roots. And if you’re wondering whether this thing is going to become a problem child that spreads through your yard uninvited, that’s a fair question with a real answer, not a brush-off. Stick around for that one.
Save-and-scroll people, I’ve got you covered too. The Pampas Grass at a Glance card at the very bottom has every number in this guide in one place, worth bookmarking before you head outside.
When to Plant Pampas Grass
Plant in spring, once the danger of frost has passed and soil has warmed into the 60s F. Pampas grass is hardy in USDA zones 7 through 11, though gardeners in zone 6 sometimes push it with heavy winter mulch and a sheltered spot.
Fall planting works in the warmest zones (9 and up) where winters stay mild, but everywhere else spring gives roots a full season to establish before cold hits.
Skip planting into cold, soggy soil. A young plant sitting in cold wet ground for weeks before it can grow roots is a plant that rots before it ever gets going.
Get the timing right and the next decision, where you actually put it, matters just as much.
Choosing the Spot and Prepping the Soil
Pampas grass wants full sun, at least 6 hours of direct light a day. Shade gives you a floppy, sparse plant that rarely flowers well.
This is where the spacing mistake happens. A mature clump spreads 4 to 6 feet wide and just as tall below the plumes, with flower stalks reaching 6 to 10 feet.
Give it 6 to 10 feet of clearance from walkways, patios, and other plants. The leaf edges are genuinely sharp, sharp enough to cut skin, so keep it well back from paths kids or pets use.
Soil needs are forgiving. Pampas grass tolerates poor, sandy, even clay soil as long as drainage is decent.
Work a couple inches of compost into the planting area if your soil is heavy clay or pure sand, but don’t over-improve it. Rich, loose soil around a young plant can actually encourage rot before roots take hold.
Once you’ve picked a spot with room to spare, the planting itself is straightforward.
Planting Pampas Grass Step by Step
1. Dig the hole
Make it twice as wide as the root ball and just as deep, no deeper. Planting too deep is a slow-motion way to kill it.
2. Loosen the roots
If the plant is rootbound, score the sides of the root ball with your fingers or a knife in three or four places before it goes in the ground.
3. Set and backfill
Position the crown at soil level, not below it. Backfill with native soil, firming gently as you go to remove air pockets.
4. Water in immediately
Give it a deep, slow soak right after planting, enough to settle the soil around the roots.
5. Mulch lightly
Keep mulch a couple inches away from the crown itself to avoid trapping moisture against it, but mulch the surrounding soil to hold water and block weeds.
That first watering matters more than people think, and what happens over the following weeks matters even more.
Watering and Feeding Through the Season
For the first 6 to 8 weeks after planting, water deeply once or twice a week, whenever the top 2 inches of soil dry out. This is the establishment window, and it’s non-negotiable.
Once established, pampas grass is remarkably drought-tolerant. Mature clumps often need no supplemental water beyond normal rainfall except in extended dry stretches.
This is the part where the “small in year one” worry gets resolved. If you assumed a modest-looking clump means weak roots or a bad start, that guess is backwards.
Pampas grass spends its first year almost entirely underground, building the root mass that will support that huge top growth later. Visible size in year one tells you almost nothing about how the plant is actually doing.
Feeding is light-touch. A balanced, slow-release fertilizer once in early spring is plenty. Overfeeding produces weak, floppy growth and fewer plumes, not more.
Water and food are easy once you know the rules, but there’s a bigger question hanging over this plant that deserves a straight answer.
The Problems That Actually Strike, and the Spreading Question
Pampas grass is genuinely low-trouble. It has almost no serious insect pests and few diseases when it’s got sun and drainage.
The real risks are crown rot from soggy, poorly drained soil, and fungal leaf spot in humid climates with poor air circulation. Both are cultural problems, not something you spray your way out of.
Fix drainage first if you see yellowing at the base or a mushy crown, since that’s almost always the cause. For leaf spot, thin nearby vegetation to improve airflow and avoid overhead watering that wets the foliage.
Now the honest answer about spreading. Pampas grass doesn’t run underground like some grasses do, but it does reseed, and in warm climates it can seed aggressively into open ground, ditches, and disturbed soil.
In several states, including parts of California, Oregon, Washington, and Hawaii, it’s classified as invasive, and some nurseries there won’t sell it. Check your local extension office before planting if you’re in a mild coastal climate.
- Cut spent plumes before seeds fully disperse if you’re worried about spread
- Choose sterile cultivars where available, since some ornamental grass breeding has focused on non-seeding types
- Avoid planting near wild or undeveloped land in warm, coastal zones
Handle the sharp leaves with gloves and long sleeves. They won’t poison you, but the cuts they leave are surprisingly deep for something that looks soft from a distance.
Manage the risks up front, and what you get in return is a genuinely dramatic bloom season.
When Pampas Grass Blooms and How to “Harvest” It
Pampas grass typically flowers for the first time in its second or third year, not its first. Don’t panic if year one passes with no plumes at all.
Plumes emerge in late summer through fall, rising well above the foliage on stiff stalks. Female plants produce the fuller, more silky-looking plumes prized for cutting and drying; male plumes are thinner and less showy.
Cut plumes for drying just as they emerge and before they fully open and start shedding seed and fluff, usually a narrow window of a week or two. Cut the stalk low, near the base, and hang bunches upside down in a dry, airy spot out of direct sun.
Wait too long and the plumes shatter and drop fluff everywhere once brought indoors, which is the most common complaint about cut pampas grass.
At season’s end, cut the entire clump back hard, down to 6 to 12 inches, in late winter before new growth starts. This yearly cutback is what keeps the clump from turning into a woody, dead-centered mess.
Everything above adds up to a plant that rewards patience more than effort, and the numbers below are the ones worth keeping handy.
Pampas Grass at a Glance
- When to plant: spring after last frost, once soil is reliably in the 60s F, or fall in zones 9 and warmer.
- Where it grows: USDA zones 7 through 11, full sun, at least 6 hours of direct light daily.
- Spacing: 6 to 10 feet from paths, structures, and other plants, since mature clumps reach 6 to 10 feet tall and 4 to 6 feet wide.
- Planting depth: crown level with the soil surface, hole twice as wide as the root ball.
- Watering: deep soaks once or twice weekly for the first 6 to 8 weeks, then drought-tolerant once established.
- Bloom time: late summer through fall, usually starting in the plant’s second or third year.
- Maintenance: cut plumes just as they emerge for drying, cut the whole clump back to 6 to 12 inches in late winter.
The whole plant hinges on patience: give it one quiet year to root, then get out of the way.
Check your state’s invasive list before you plant, since that’s the one step no amount of good gardening can undo later.