Here is the short version: growing bay leaf means starting with a young nursery plant rather than seed, giving it a container or well-drained bed in full to partial sun, watering only when the top couple inches of soil dry out, and waiting a patient one to two years before you harvest anything worth cooking with. Bay (Laurus nobilis) is a slow, tough Mediterranean shrub, not a fast salad herb, and once you stop treating it like basil, it gets a lot easier to keep alive.
Most people who kill a bay plant do it in the first three months, and almost always with the hose. There is also a sign of stress everyone reads backward, thinking their bay needs more water when it actually needs less, or more light when it actually needs protection from a cold snap.
And the question you are about to ask, which is when you can finally start pulling leaves for the stew pot, has an honest answer that most articles dance around. Stick with this, and at the bottom you will find a save-able Bay Leaf at a Glance card with the numbers in one place.
When to Plant Bay Leaf
Bay leaf is planted outdoors after your last frost date has passed and nighttime temperatures are reliably staying above about 40 to 45 F. This is a Mediterranean evergreen, hardy outdoors year round only in USDA zones 8 to 11. If you garden in zone 7 or colder, plan on growing it in a pot you can bring inside for winter.
Spring is the best planting window almost everywhere, giving the roots a full warm season to establish before any cold weather arrives. Fall planting works in mild-winter climates but leaves less margin for error.
Skip trying to start bay from seed unless you enjoy a real challenge. Seeds are slow, unreliable, and can take months to germinate, so almost everyone starts with a nursery plant or a rooted cutting instead.
Getting the calendar right matters less than getting the plant itself right, which is where most people actually go wrong.
Choosing the Spot and Prepping the Soil
Bay wants full sun to light afternoon shade, at least four to six hours of direct light a day. In hot inland climates, some afternoon shade actually helps it look better through summer.
Soil drainage is the real deal breaker. Bay roots rot fast in heavy, waterlogged clay, so amend dense soil with compost and coarse grit, or skip the ground entirely and grow it in a pot.
A container with drainage holes, filled with a peat or coir based potting mix cut with perlite or coarse sand, is honestly the safer bet for most home gardeners. It also lets you move the plant when winter turns hard.
If you assumed rich, moisture-retentive soil is a good thing here, that is the instinct that drowns more bay plants than drought ever does. This plant evolved on rocky Mediterranean hillsides, and it wants soil on the lean, fast-draining side.
Once the site is right, the actual planting is the easy part.
Planting Bay Leaf Step by Step
1. Pick your container or bed spot
Choose a pot at least 12 to 16 inches across for a young plant, or a garden spot with sharp drainage and room to eventually reach 6 to 10 feet tall if left unpruned.
2. Loosen and check the root ball
Slide the nursery plant out and gently loosen any tightly circling roots. Bay is often pot-bound when purchased, and unwinding those roots now prevents strangled growth later.
3. Set the depth
Plant at the same depth it sat in its nursery pot, with the base of the stem at soil level. Burying the stem crown invites rot.
4. Space for airflow
In the ground, give each plant at least 3 to 4 feet of breathing room since bay eventually becomes a substantial shrub or small tree. In pots, one plant per container is standard.
5. Backfill and water in
Firm the soil gently around the roots and water thoroughly right after planting to settle air pockets. Do not fertilize on planting day, since fresh roots can burn easily.
Get through that first month without overwatering, and you have cleared the hardest part of growing bay.
Watering and Feeding Through the Season
Water bay only when the top 1 to 2 inches of soil feel dry to the touch, then water deeply and let it drain completely. Established plants, whether potted or in the ground, are genuinely drought tolerant and would rather be slightly underwatered than sitting wet.
Yellowing leaves and a mushy base are the classic overwatering signature, and this is the sign most people misread. The instinct is to water more when leaves look sad, but a bay with yellow, dropping leaves and soggy soil needs a break from the hose, not another dose.
Feed lightly, once in spring and once in midsummer, with a balanced, diluted liquid fertilizer. Bay is a slow grower and does not want heavy feeding, which pushes soft growth that is more vulnerable to cold and pests.
Potted bay dries out faster than garden bay, especially in summer heat, so check container plants every few days rather than on a fixed schedule.
Get the water right and most of your remaining problems will be minor ones.
Problems That Actually Show Up
Scale insects and mealybugs are the most common trouble on bay, showing up as small brown bumps or white cottony fluff along stems and leaf undersides, often with a sticky residue on nearby leaves. Wipe them off with a damp cloth or treat with insecticidal soap or horticultural oil, following the product label exactly.
Root rot from soggy soil is the other big one, and by the time leaves are yellowing and stems feel soft near the base, damage is often already done below the soil line. Repotting into fresh, dry, well-draining mix and cutting back watering is the only real fix, and severe cases may not recover.
Cold damage shows up as blackened or browned leaf edges after an unexpected freeze. Potted plants should come indoors, or at least against a sheltered wall, once temperatures threaten to drop below about 20 to 25 F for extended periods.
Sooty mold, a black film on leaves, usually just means an insect problem upstream is leaving behind sugary residue, so treat the pest and the mold clears on its own.
None of this is common if the drainage and watering are right from the start, which is exactly why that first section matters so much.
Handle pests and cold early, and the plant will reward you with actual leaves to harvest.
When and How to Harvest Bay Leaf
Here is the honest answer to the question everyone eventually asks: a bay plant needs roughly one to two years of steady growth before it has enough mature leaves to harvest without setting the plant back. This is not a fast herb, and there is no shortcut around that timeline.
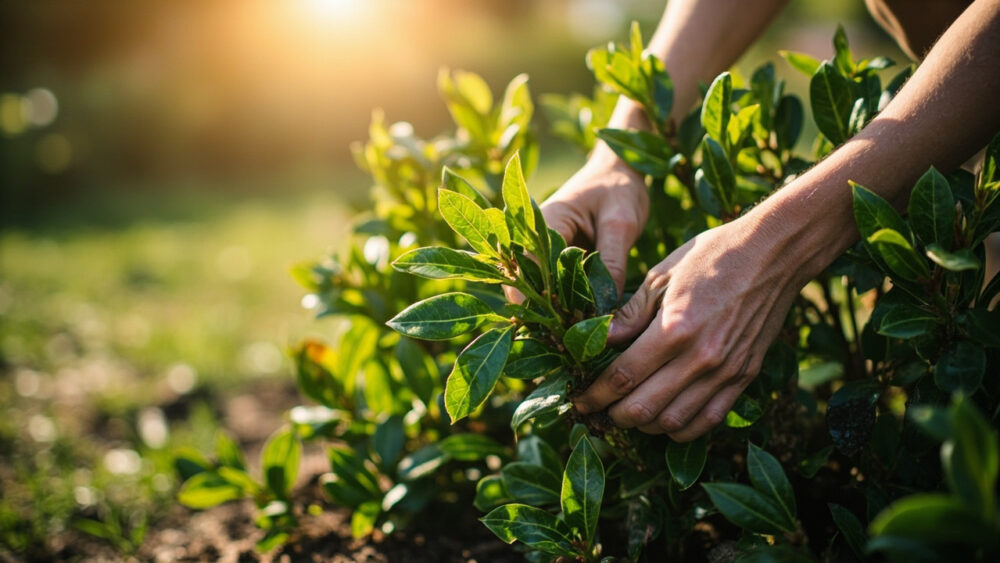
Once established, harvest individual leaves any time they are firm, deep green, and fully mature, which usually means leaves that are at least a few months old and no longer glossy bright green. Snip or pinch them individually rather than stripping a branch bare.
Never take more than about 20 to 30 percent of the plant’s leaves at once. Bay regrows slowly, and heavy harvesting can stall growth for a season.
Fresh leaves have a sharper, almost bitter edge compared to dried. Most cooks actually prefer bay leaves dried for a week or two in a dark, airy spot, since drying mellows the flavor and lets it keep for a year or more in a sealed jar.
That slow timeline is the tradeoff for a plant that, once mature, will supply you with bay leaves for decades.
Bay Leaf at a Glance
- When to plant: after your last frost, once nights stay above about 40 to 45 F, spring is the best window in most climates.
- Where it’s hardy outdoors: USDA zones 8 through 11, container growing with winter indoor protection everywhere colder.
- Light and soil: full to partial sun, four to six hours minimum, lean and fast-draining soil or potting mix.
- Spacing and depth: 3 to 4 feet apart in the ground, one plant per 12 to 16 inch pot, planted at the same depth as its nursery container.
- Watering: only when the top 1 to 2 inches of soil are dry, then water deeply and let it drain.
- Feeding: light, diluted balanced fertilizer twice a season, spring and midsummer.
- Harvest: wait one to two years for maturity, then take individual mature dark green leaves, never more than 20 to 30 percent at once.
Get the drainage and watering right, and bay basically takes care of itself for years.
Patience with the timeline is the only real trick to this plant.