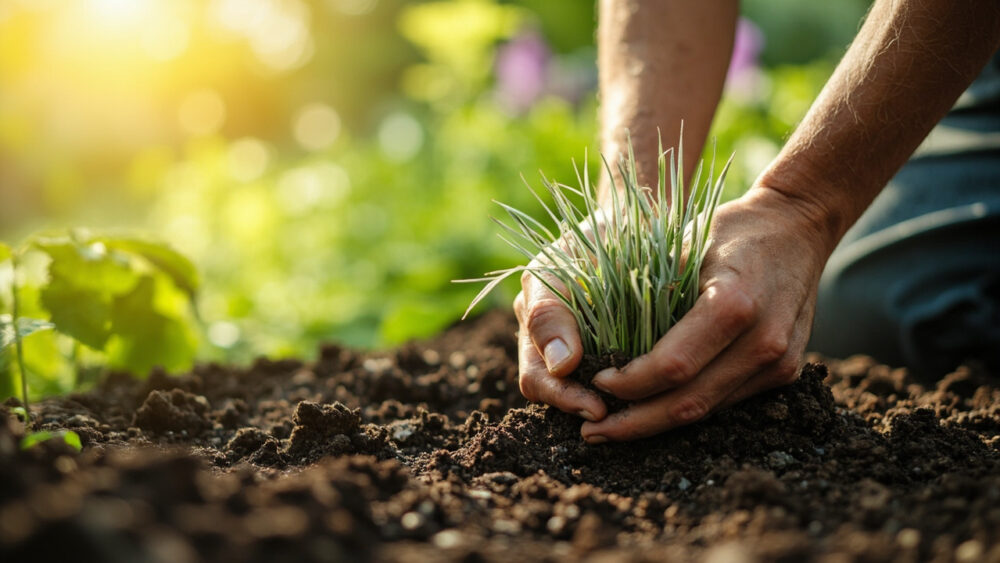
The best time to plant pampas grass is in spring, once the soil has warmed and any frost danger has passed, giving it a full growing season to establish deep roots before winter. Dig a hole twice the width of the root ball, set the crown at soil level, space plants 6 to 10 feet apart, and water deeply right after planting. That part is simple. What trips people up is everything around it.
Most failed attempts do not fail because pampas grass is fussy. They fail because someone plants it too close to the house, in soil that stays wet all winter, or in a spot that looked big enough in April and felt cramped by August. There is also a sign of trouble everyone reads wrong in year one, and a bloom question almost every new grower asks by September that has a blunt answer.
Stick with me through the planting steps, the season-long care, and the problems that actually show up, and you will get the full picture instead of a guess. The save-able Pampas Grass at a Glance card is waiting at the bottom once you have the reasoning behind it.
When to Plant Pampas Grass
Spring planting wins almost everywhere pampas grass is grown, once nighttime temperatures reliably stay above the mid 40s and the soil is workable, not soggy. In mild-winter regions, zones 8 and warmer, fall planting works too, giving roots a head start before summer heat arrives.
Anywhere colder, skip fall planting entirely. A young plant put in the ground six weeks before frost has not built the root mass to survive winter, and you will lose it.
Pampas grass is hardy roughly in zones 7 through 10, though gardeners in zone 6 sometimes push their luck with heavy mulch and a protected spot. If you are north of that, treat it as an annual or grow it in a large container you can move.
Timing gets the plant in the ground alive, but the spot you choose decides whether it thrives.
Choosing the Spot and Prepping the Soil
This is where the season gets decided before you even dig. A mature pampas grass clump reaches 6 to 10 feet tall and just as wide, with leaf blades that have edges sharp enough to cut skin. Give it real distance, at least 6 feet from walkways, patios, and anywhere kids or pets pass through regularly.
It wants full sun, six or more hours a day, and soil that drains well. Heavy clay that holds water through winter is the single biggest reason established plants rot at the crown. If your soil stays soggy a day after rain, work in coarse sand or compost to open it up, or pick higher ground.
Pampas grass is not picky about fertility. It actually performs better in average to lean soil than in rich, heavily amended beds, which tends to produce floppy growth instead of the tight, upright form you want.
Get the spot right and the plant does most of the rest of the work itself.
Planting Pampas Grass Step by Step
1. Dig the hole
Make it twice as wide as the root ball and just as deep, no deeper. Planting too deep is one of the fastest ways to rot the crown before it ever gets going.
2. Loosen the root ball
If the plant is container-grown and the roots are circling tightly, score them lightly with a knife or gently tease them apart. This tells the roots to grow outward instead of continuing to spiral.
3. Set the crown at soil level
The point where the stems meet the roots should sit even with the surrounding ground, not buried and not raised on a mound. Backfill with the native soil you dug out, mixed with a shovelful of compost if your soil is very poor.
4. Space plants 6 to 10 feet apart
This feels excessive when you are looking at a 2-gallon nursery pot. It is not. A mature clump needs that room, and crowded plants shade each other out and bloom poorly.
5. Water it in deeply
Soak the area thoroughly right after planting, enough to settle the soil around the roots and eliminate air pockets. Skip a light sprinkle here; it will not reach the root zone.
The hole and the spacing matter, but what happens over the next few months decides whether this plant becomes a fixture or a disappointment.
Watering and Feeding Through the Season
For the first growing season, water deeply once or twice a week whenever the top 2 inches of soil feel dry, more often during a hot, dry stretch. This is the establishment window, and it is the only time pampas grass really needs babying.
Once established, usually by the second year, pampas grass is remarkably drought tolerant. Established plants often need no supplemental water at all outside of extended drought, and overwatering a mature clump is a far more common mistake than underwatering one.
Skip heavy feeding. A light application of a balanced fertilizer in early spring is plenty. Too much nitrogen produces weak, floppy foliage and fewer of the plumes people grow this for in the first place.
If you assumed a bigger, lusher-looking plant in July means you are doing everything right, that is the guess that backfires by September.
The Sign Everyone Misreads in Year One
New growers often panic when the plant looks sparse or ragged through its first summer, assuming it is dying or that they planted it wrong. It usually is not dying. First-year pampas grass is building roots, not putting on a show above ground, and a modest, unimpressive-looking clump in year one is completely normal.
The real warning signs are different: a crown that feels soft or mushy at the base, foliage that yellows uniformly and pulls away easily, or a smell of rot at the soil line. Those point to crown rot from poor drainage or planting too deep, and that is a much harder problem to fix than a slow first season.
Beyond rot, pampas grass has few serious pest or disease issues. Occasional fungal leaf spot can show up in consistently damp, humid conditions; improving airflow by thinning old growth usually solves it without needing a fungicide at all.
Patience solves the sparse look, drainage solves almost everything else, and next comes the question everyone asks once the plant finally does something.
When and How Pampas Grass Blooms
Here is the honest answer to the question every new grower eventually asks: no, your pampas grass is not going to bloom in its first year, and often not in its second either. Most plants need two to three full growing seasons before they’re mature enough to produce the tall, feathery plumes people plant it for.
Once mature, the plumes emerge in late summer to early fall, rising 2 to 4 feet above the foliage on stiff stalks. They start out narrower and silky, then open into the full, fluffy form over a few weeks.
If you want the plumes for cutting and drying, harvest them just as they begin to open, before they fully fluff out and start shedding seed. Cut the stalk low, hang the plumes upside down in a dry, ventilated spot, and they will hold their shape for months indoors.
Leave some plumes on the plant if you want winter interest in the garden, since they hold up well through light frost and add structure when little else is blooming.
Once the plant is mature, the yearly rhythm is simple: cut back hard in late winter, watch it fill in through spring, and let it put on its real show by fall.
Pampas Grass at a Glance
- When to plant: spring after frost danger passes, once soil is workable, or fall in zones 8 and warmer.
- Where it grows: USDA zones 7 through 10, with zone 6 possible in a sheltered spot with heavy mulch.
- Spacing and depth: 6 to 10 feet apart, crown set level with the surrounding soil, never buried deeper.
- Sun and soil: full sun, at least six hours daily, well-drained average soil rather than rich, heavily amended beds.
- Watering: deep watering once or twice weekly the first season, little to none needed once established.
- Time to bloom: two to three growing seasons before plumes appear, arriving late summer into early fall.
- Harvest for drying: cut plumes just as they begin opening, hang upside down in a dry, ventilated spot.
Get the drainage and the spacing right at planting, and pampas grass takes care of nearly everything else itself.
The plumes are worth the wait, but the patience in year one is the real price of admission.