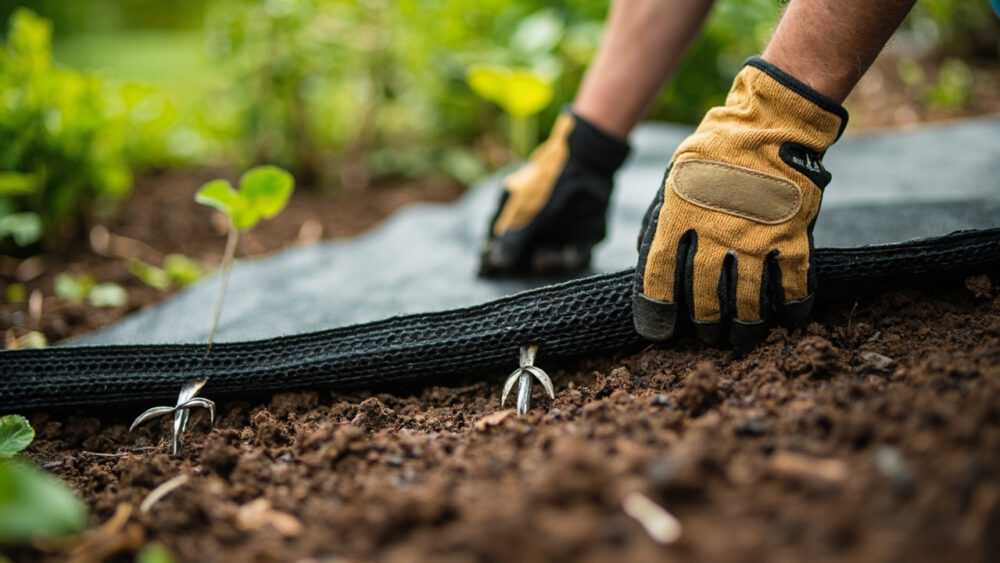
Here is how to lay landscape fabric so it actually stays down: clear and level the bed first, cut the fabric to overlap seams by 4 to 6 inches, pin it every 12 to 18 inches with landscape staples, cut slits (not X-shaped flaps) for each plant, then cover the whole thing with 2 to 3 inches of mulch or gravel. Skip any one of those steps and you get the classic landscape fabric failure: weeds punching up through staple holes and seam gaps within a year.
How to lay landscape fabric correctly is less about the fabric itself and more about what happens underneath and on top of it. Most people get the anchoring wrong, and almost everyone underestimates how much soil it takes to bury a seam so weeds cannot find the gap.
There is also a decision nobody warns you about until it is too late: whether fabric belongs under your mulch at all in beds with real perennials. I will give you the honest answer, plus the exact spacing and overlap numbers, and a save-able Diy at a Glance card at the very bottom of this guide.
What You Need Before You Start
Landscape fabric comes woven or non-woven; woven is more durable and lets water through better, and it is what most gardeners should buy for beds meant to last more than a couple of seasons. You will also need landscape staples (6-inch galvanized ones hold better than the flimsy 3-inch kind), sharp scissors or a utility knife, a rake, and a wheelbarrow’s worth of mulch, gravel, or bark per roughly 30 to 40 square feet of bed.
Buy 10 to 15 percent more fabric than your bed’s square footage. You will need the extra for overlaps, and running short mid-project means a seam that never gets covered properly.
Get your materials staged before you cut anything.
Laying Landscape Fabric Step by Step
Step 1: Clear the bed completely
Pull every weed by the root, not just the visible top growth. Fabric does nothing to stop a dandelion or bindweed root that is already established underneath it; it just hides the problem until the plant finds a seam or staple hole to punch through.
Step 2: Grade and level the soil
Rake the bed smooth and remove rocks, roots, and debris that would poke through or puncture the fabric. A lumpy base means the fabric bridges gaps instead of lying flat, and any gap under fabric becomes a pocket where soil collects and weed seeds germinate right on top of it.
Step 3: Roll out the fabric
Unroll it across the bed and let it run long. You will trim edges last. Overlap any seams by 4 to 6 inches minimum, and always overlap so water sheds toward the lower piece, not the reverse.
Step 4: Anchor it down
Staple every 12 to 18 inches along seams and edges, and add extra staples at any point where the fabric puckers. This is the step almost everyone shortchanges, and it is the actual reason fabric fails, not the fabric quality itself.
Step 5: Cut planting slits, not X-cuts
For each plant, cut a single straight slit or a small circle just big enough for the root ball, rather than an X. An X-cut creates four triangular flaps that curl back and expose bare soil, which is an open invitation for weeds.
Step 6: Cover with 2 to 3 inches of mulch or gravel
Fabric left exposed to UV light degrades in one to two seasons and looks bad the whole time. Mulch also weighs the fabric down and buries every seam and staple head so weeds cannot find a way through.
That covering step is exactly where the next honest tradeoff shows up.
The Detail That Actually Decides Whether This Works
If you assumed thicker fabric is the key to a weed-free bed, that is the guess that costs people the most money for the least benefit. Fabric weight matters less than seam coverage and mulch depth.
Weeds do not usually grow up through intact fabric. They grow in the mulch layer sitting on top of it, using windblown seed and the thin soil that accumulates there over time. That means fabric only buys you one to three years of real weed suppression before topsoil builds up on the surface deep enough to host a new weed population regardless of what is underneath.
This is the honest answer to the question you were probably about to ask: fabric is not a permanent fix, it is a multi-year head start. Plan on refreshing mulch and pulling the occasional surface weed every season, same as any bed, just less often.
Get the mulch depth right and you buy yourself real time.
Where Fabric Helps and Where It Backfires
Fabric earns its keep under gravel paths, around shrubs and trees that will not be divided or moved, and in beds you are not planning to replant seasonally. It is a genuinely good call there.
Skip it in beds with perennials you divide, annual flower beds, or vegetable gardens. Fabric blocks the natural movement of organic matter into the soil, makes it hard to add compost, and turns replanting into a wrestling match with staples and slits every single season.
For vegetable and cut-flower beds, straw mulch or a biodegradable paper mulch does similar weed suppression without trapping you in a layout for years.
Budget matters here too: gravel-only beds can skip fabric entirely if you lay 4 inches of gravel over a compacted base, though you will hand-weed a bit more in year two.
Which bed you are working on should decide your material before you decide your technique.
Upkeep Once It’s Down
Check staples once a yearusually in early spring, since frost heave and foot traffic work them loose over winter in colder zones. Re-seat any that have popped up before they snag a mower or trip someone.
Top off mulch as it thins, generally every one to two years, since thin mulch is the number one reason “weed-proof” beds stop being weed-proof. Pull any weeds that do establish while they are small. Their roots have nothing to grip in fabric and come out easily if you catch them early.
After three to five years, expect to lift and replace the fabric in high-traffic beds, since UV exposure and soil buildup eventually degrade it past the point of being worth patching.
Stay ahead of the mulch layer and the fabric underneath keeps doing its job.
Diy at a Glance
- Best fabric type: woven landscape fabric for durability and water flow, non-woven for short-term or budget projects.
- Seam overlap: 4 to 6 inches minimum, always shedding water downhill toward the lower piece.
- Staple spacing: every 12 to 18 inches along seams and edges, plus extra at any pucker point.
- Planting cuts: straight slits or small circles, never X-cuts that curl back and expose soil.
- Mulch depth on top: 2 to 3 inches, refreshed every 1 to 2 years as it thins.
- Realistic lifespan: strong weed suppression for 1 to 3 years, full fabric replacement around 3 to 5 years in busy beds.
- Where to skip it: vegetable beds, cut-flower beds, and any perennial bed you plan to divide or replant.
Fabric is a tool for beds that stay put, not a permanent weed cure.
Get the staples and mulch depth right, and it will earn its keep for years.